
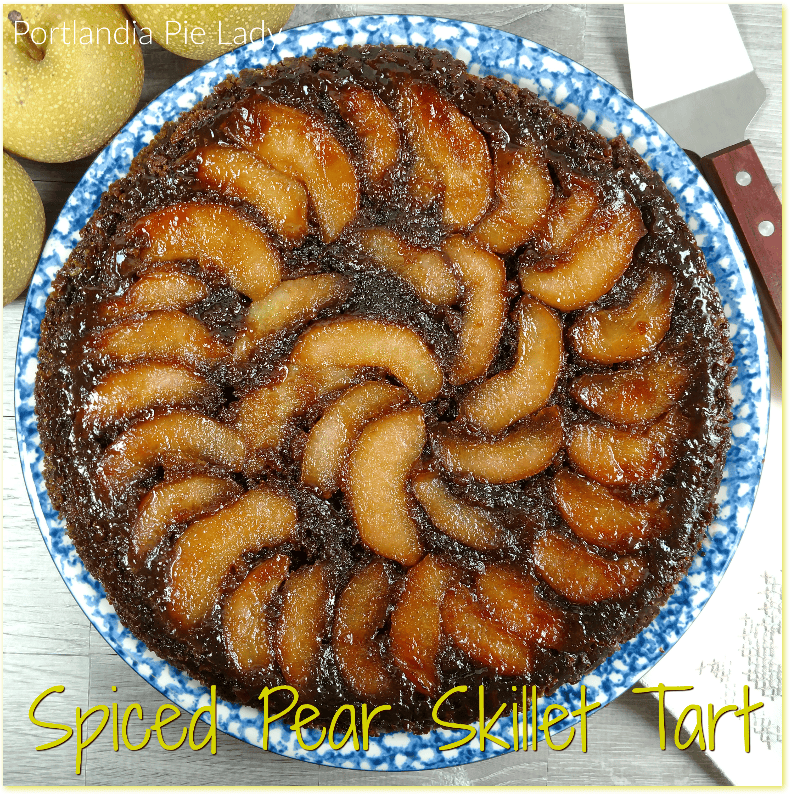
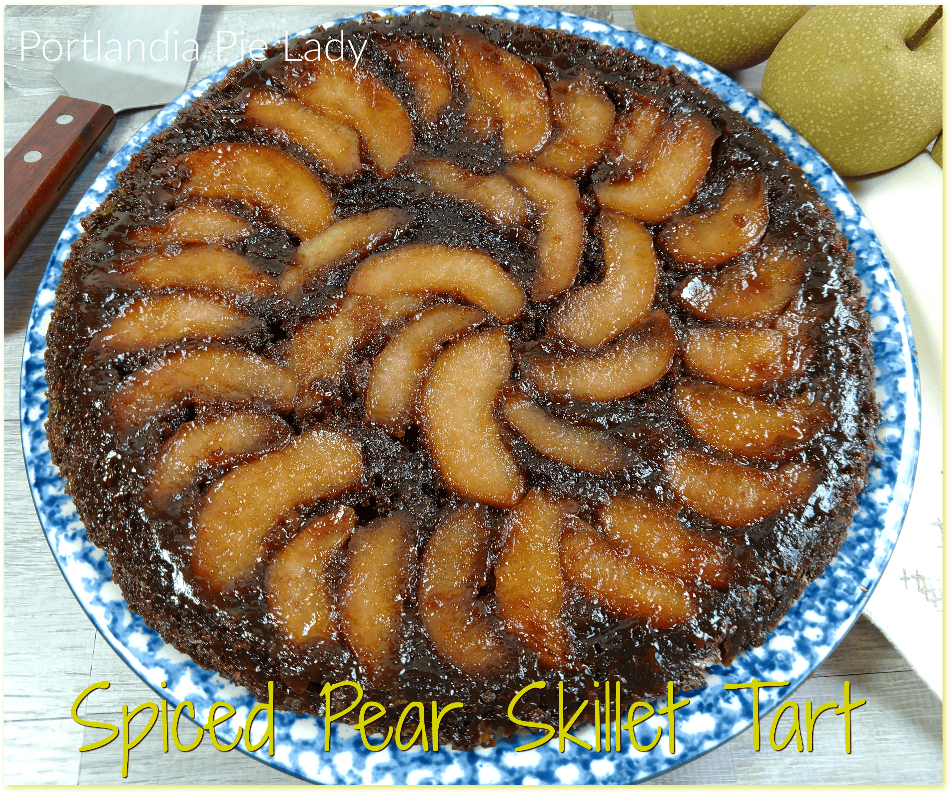
A spicy pear tart, Spice Pear Skillet tart, is a must have at the end of summer. We do all love baking in season, don’t we? Fresh picked fruit is simply the best. Our Asian pear tree produces an abundance of gorgeous crisp pears every year. This is one of my first baked desserts I make at the beginning of every fall.
Any kind of pear will do, but as my pear tree was brimming, Asian pears it is. If you haven’t had an Asian pear they are a bit juicier and crisper than say a Bartlett pear, but once baked they are very similar in texture. So, go with the flavor of pear you enjoy the most. If pears are not your “thing” go with apples, I have used Gala and Granny Smith, it will still be divine and just as tasty!
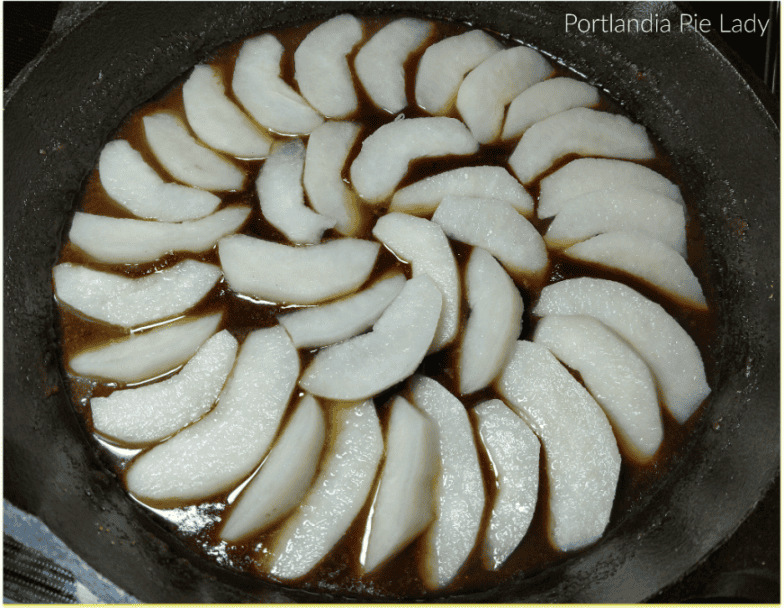
I make the entire tart from start to finish in a cast iron skillet. The heavy skillet keeps the pears from burning and distributes the heat perfectly while baking.
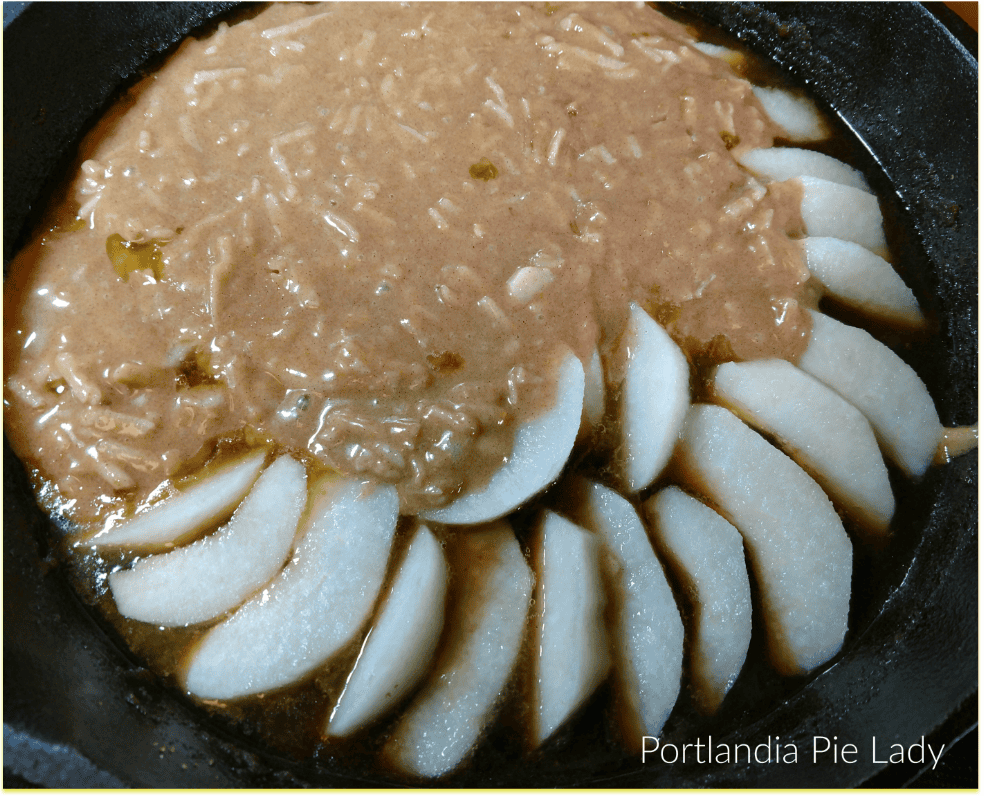
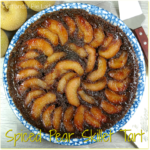
Melt the butter and brown sugar in the skillet on your stove top. Once melted, place the pears in your desired pattern. Any design will bake beautifully. I love the round floral pattern but this is a time for you to experiment and use your creative prowess.
Simply spoon the prepared batter over the top of the pears and bake!
Remove the baked pear tart from the oven and place a large platter over the skillet. Use pot holders to hold the platter and skillet to invert the tart onto pattern. You could call this an upside-down tart. If a pear slice clings to the skillet for dear life. no worries. Gently use a spatula, scoop out while still warm and place back onto tart.
The edges will be a caramelized brown sugar buttery-spicy pear flavor that is out of this world. I think this tart has the power to turn anyone into a pear lover. This is also a very easy tart to make gluten free. I use my own gluten free flour mix with Bob’s Red Mill products, a 1 to 1 substitute.
Don’t forget to save the last slice for yourself!
Spiced Pear Skillet Tart
Ingredients
- 1 cup firmly packed brown sugar
- 6 tablespoons butter
- 1 cup flour (use gluten free flour mix for gluten free)
- 1 cup pure cane sugar
- 2 teaspoons ground cinnamon
- 1-1/4 teaspoon baking soda
- 1/2 teaspoon salt
- 1/2 cup canola or vegetable oil
- 2 large eggs
- 1 tablespoon fresh grated ginger (or 1 teaspoon dry ground ginger)
- 1 medium size pear, peeled, coarsely grated
- 3-4 medium sized pears, peeled, cored, sliced lengthwise, each into about 12 wedges
- 12 inch cast iron skillet
Instructions
- Preheat oven to 350 degrees.
- Add butter & brown sugar to skillet, place in oven about 4 to 5 minutes until butter is melted, remove from oven & whisk the butter and sugar together.
- In a separate bowl, stir & mix the dry ingredients flour, sugar, cinnamon, baking soda and salt.
- By hand or with electric hand mixer, beat in eggs and oil.
- Stir in grated pear and ginger and set batter aside.
Assembly:
- Arranged the sliced pears in the skillet in a flower pattern or any pattern you wish, fitting close together.
- Pour the batter over the pears spreading evenly.
- Bake 55 to 60 minutes at 350. Middle will spring back if touched.
- Cool for 15 to 20 minutes and then loosen the edges of tart with a knife. Place a large platter over the skillet and invert tart onto platter. Replace any pieces that stick to the skillet (there's always one) and your beautiful tart is ready to serve.


How many eggs for this recipe!? 🙂
2 eggs! I will update the recipe immediately. Thank you for catching this, I owe you a pie!