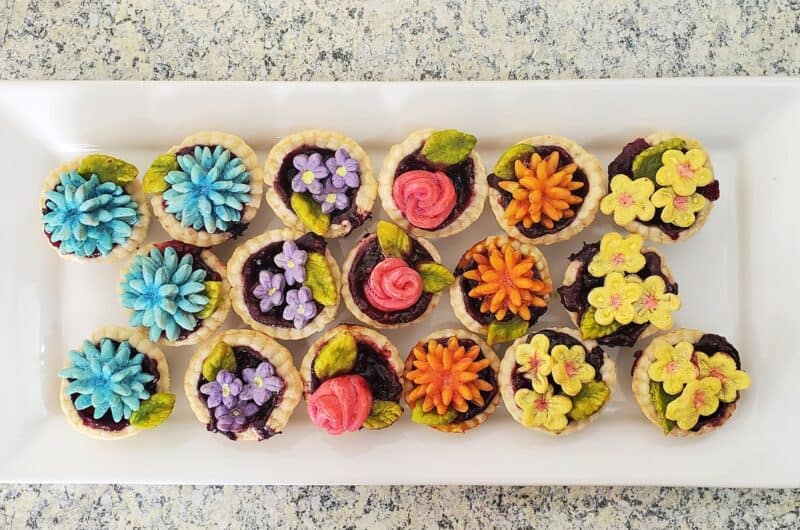
Pie crust flowers are so much fun to create; beautiful blooms of sunshine. Whether it’s a rainbow of flowers or bouquet spray, they’re a pretty addition to any pie.
This blog may contain affiliate links.
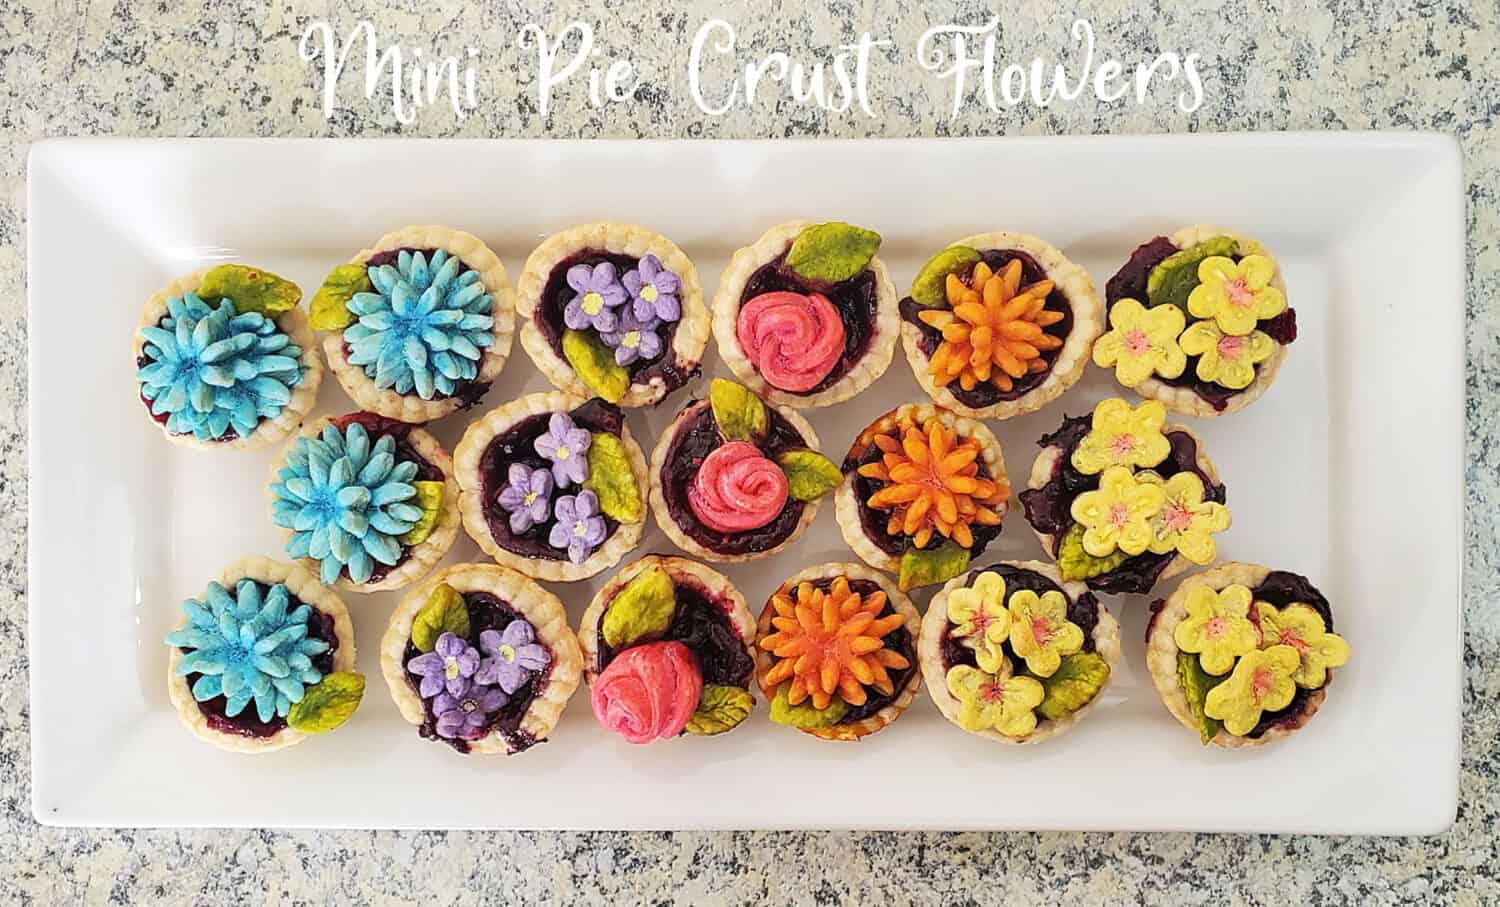
I love making rainbows of pie crust flowers for pride month, as everyone is deserving of love. And when were flowers never wanted? They bake the way they want to, all I can do is give these blooms a good start. Regardless, I love them all the same.
Pie Crust Flower Tutorial
Below are pictures of the steps for creating flowers and leaves. And thank heavens for white food coloring if you want pastel colors, which is what I did for these little blooming beauties.
ALL FLOWERS & LEAVES ARE PAINTED WITH DOUGH IN FROZEN STATE. Make your blooms and leaves, place on parchment paper and freeze fully. About 30 minutes or longer depending on freezer. Paint a few at at time as pie crust defrosts very quickly.
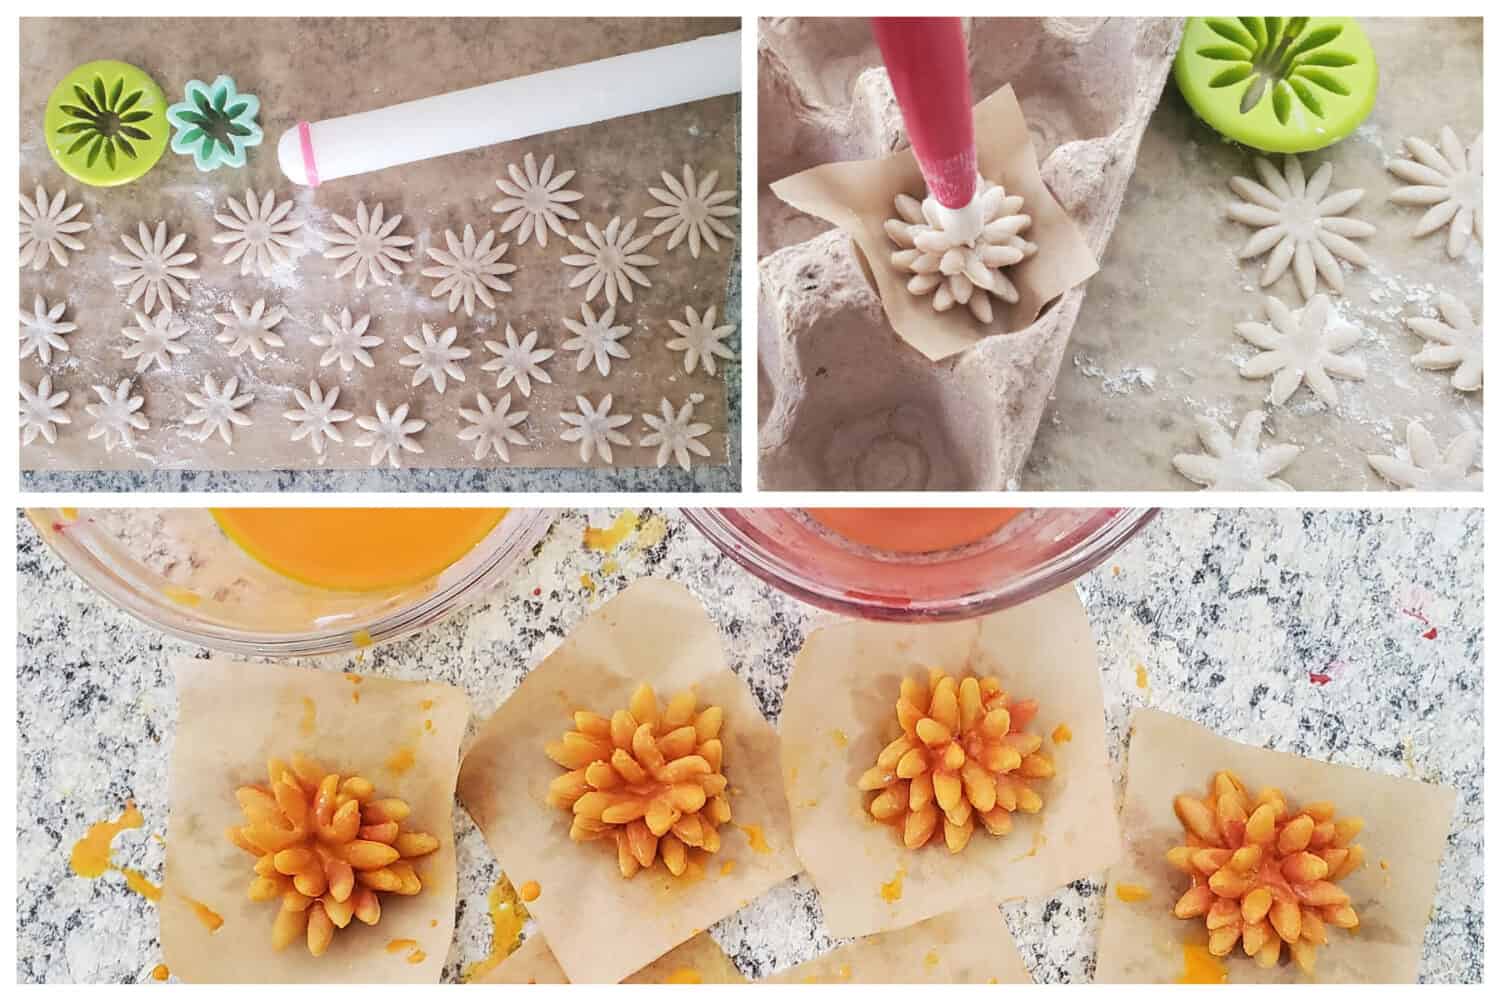
For foolproof thickness, use a small fondant rolling pin with the pink bands on end (see below in marigold pic). This rolling pin comes in a set of fondant tools that I could not live without.
Dahlias and Marigolds:
It’s the same two flower petal cookie/fondant cutters for each. Large: 1-3/4 inch. Small: 1-1/2 inch. You can use 2 large and 1 small, or 1 large and 2 small. Use a starburst fondant tool to push in bloom layers together to get the effect you want. After initial layer of food coloring, re-freeze flowers for 10 minutes and add 2nd dark tone (very watery) for creases. This added step is not necessary, just play around with it.
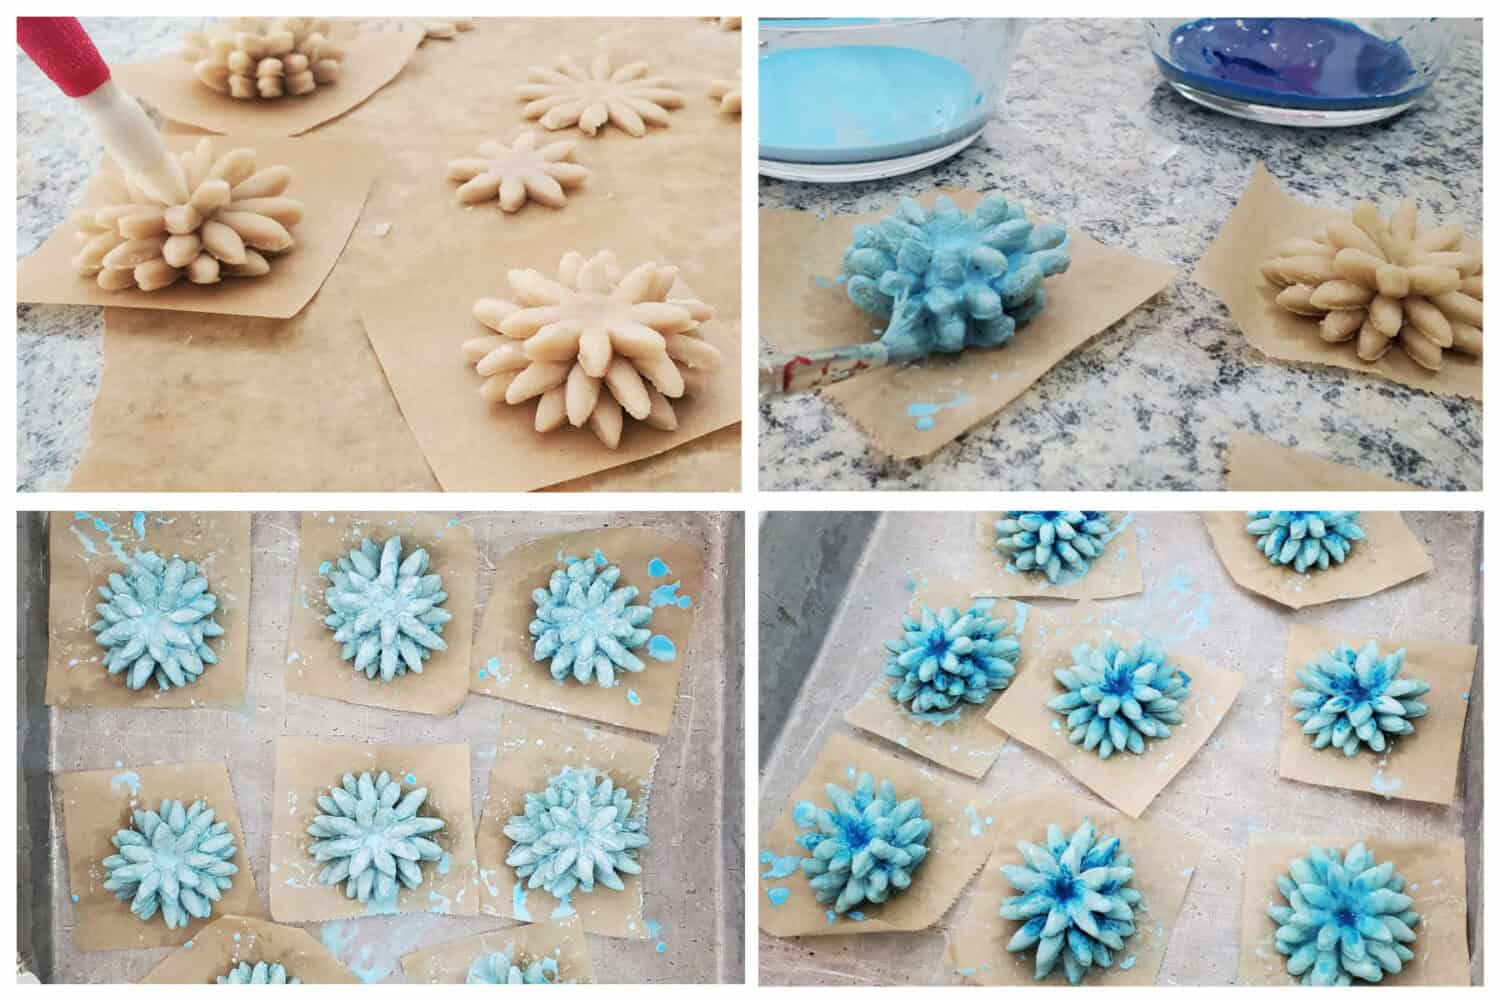
Dot each layer of pie dough with water to help “glue” them together. See pic below, left, for the 2 fondant cutters I used for dahlias and marigolds. THe marigolds are pinch a little more than the blue dahlias.
Roses
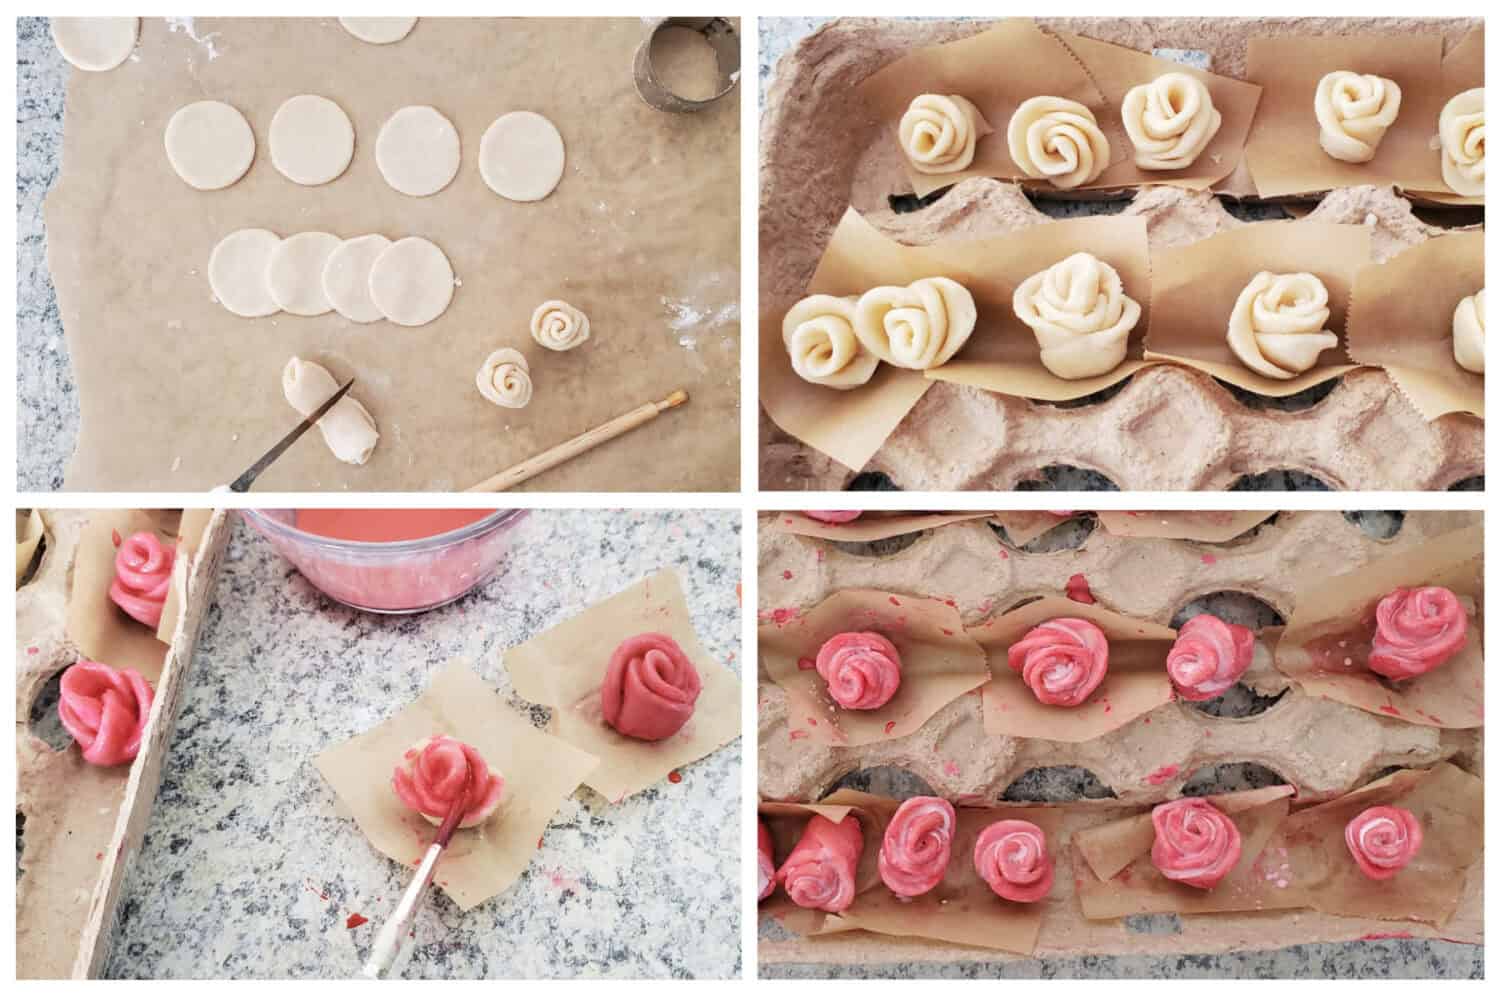
I love roses. You will use a 1-1/2 or 1-3/4 inch round cookie cutter, dot each one with water to “glue” together and roll up. Roll the middle with a wooden dowel and cut in half. Each roll will make 2 roses. I used white as the 2nd color, watered down. It didn’t quite give it the effect I wanted, but it did lighten up my coral color.
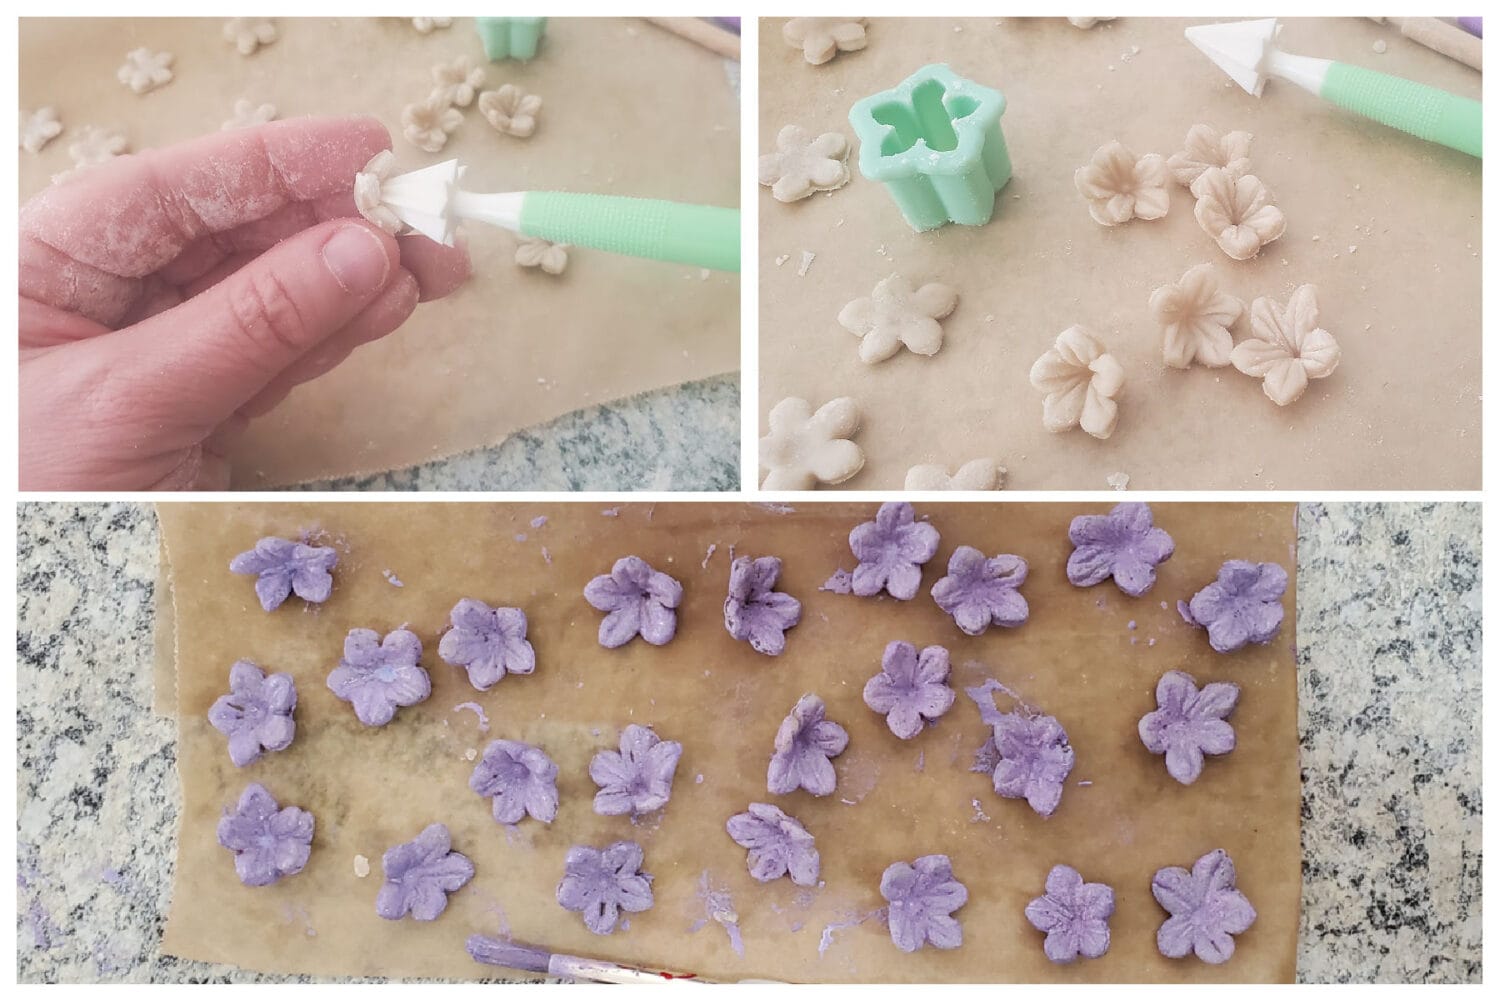
Buttercups & Periwinkles
They may look the same, but one fondant cutter had rounded edges and the other had slightly pointed edges. It’s subtle and in the end it did not make a huge difference.
Buttercup: 1-inch petal cookie cutter. Periwinkle: 3/4-inch cookie cutter. HOWEVER, the size is so insignificant, you can use the same size for both, it’s how you manipulate and shape the pie dough.
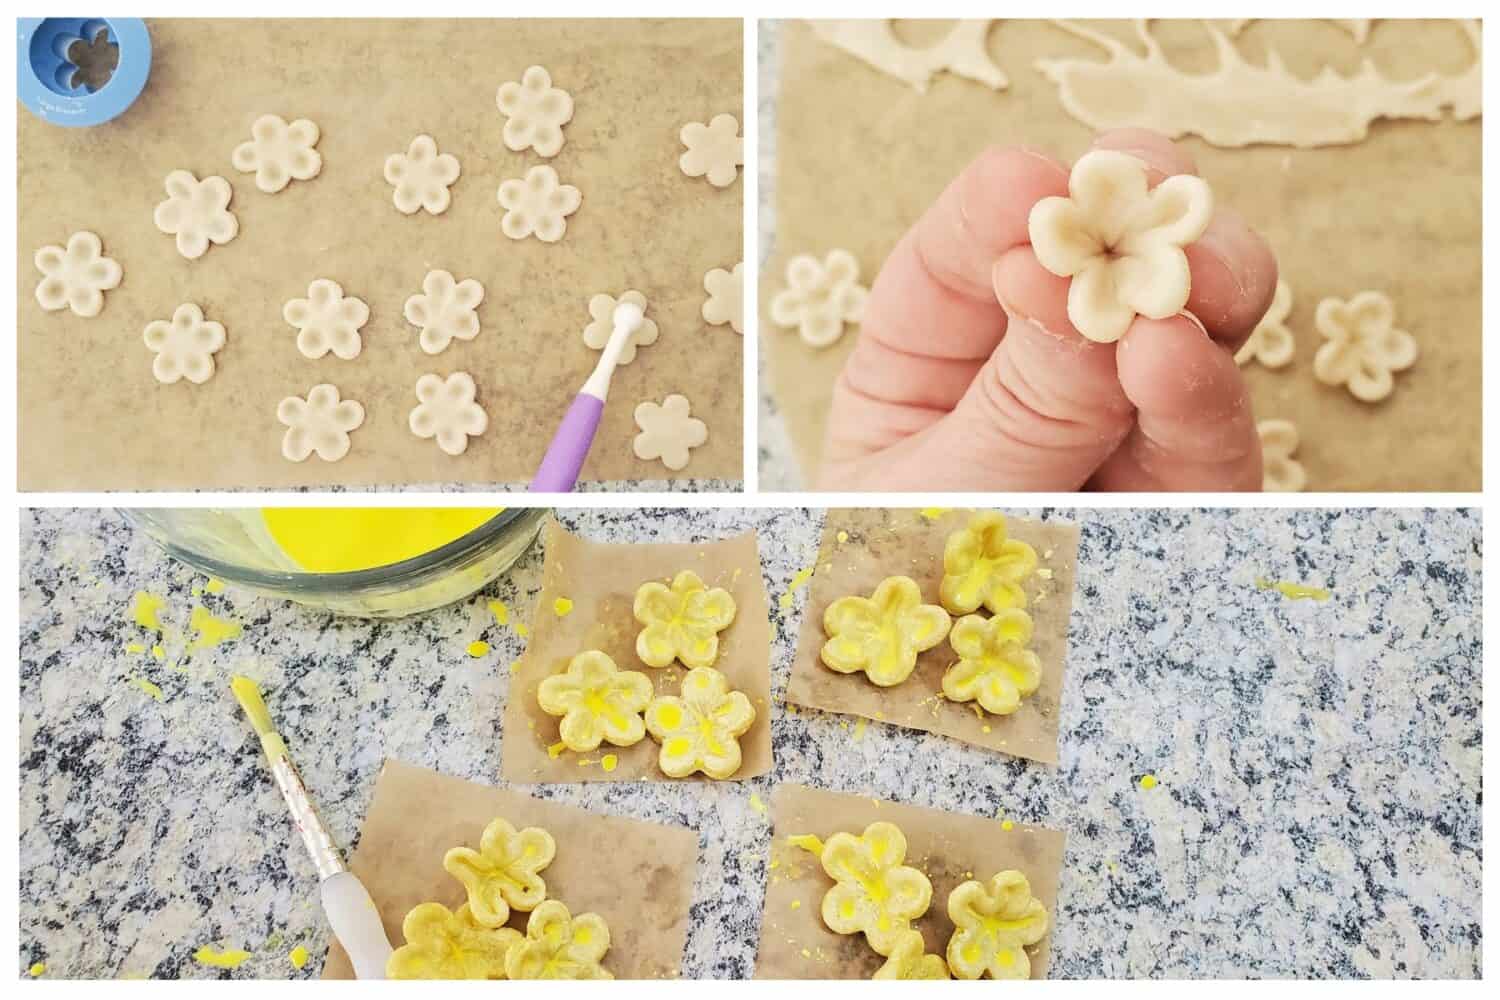
Use a round tool to press out petals of buttercups if desired. If too thin the petals flatten out while baking. For both flowers use a startburst fondant tool to crease the inside while holding the petal, turn flower or tool and repeat to get all petals. (Not Pictured: I used orange for stamen dot for buttercups and yellow for stamen of periwinkles.)
Leaves – Lots of Leaves
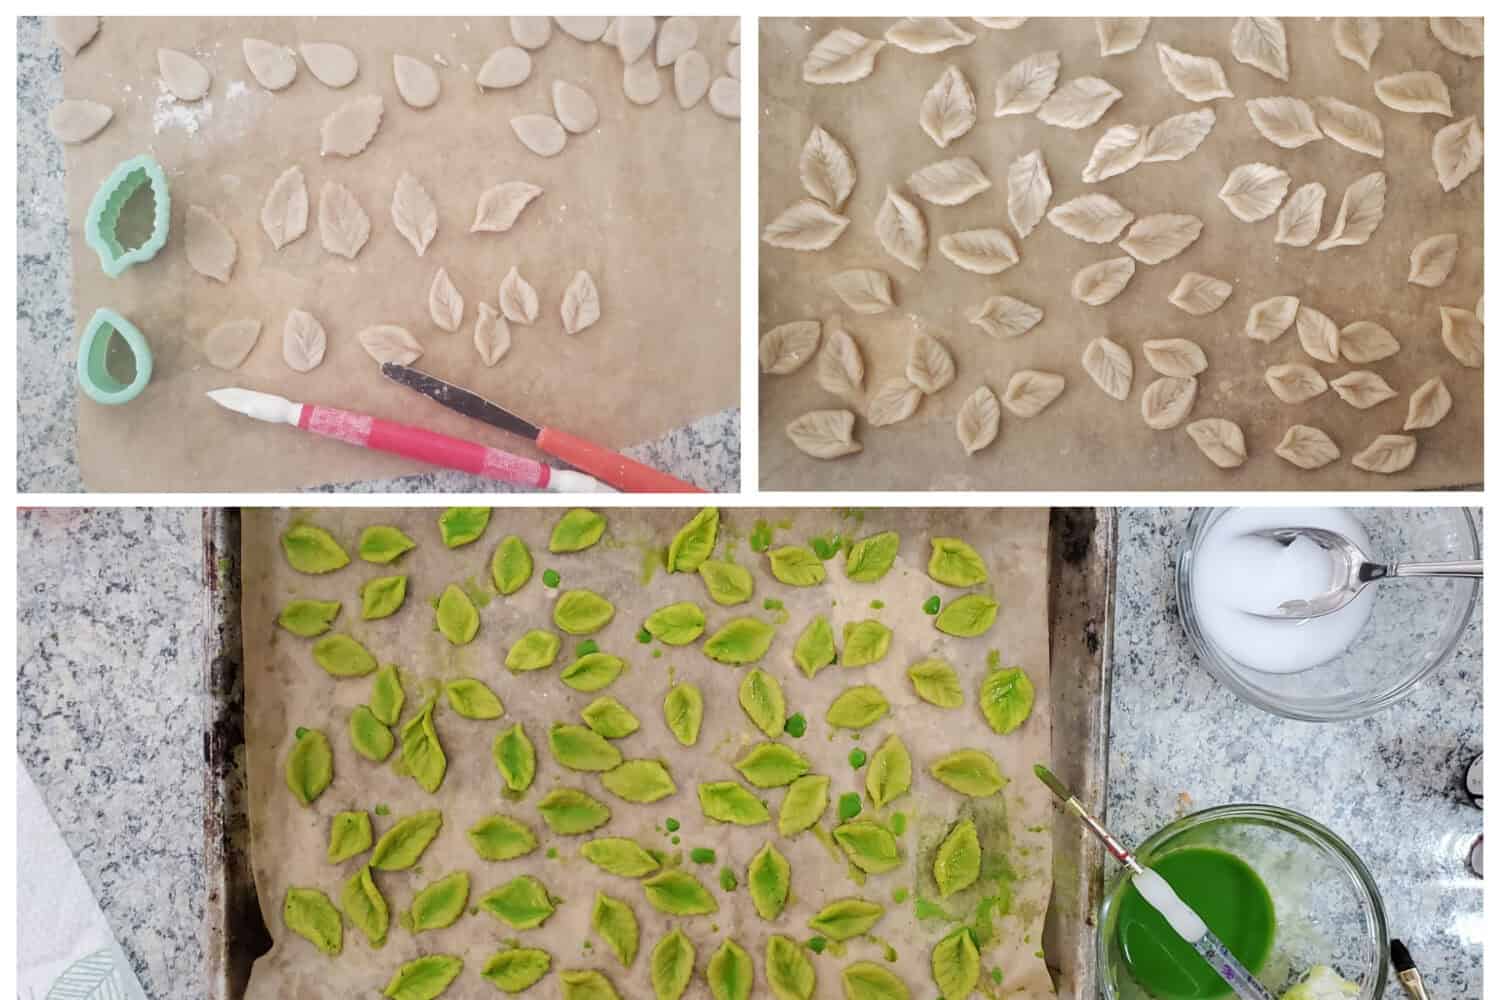
Green is my favorite color and no flower is fully dressed without a leaf. Use 2 different sizes of leaf cookie cutters for variety (1-1/4 inch in length and slightly under 1-inch in length). Then use a starburst tool to press into each cutout. Use your fingers and give each leaf a quick pinch to bend leaf one way or another for variety.
Assembly Time!
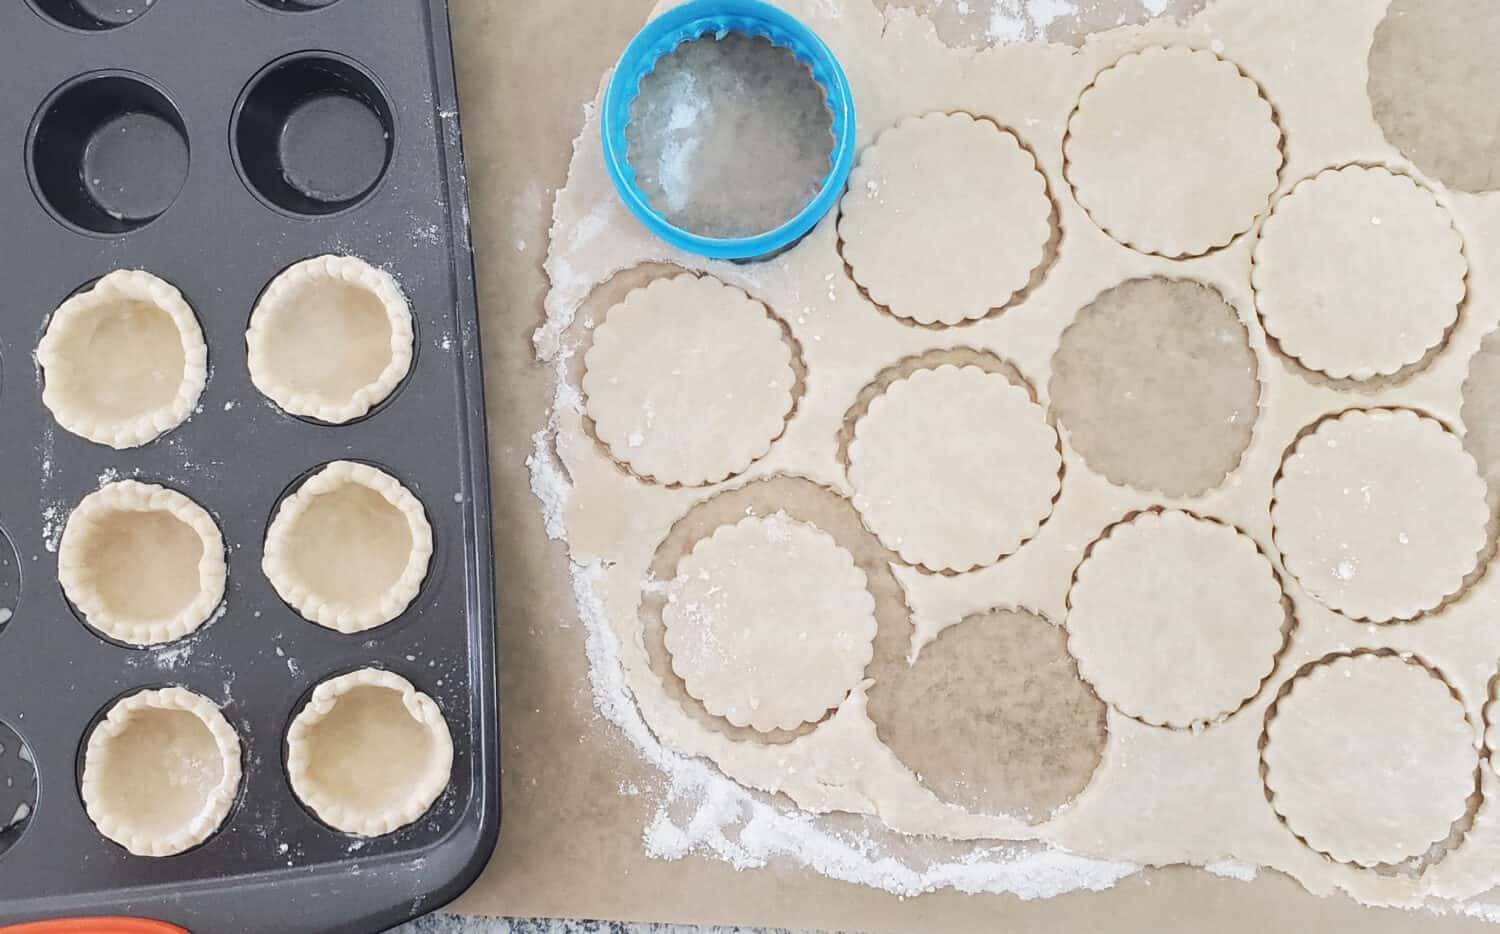
This is the FUN part. While your lovely flowers remain frozen, prepare your mini pies. Spray a 24 cup muffin tin pan with non-stick spray. Roll out pie dough and cut the circles for crust using a 2-1/2 inch cookie cutter. I used the scalloped side. Gently press into each muffin tin.
Scoop in 1 tablespoon of pie filling of your choice. I used what I call “Bumbleberry,” which is left over triple berry pie filling and some extra frozen raspberries and some chopped cherries.
Here are links to few recipes for fruit fillings you may want to try: Blueberry Rhubarb, Triple Berry, Marionberry (aka Oregon Blackberry), Classic Strawberrry Rhubarb. Just remember to chop or snip the marionberries and strawberries into smaller pieces to distribute fruit easier in these mini tins.
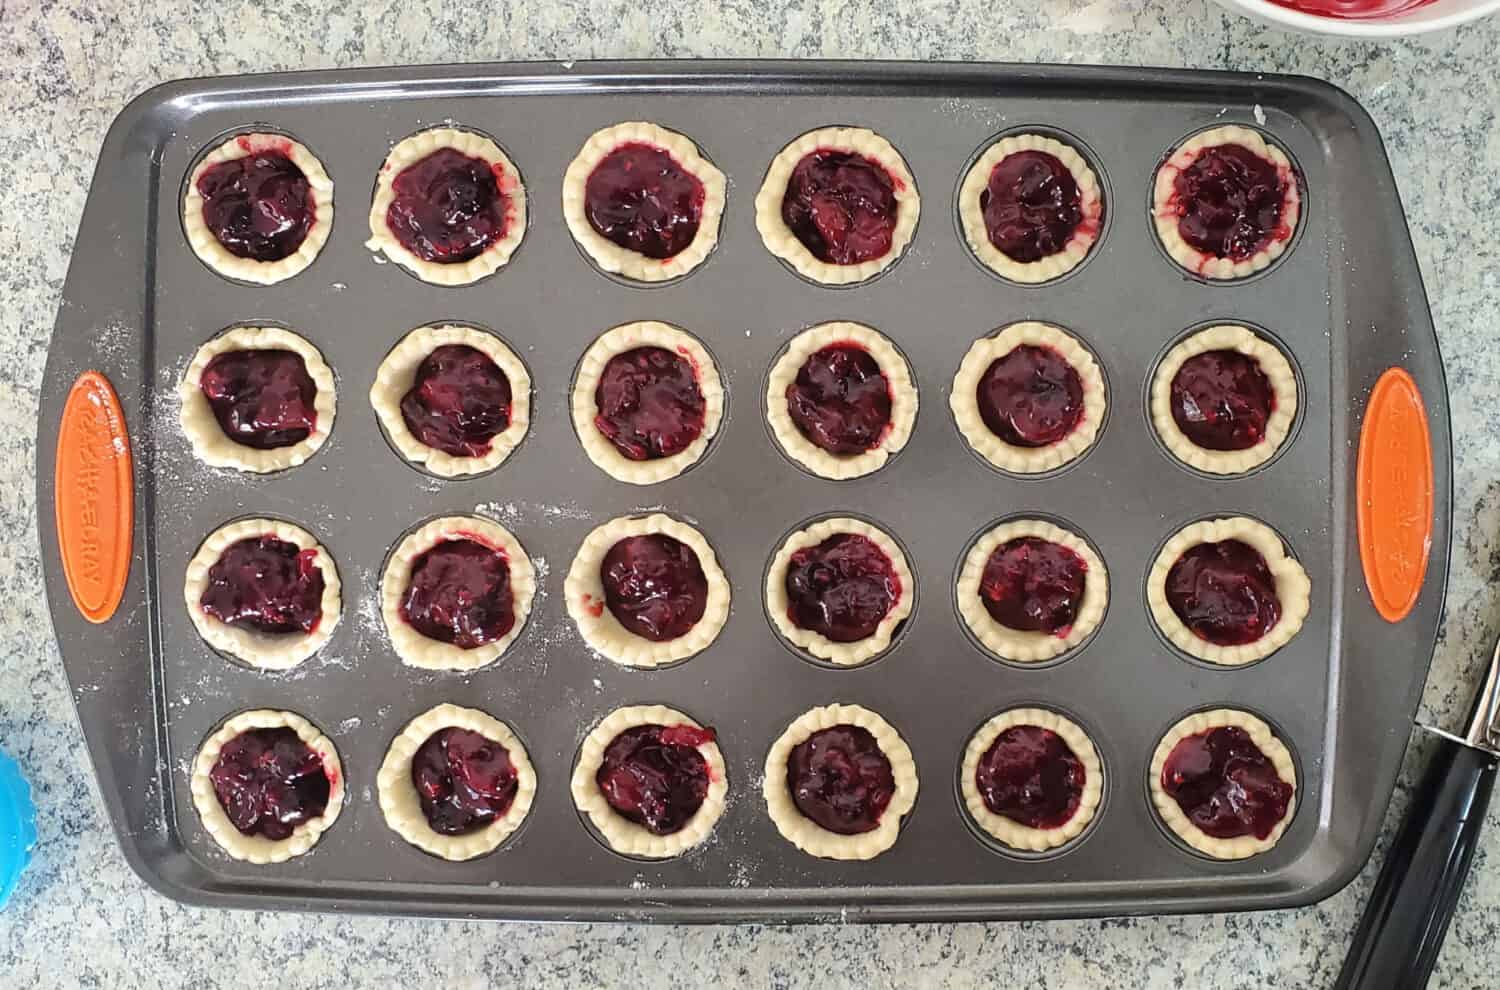
Place one or two leaves on each mini pie. Buttercups and periwinkles, add 3 blooms. Roses, dahlias, and marigolds, place 1 each.
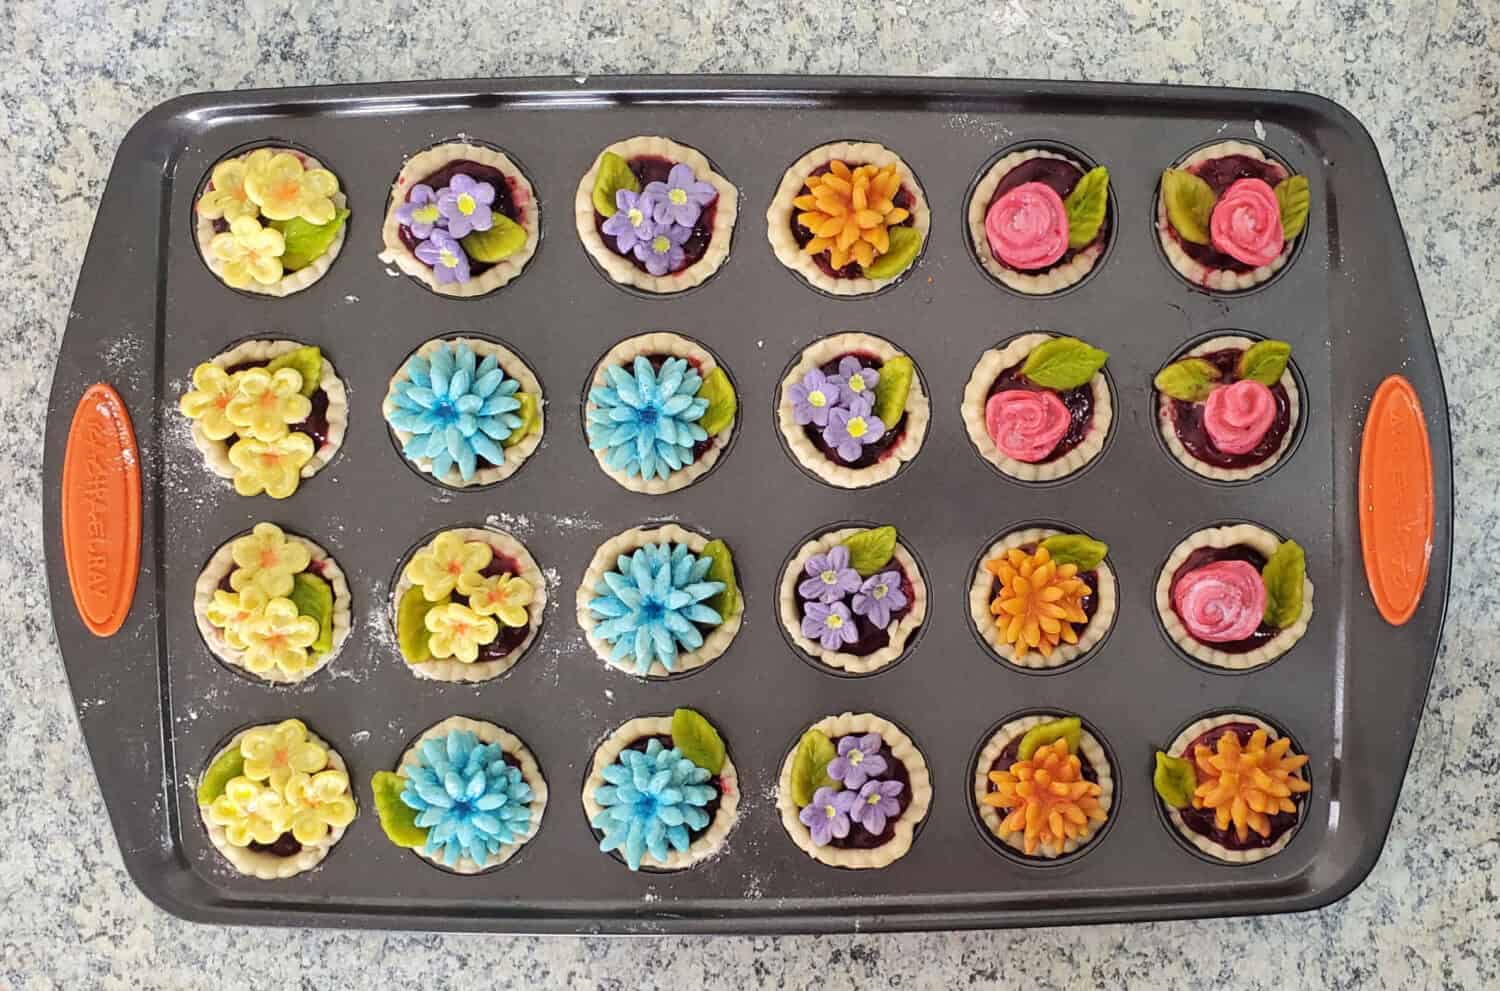
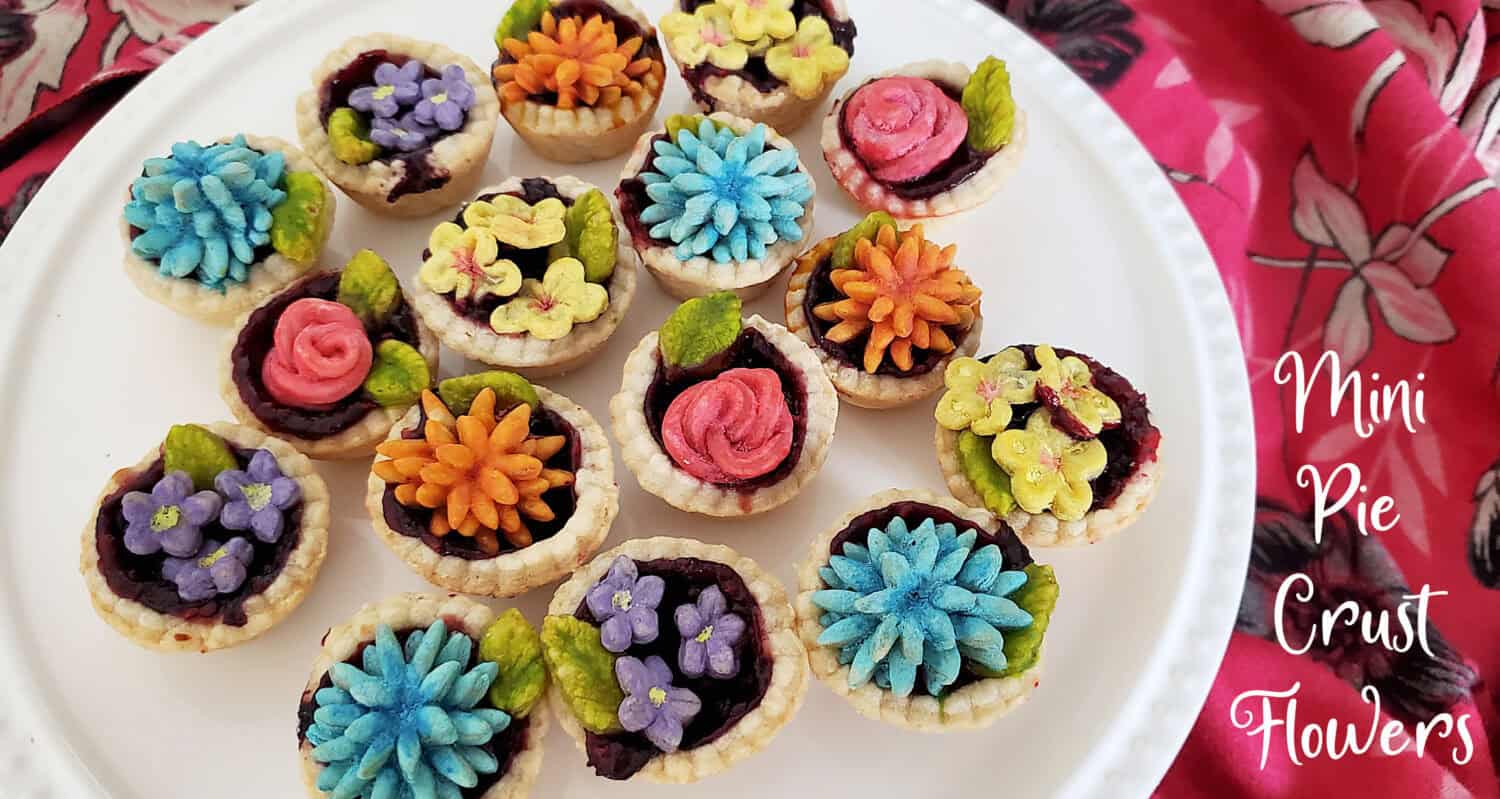
As the pie filling is already cooked, you only need to bake long enough to bake the crust. Bake at 350 F. 20-25 minutes. (If your oven cooks hot, 20 min; cool, 25 minutes.) And here are the baked beauties below.
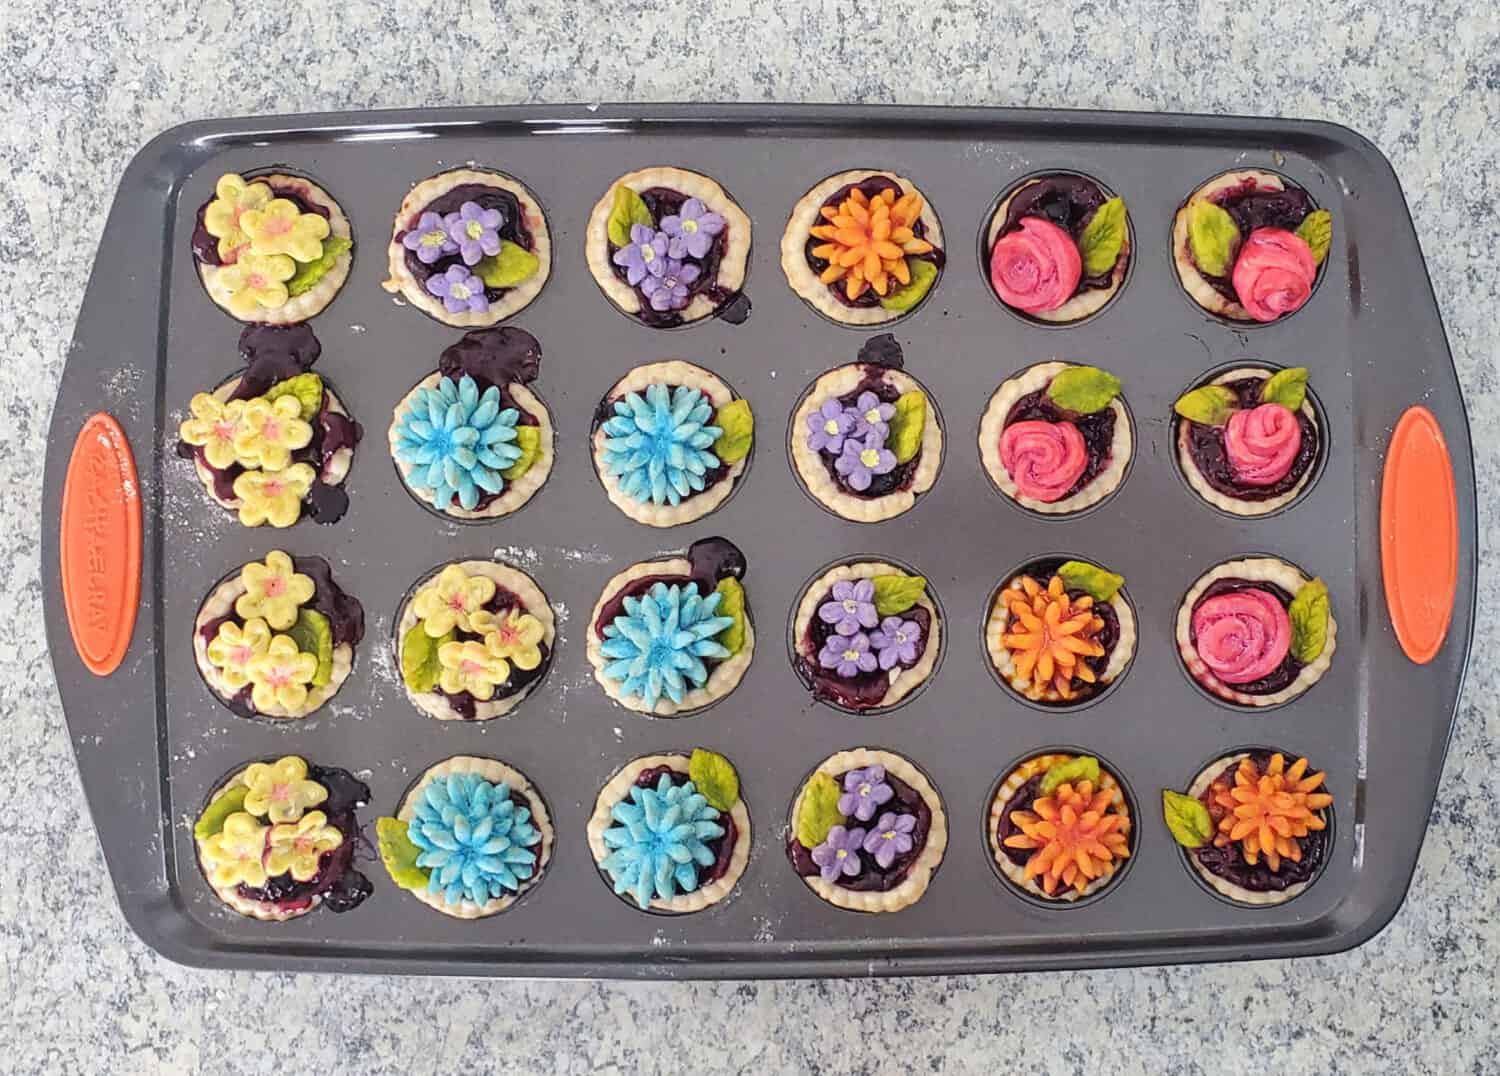
A couple of the smaller blooms were bubbled out of place, just slide them back while still warm.
Products that you may find useful for pie crust flowers:
Fondant Cutters; flowers, leaves, and more: MOACC Cake Tools 36 piece set. I use these cutters for cookies, pie dough, fondant, etc. Very versatile and nearly every shape you could want.
Round Cookie Cutters: R&M Round Scalloped & Smooth cookie/biscuit cutters. This set also has sizes I use for hand pies and empanadas.
Fondant Tools: Fondant Cake Decorating Hand Tools. This also comes with the rolling pin I used to ensure the pie dough for flowers was the right thickness (using the pink rubber end attachment). Smoother Rolling Pin These are great for ALL baked goods. I have a lot of mileage on mine and they’re still going strong.
Mini Muffin Tin: Rachael Ray Yum-o! Nonstick Bakeware 24-Cup Mini Muffin Pan. Can I say I love the extra “handles” for getting out of oven without my potholder or oven mitt smashing one of the yummy baked creations. I AM IN LOVE with this baking pan.
Pie Crust Flowers & Mini Pies
Course: Crusts!!!, Decorative u0026amp; Creative Pie Tops, Fruity-liciousCuisine: American8
servings1
hour20-25
minutesPie crust flowers for mini pies or a bouquet for a full-size pie. Play with fun colors and make ahead to keep frozen for your next pie!
Ingredients
- Pie Dough Recipe **
3 cups all purpose flour
1 teaspoon salt
2 tablespoons sugar (optional)
1 cup vegetable shortening
1/2 cup butter
3/4 cup cold water
- Berry Pie Filling
1-1/2 cups of favorite fruity pie filling
- Equipment
Cookie cutters for flowers, leaves and mini muffin tin
Mini muffin tin
Rolling pin
Parchment paper, sheets and cut into 2 inch squares for flowers
Food coloring, including white food coloring
Custard cups and food safe paintbrushes
Directions
- Pie Crust Flower Instructions
- In a large bowl, stir all of the dry ingredients together for the pie crust dough (flour, sugar, and salt).
- Using a large tine fork or pastry cutter, cut in the shortening/butter until pea-sized and crumbly.
- Add the cold water all at once and mix just until it forms a ball (do not knead or over mix).
- Divide into 3 sections and cover bowl with plastic wrap while creating flowers.
- Roll out a small tennis ball sized dough and roll to 1/8 inch thick. Cut flowers to desired shapes. Place on parchment and baking sheet or egg carton container and place in freezer for at least 30 minutes.
- Prepare your food coloring. Start with 1 tablespoon water, small drop of white. Use a toothpick to add small tiny amounts until desired color. It’s easier to go darker than lighter.
- Keep flowers/leaves frozen, painting a few at a time as pie dough defrosts quite quickly. Place painted flowers back into freezer until ready to use.
- Baking Mini Pies with Flowers
- Preheat oven to 350 F.
- Using a 24 cup mini muffin tin, spray each tin with nonstick cooking spray, set aside.
- Roll out 1/3 of dough and cut circles for each tin. Gently press each circle into tin.
- Scoop in 1 full tablespoon of pie filling.
- Place flower and leaves on top of each mini pie. Bake 350 F. for 20 to 25 minutes.
Notes
- **This is Grandma’s Pie Crust recipe without added baking powder, as I did not want the flowers to change shape too much. With the butter in the crust, it was nearly indiscernible that the baking powder was not added. Win-win.






Absolutely brilliant! Thank you for sharing. 😊😊😊