Beware of Zombies!
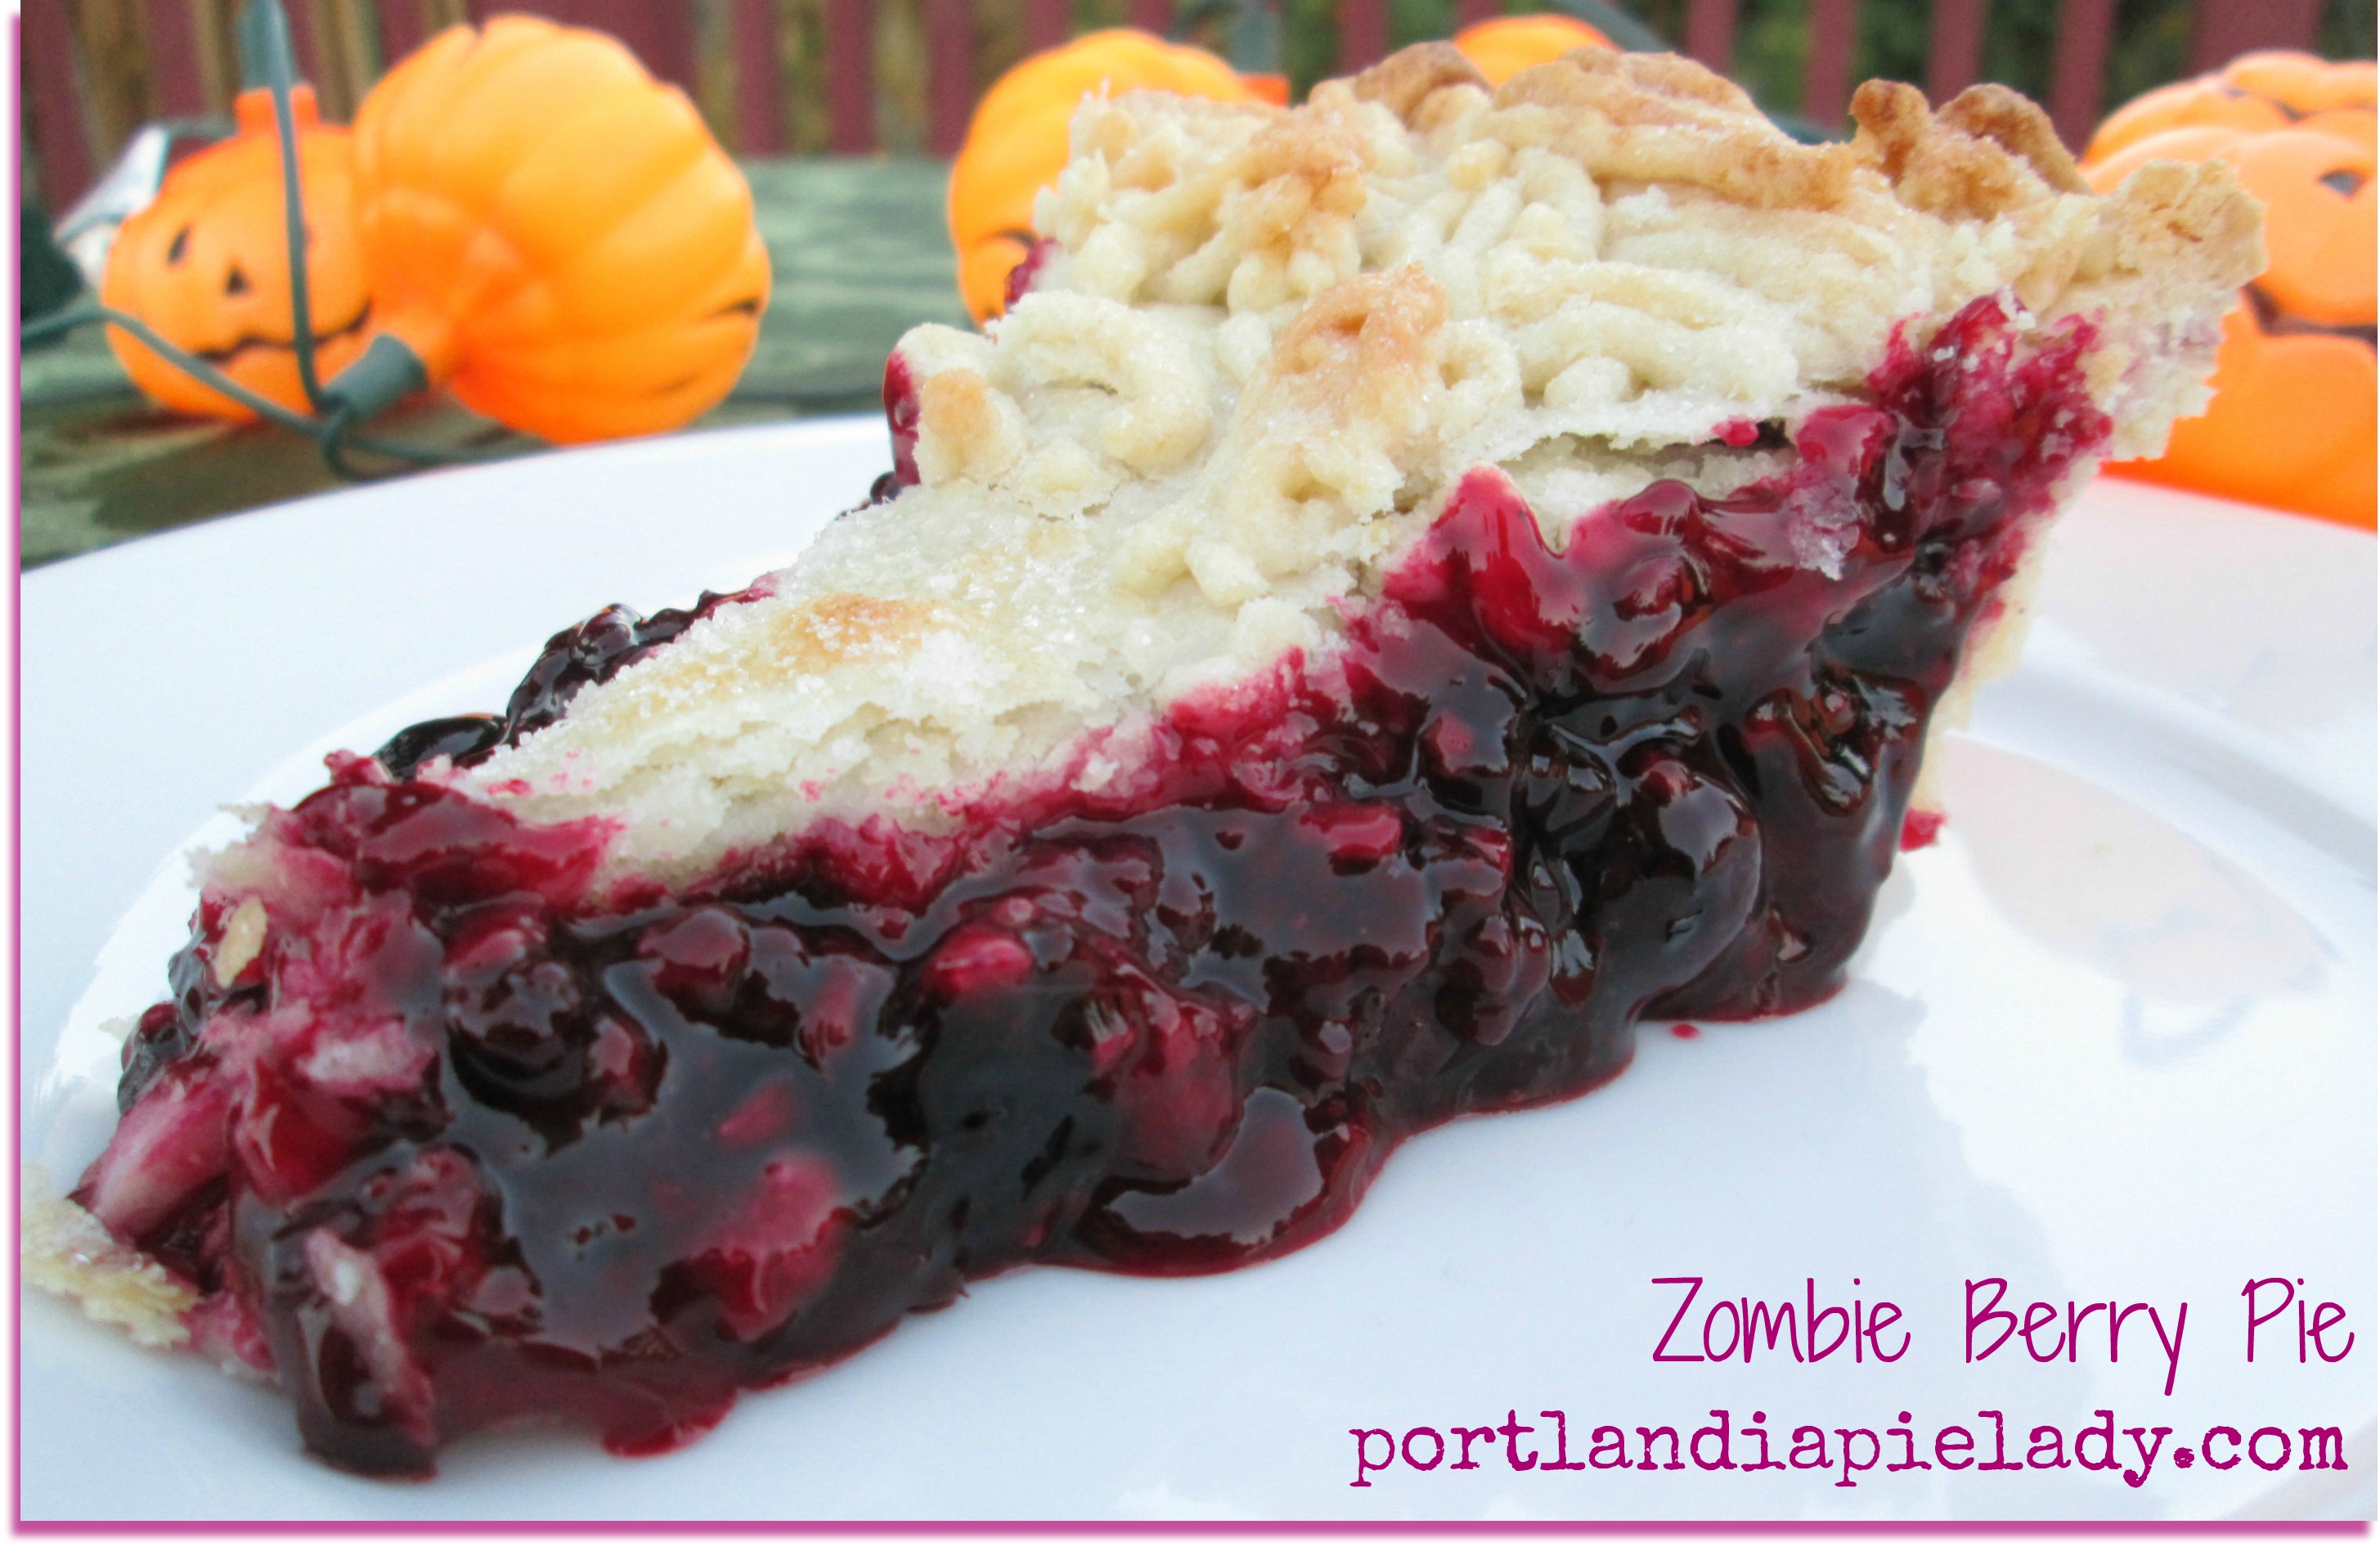
The actual Zombie Face pie is now at the end of the post. It made me jump/gasp every time I saw it. I could not look at the zombie-baked face without turning away (shudder) so I moved the picture to the end. For those of you who keep up with The Walking Dead, it’s like a “Walker” got its face baked in a pie! (I watch some of the show “through my fingers” like it makes it less intense, yes, I’m a wuss, but I love it.) I took a Facebook quiz once that said I would survive everyone in the Zombie apocalypse, but now I am not so sure.
This ghoulish creepy-looking pie screams Halloween but by far is much tastier than your kid’s left over candy. (Best of Both Worlds: Snag a piece of candy while the kiddo sleeps off the sugar coma, next day, slice of zombie berry pie, win-win!)
I am blessed with a yard full of blackberries, red raspberries, black raspberries, gooseberries, and blueberries and I’ve been saving the last pickings in my freezer for the perfect pie. My inspiration for a zombie theme came from Jen, who works at The Tacoma Cat Hospital (with my big bro). She sent me a pic of a wonderfully scary berry pie and that sealed the deal.
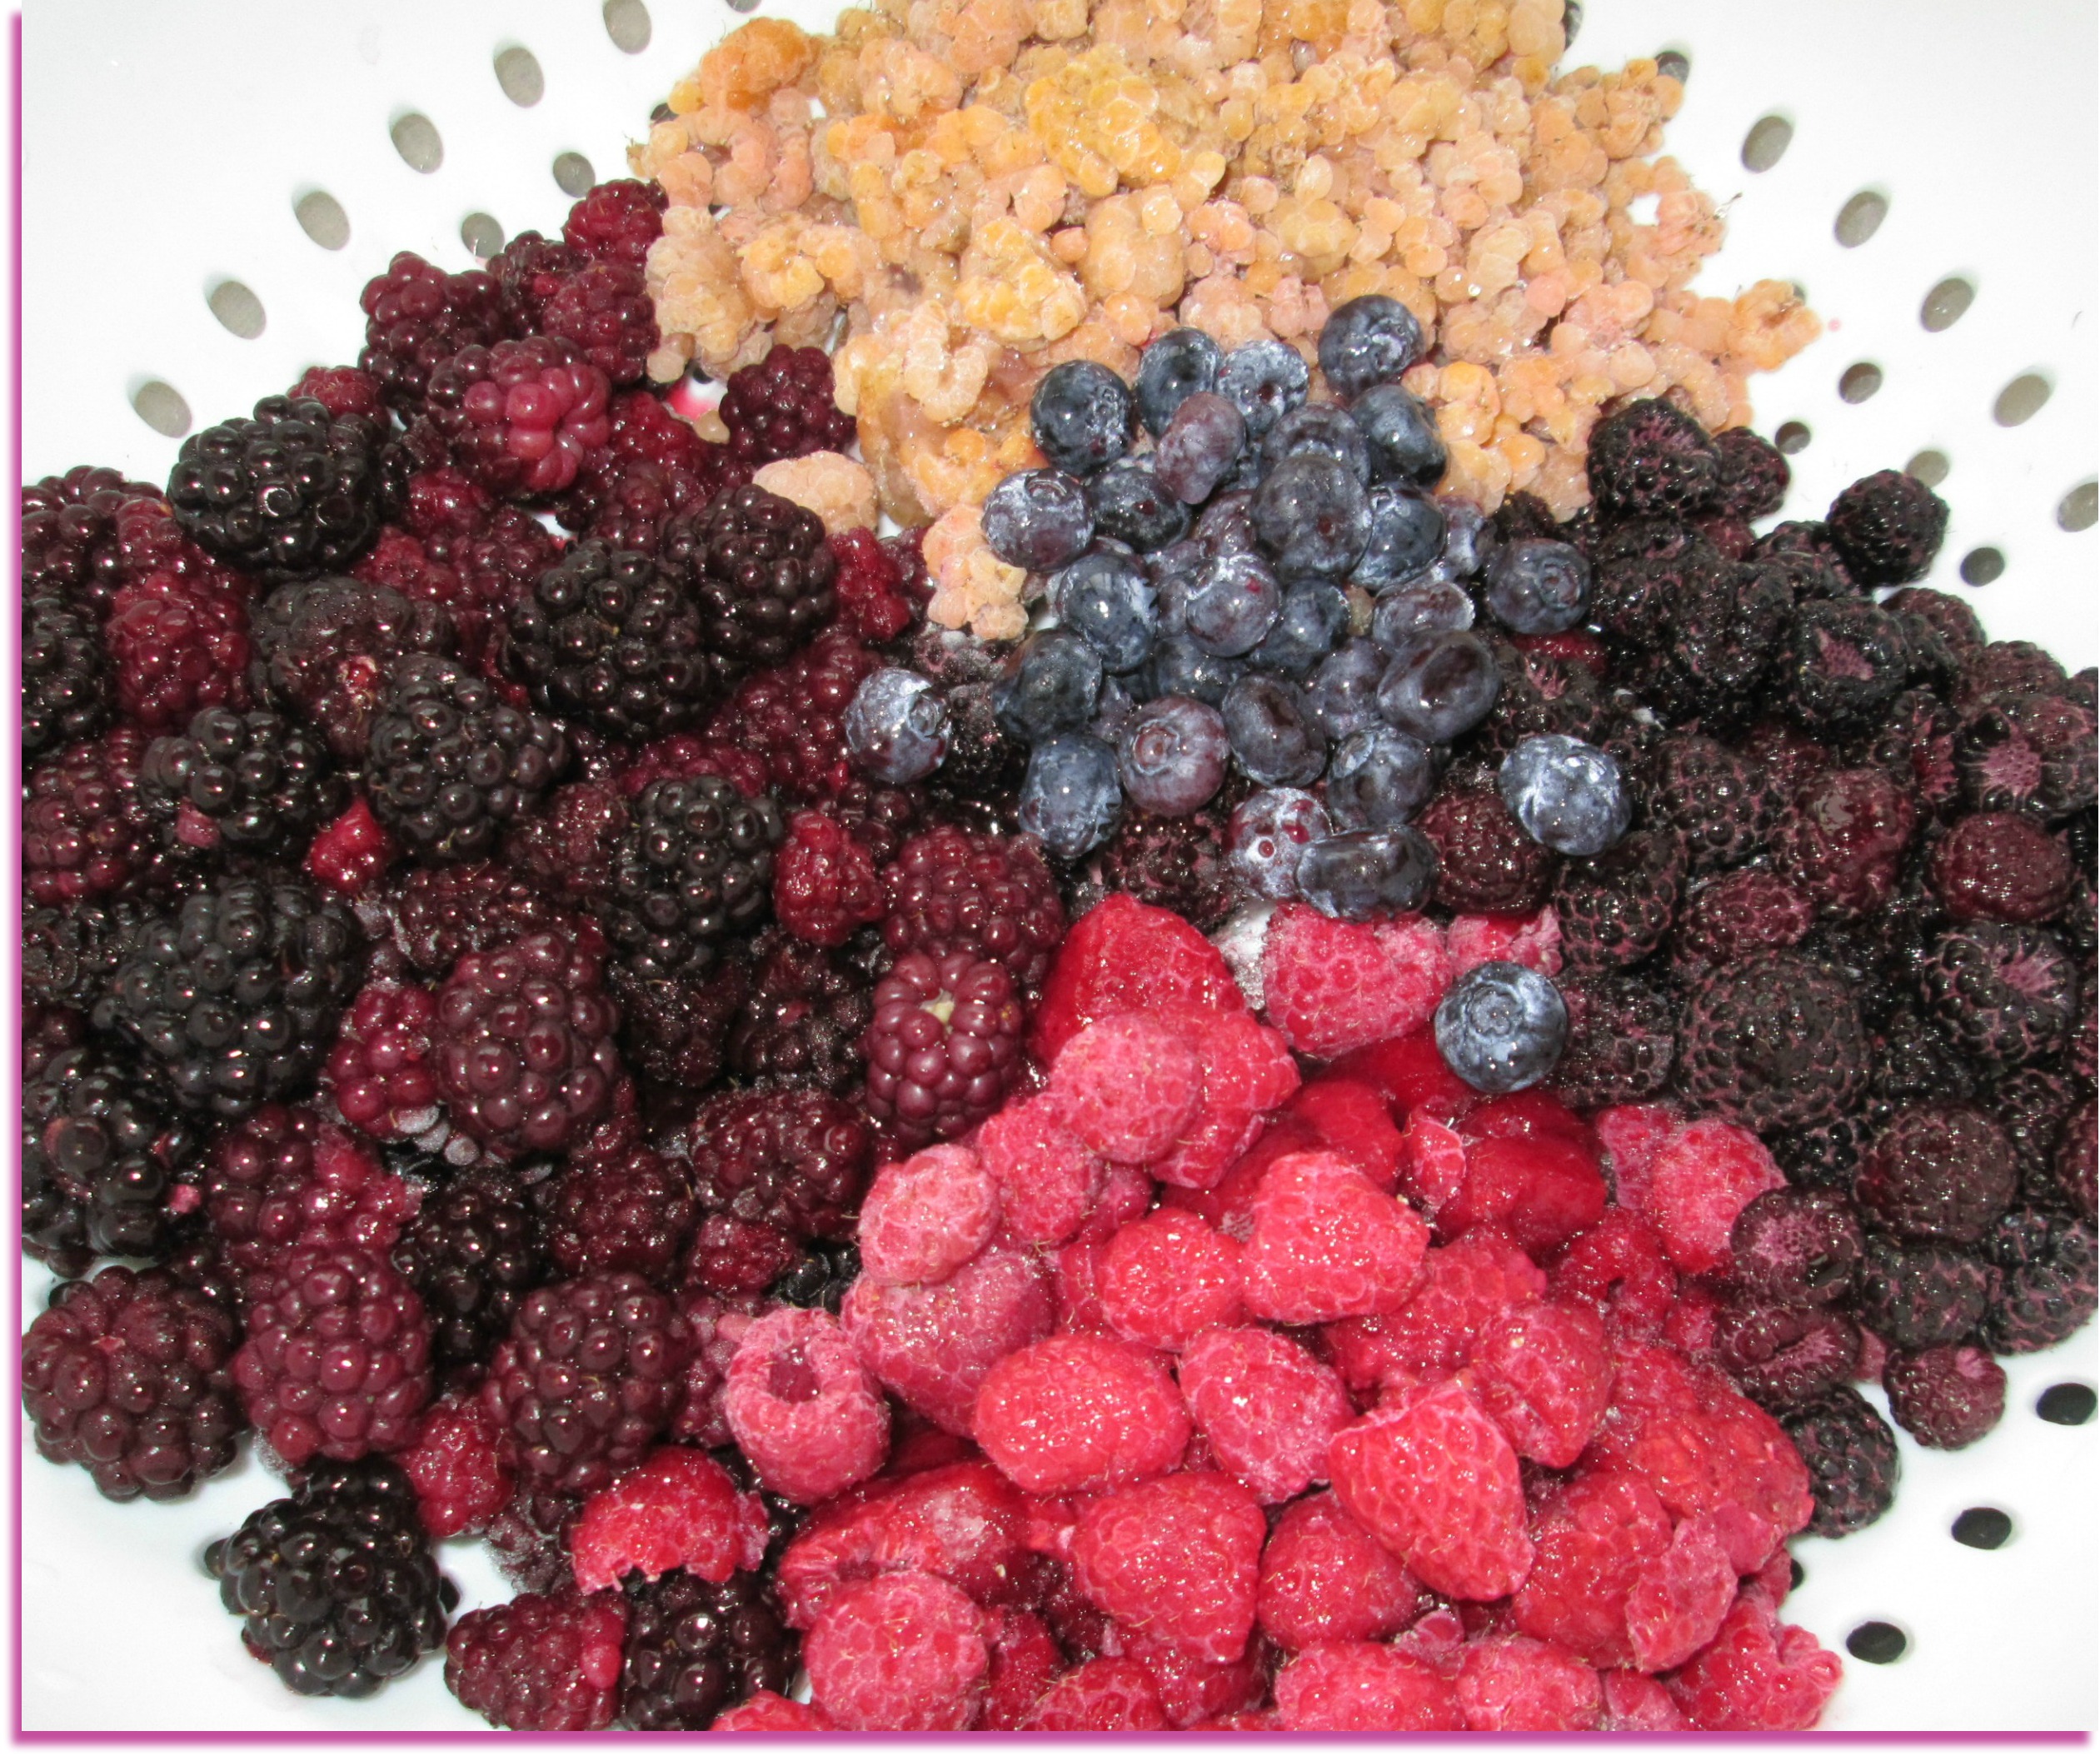
You can use ANY combination of berries you want. Note: Gooseberries don’t have a lot of flavor on their own, so they’re perfect to use in any berry combination, they take on the flavor of the berries they’re cooked with (they’re the zucchini of the berry world).
You can use fresh berries, but since it is hard to find fresh in fall and winter, I decided to go frozen for the tutorial. It’s a very effective method to use so you don’t end up with a watery runny pie (boo).
There is also a step-by-step for how I put the zombie face together, but you can do anything you want! Maybe something a little easier on the eyes, like a cute pumpkin, is more your style. You could just go classic and put a regular crust on top and let berry filling dribble out of your mouth (that would make YOU the zombie).
Okay, go, have some fun, scare your friends, scare your family and save the last slice for yourself.
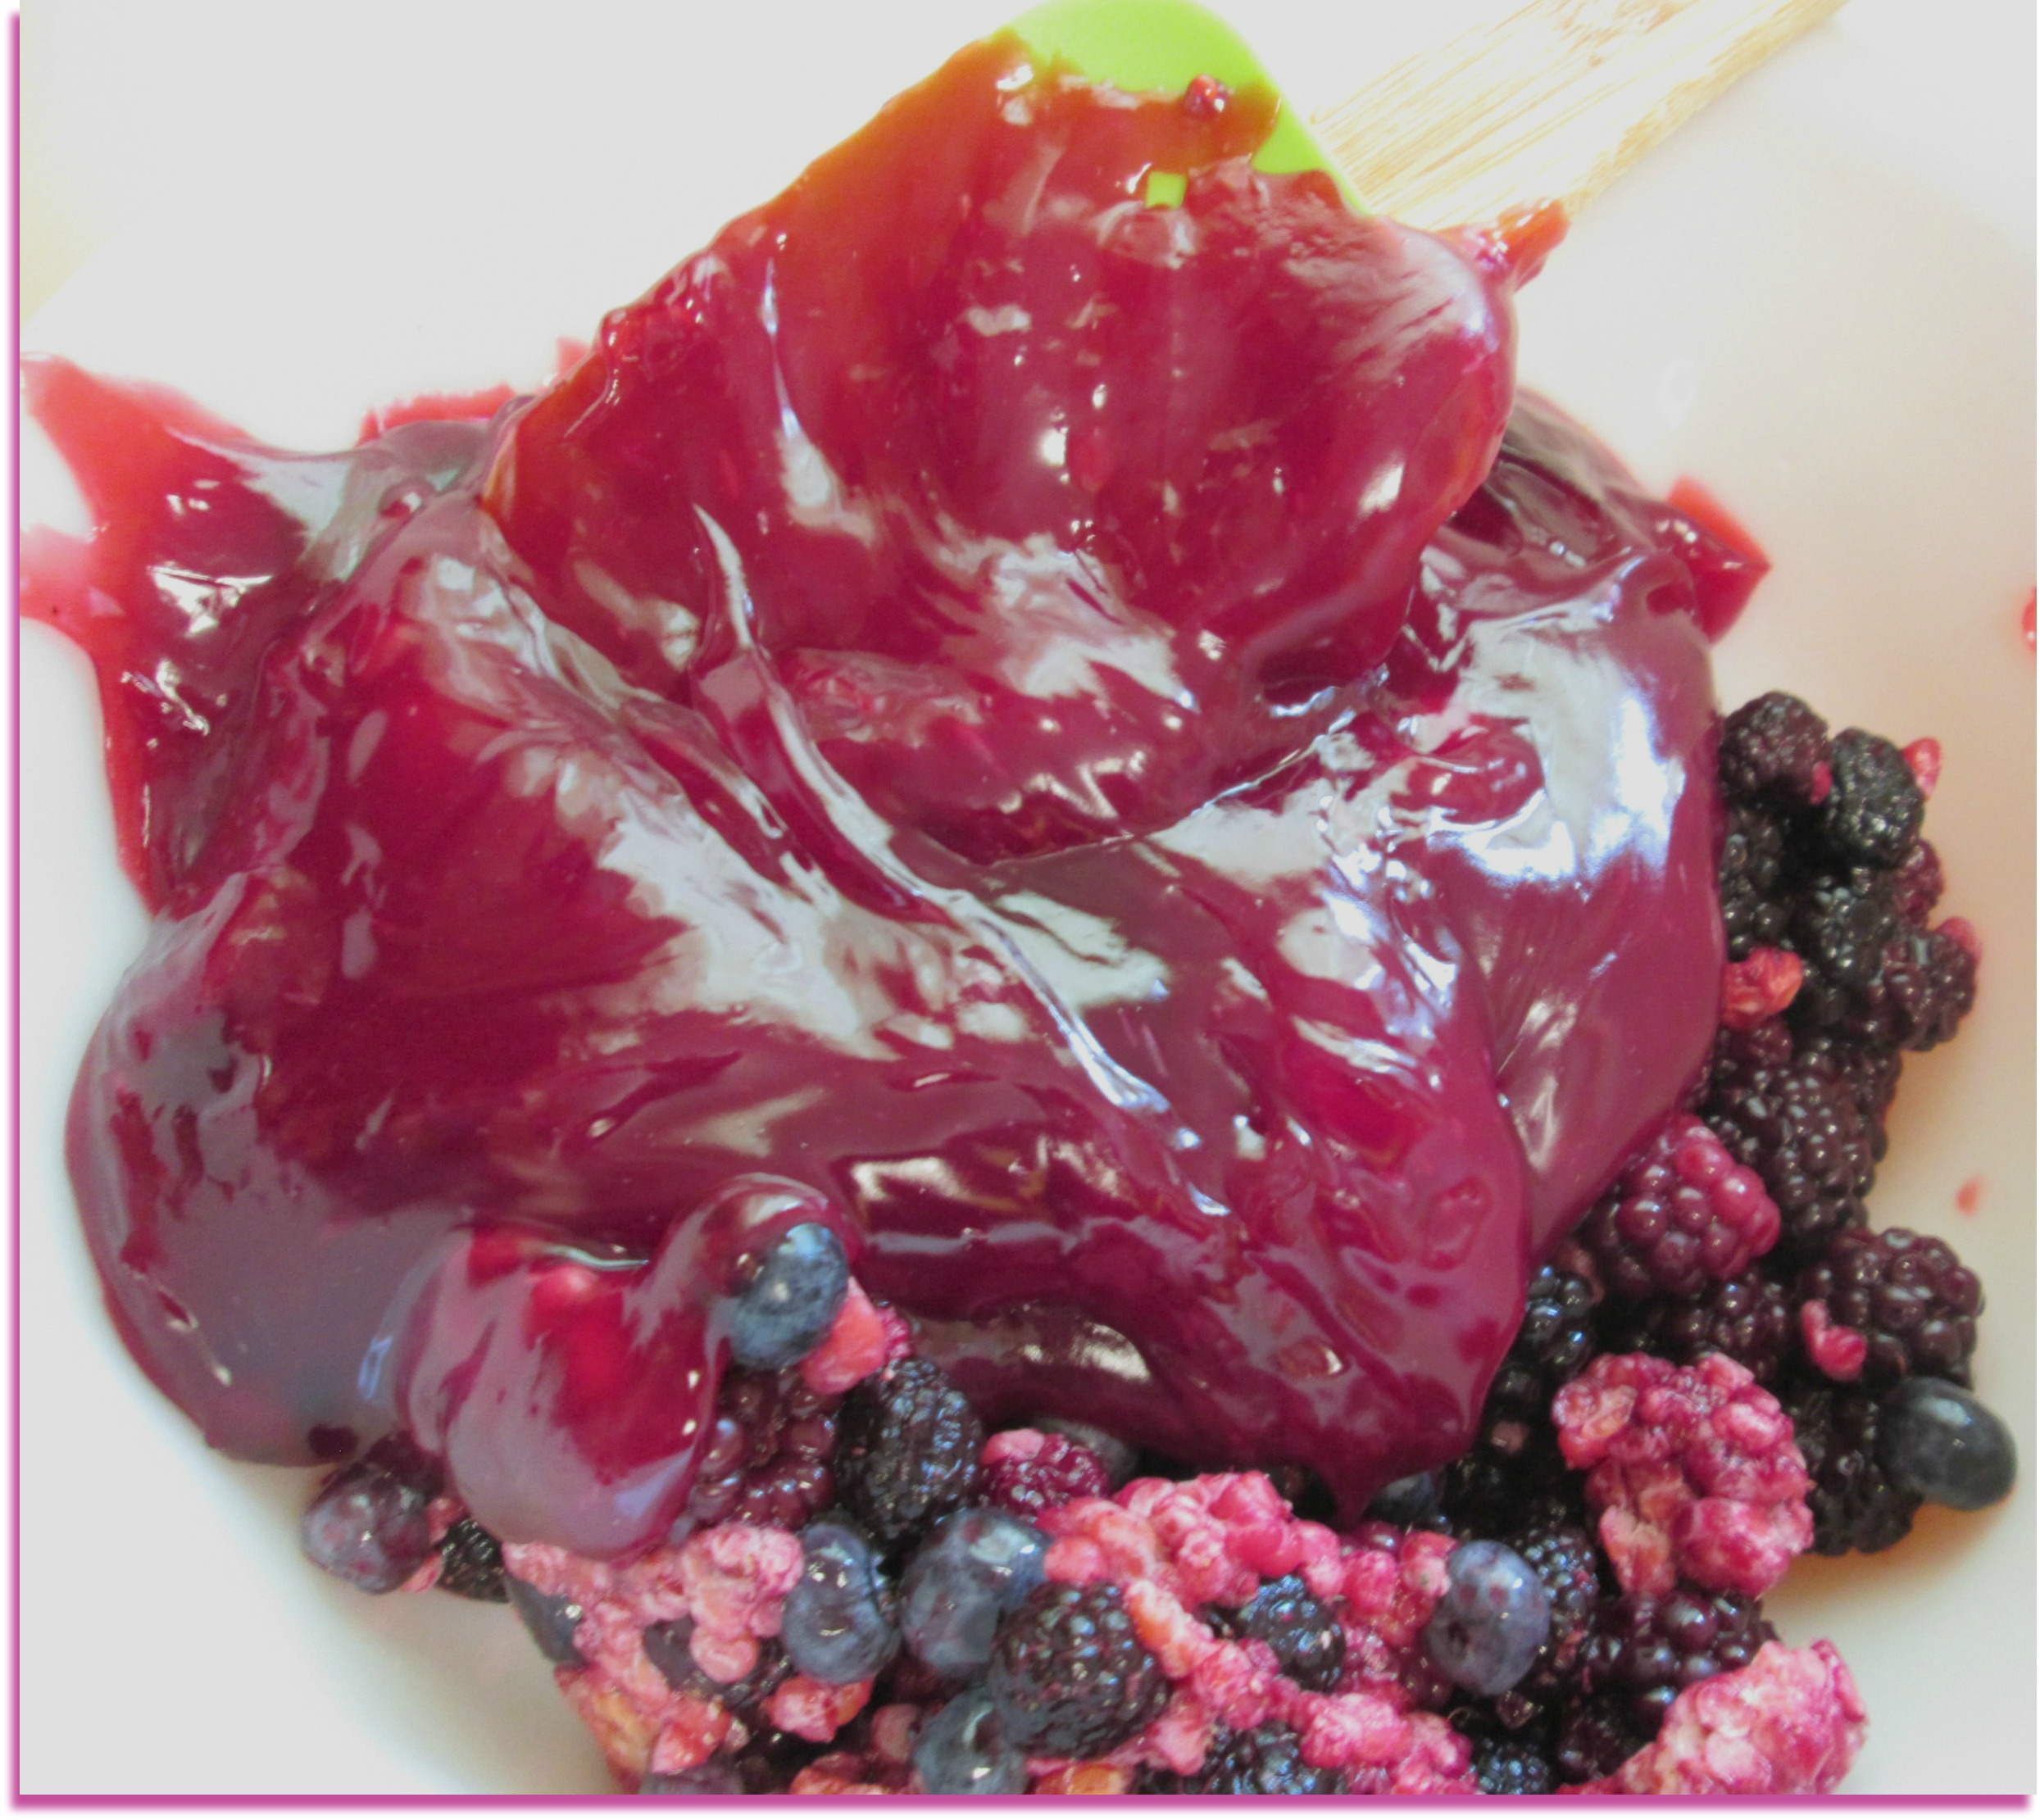
The cooked juices for the filling will be thick, but will fold into berries quite easily, don’t worry if some berries get crushed.
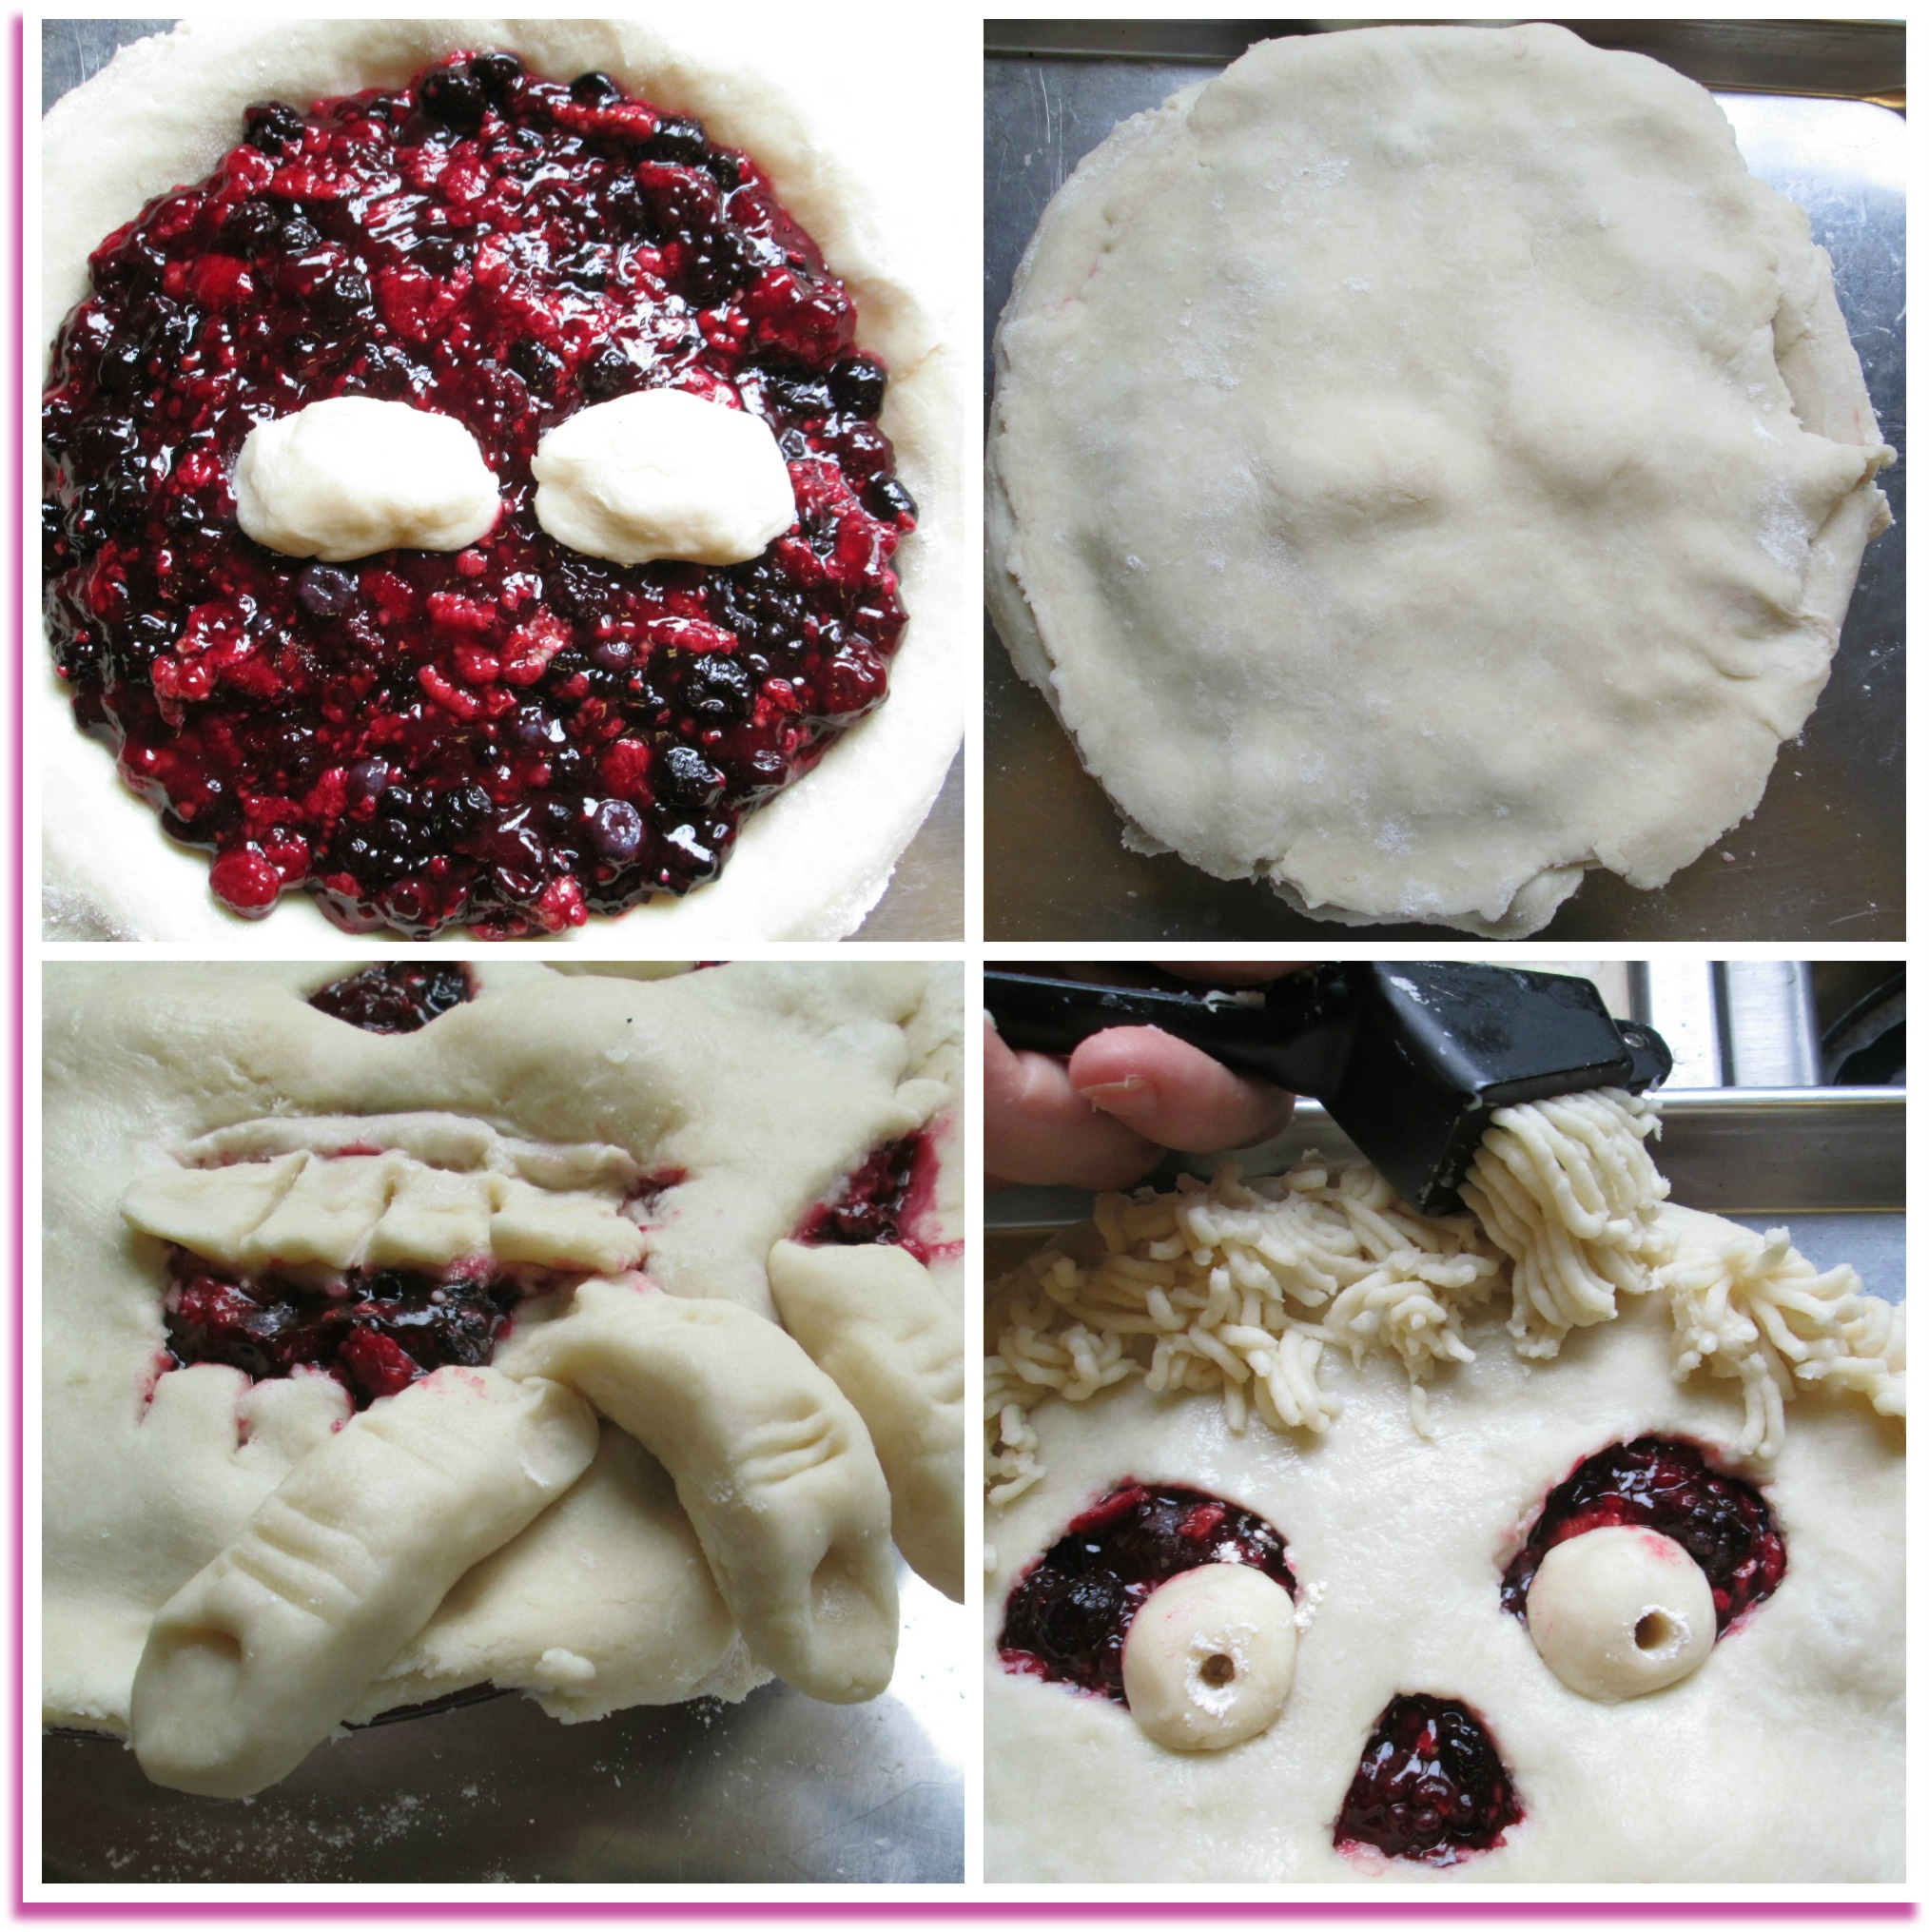
A. Put two hunks of pie dough where you want the “cheek bones” to protrude. B. Press the top crust a little around the cheekbone area. C. Cut out eyes, nose, mouth, and make teeth (dentures) and use a knife to poke it in. Work in some flour into extra dough and roll a “snake” for fingers and a nice long rope for intestines. D. Form hair with a garlic press.
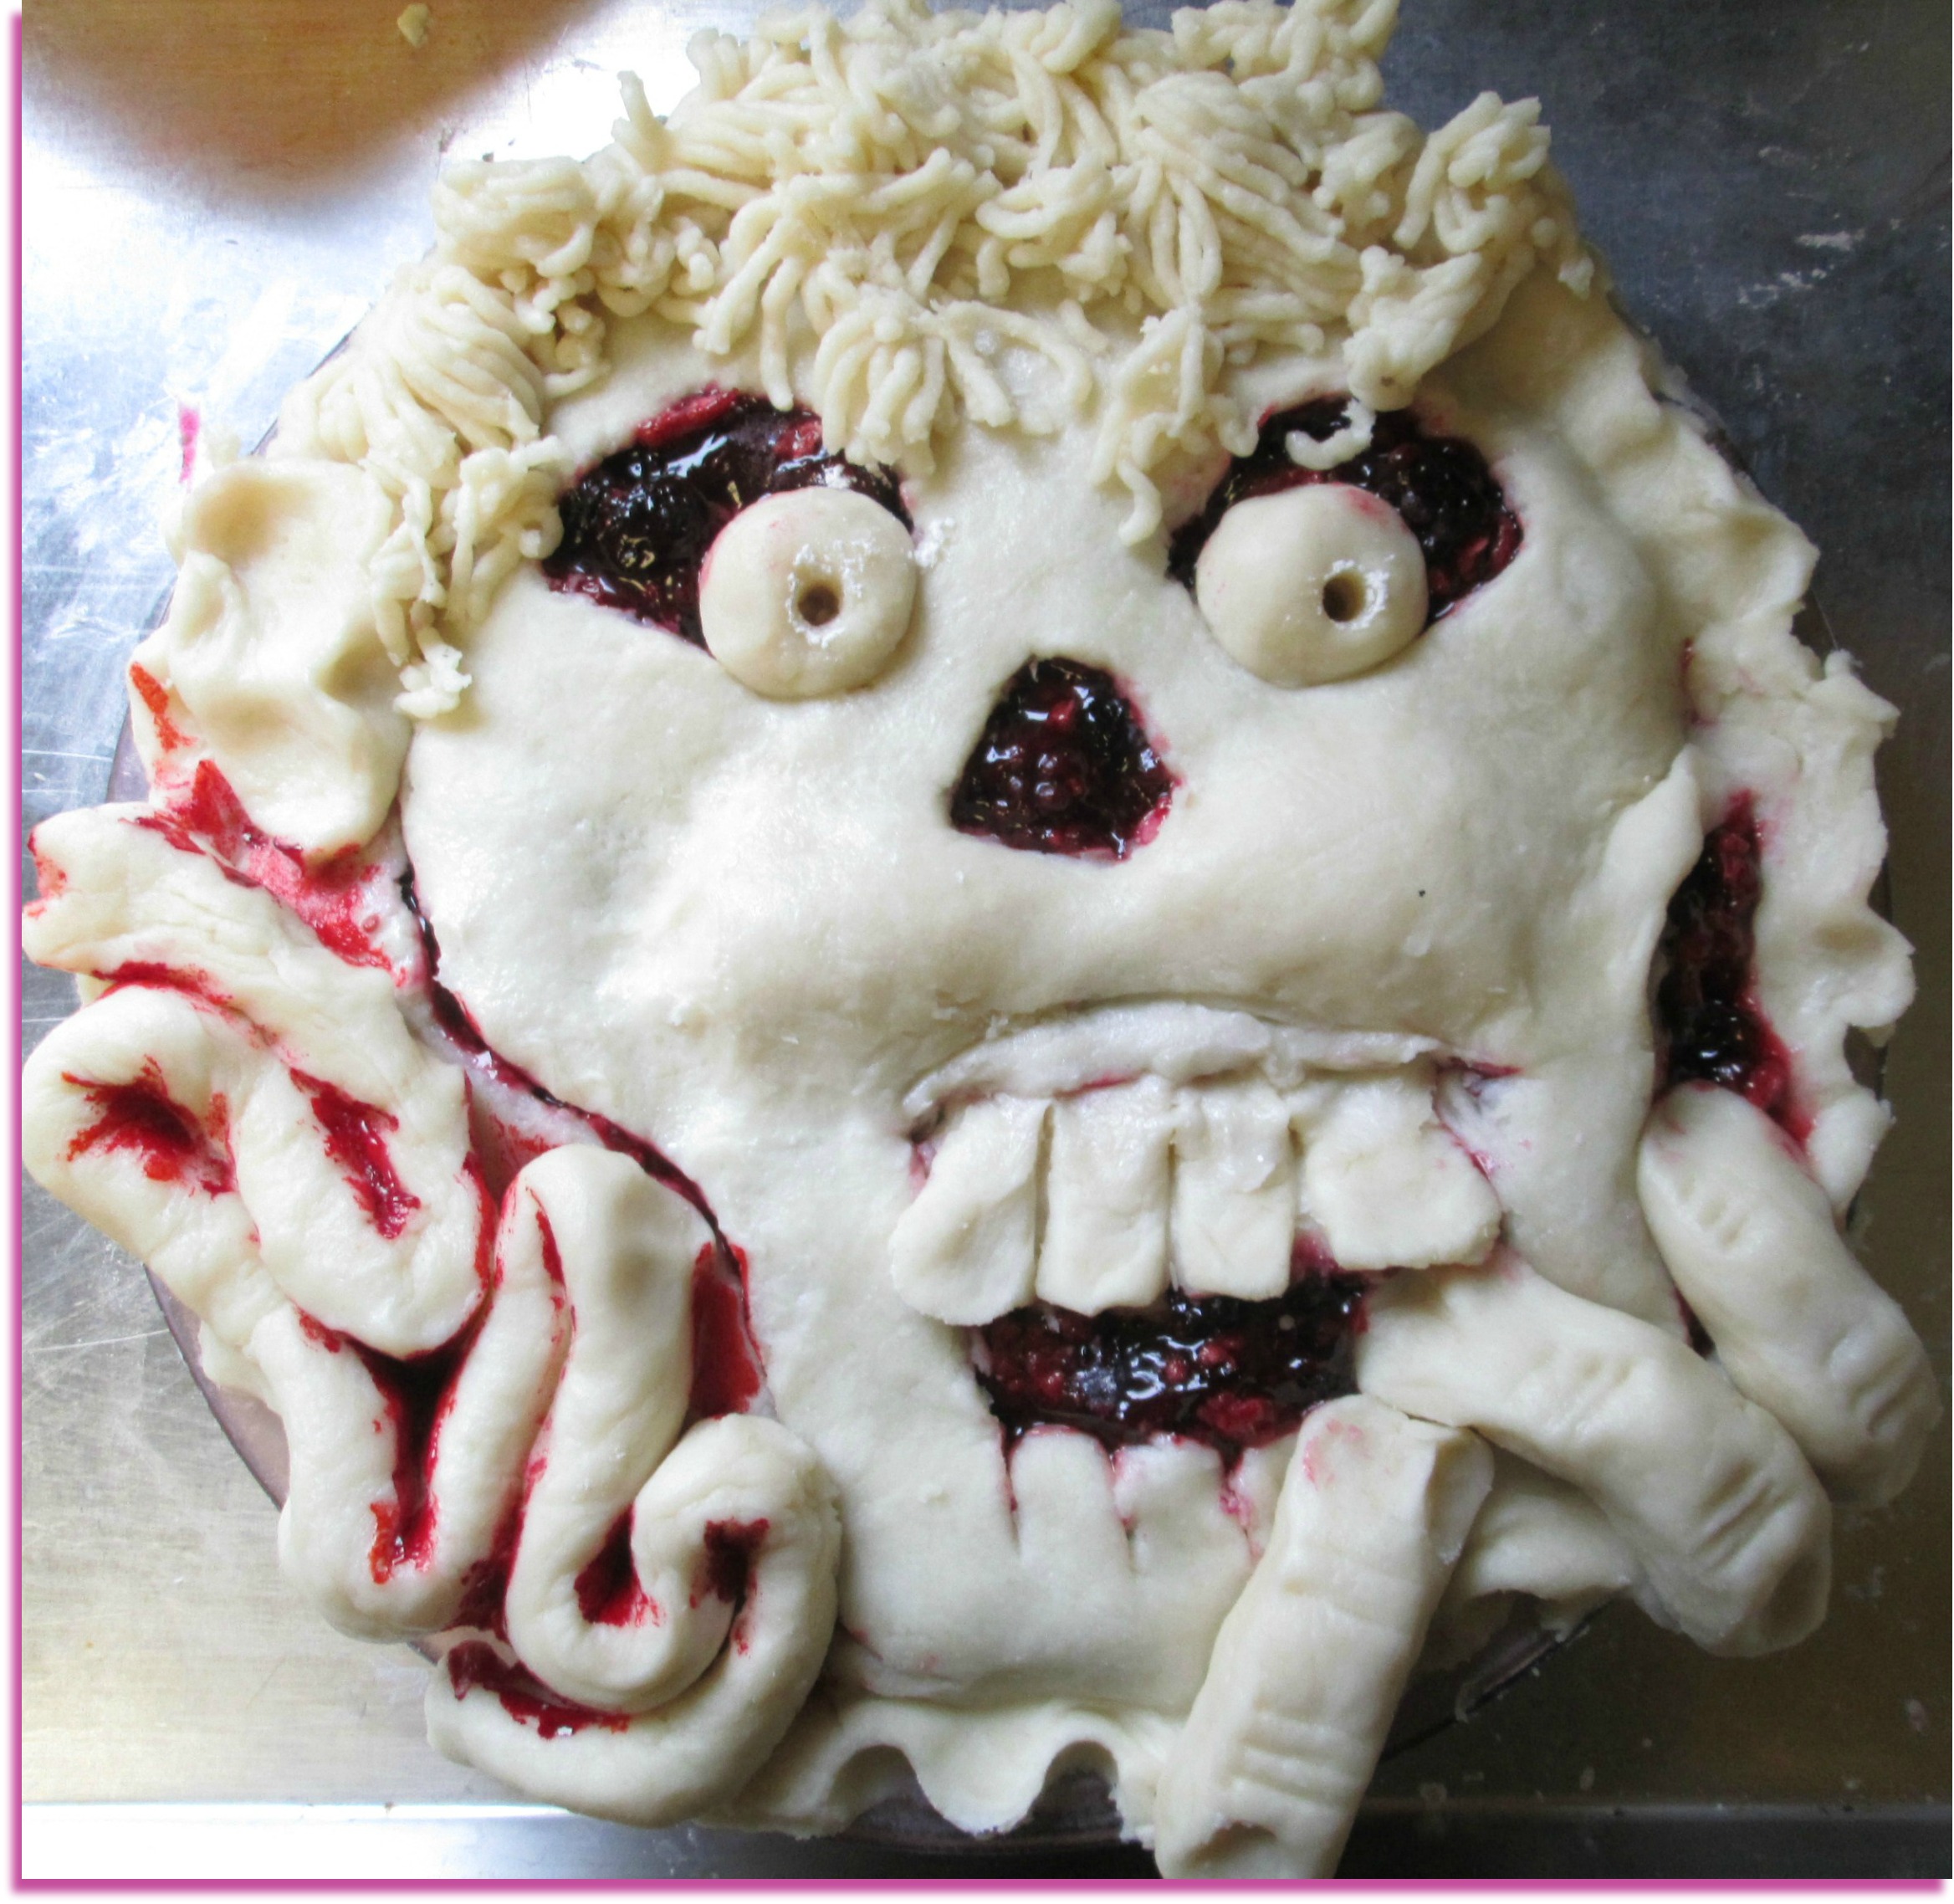
Cut an outline straight into top crust of the face/jaw line (will also serve as a vent). Place on last rope for intestines and use some extra pie filling to cram into the loops creases. Use your imagination! I brushed the crust with milk and sprinkled sugar on top, but now I wish I had done egg for more color!

For gluten free use my Gluten Free Pie Crust made with my All Purpose Gluten Free Flour, but make 1-1/2 recipe for extra dough to make zombie features.
Zombie Berry Pie
Zombie Berry Pie, for Halloween, is a mix of all of your end of summer (and freezer berries) baked in a buttery flaky crust, with its own unique berry flavor with every pie.
12
slices25
minutes50
minutes1
hour15
minutesKeep the screen of your device on
Ingredients
- Filling
5 cups 5 cups mixed berries (black raspberry, red raspberry, gooseberry, blackberry, boysenberry, etc.)
1 tablespoon 1 tablespoon orange juice
1 tablespoon 1 tablespoon lemon juice
3/4 cup 3/4 cup pure cane sugar
1/4 cup 1/4 cup clearjel food starch or tapioca starch
dash of dash of salt
1 egg 1 egg plus 1 tablespoon water (for egg wash)
- Grandma's Pie Crust (Makes one double crust 9-inch pie shell)
2 cups 2 cups flour
1 teaspoon 1 teaspoon salt
2 tablespoons 2 tablespoons sugar
1/8 teaspoon 1/8 teaspoon baking powder
1/2 cup 1/2 cup butter, cold, grated
1/2 cup 1/2 cup shortening
1/2 cup 1/2 cup cold water
Directions
- Pie Crust Instructions
- Cut in all dry ingredients until crumbly. Add water all at once and mix just until forms a ball (do not kneed or over mix).
- Divide dough in half (this will be rather soft). Roll out one half on heavily floured counter top about 1 to 1-1/2 inches wider than pie plate, roll up on to rolling pin and unroll into pie plate (dough is too soft to pick up by hand). Repeat for the top crust.
- Pie Filling and Assembly
- Preheat oven to 375 F.
- In a large bowl, mix dry ingredients together, sugar, starch. Toss the berries into the dry ingredients, being careful not to break them up too much. Add the orange and lemon juice. **(If using frozen berries that have thawed, see directions below.)
- Place the pie filling in the unbaked pie shell, brush edge of bottom crust with egg wash, arrange top crust, fold and crimp to seal the edges. Brush with egg and sprinkle on sugar, Cut vents in top crust for steam to escape.
- Bake 375 for 45 to 50 minutes.
- Thawed Frozen Berry Instructions
- Save and strain the juice that separates from the thawed berries. Set the berries aside.
- In a sauce pan add the strained juice, sugar, orange and lemon juice and ClearJel starch (see recipe above) and stir together to eliminate lumps.
- Cook and stir juice mixture over medium-high heat, whisking while cooking until the juice loses the opaque color and thickens. Fold in the thawed berries and add to pie shell. Bake as above.