Dia de Muertos celebrations in Mexico are simply mesmerizing. Elaborate ofrendas adorned with an endless sea of gold, orange and red marigolds are so beautiful. I have watched many video celebrations for Day of the Dead and it’s definitely on my bucket list. And, FYI it is correctly translated as Dia de Muertos, even though Dia de los Muertos is often used.
Today’s pie is a tutorial so you can make your own Dia de Muertos Pie with pie crust marigolds. Plan on making the marigolds and other skull parts the day before you plan on baking the pie. You will thank yourself for splitting up the pie project over two days.
Gather some empty egg cartons, parchment paper, food coloring, 3 sizes of flower cookie cutters, and fondant tools. If you don’t own fondant tools, toothpicks, pencils, or ice picks will work.
Cut 30 pieces of parchment into approximately 2-1/2-inch squares; and then make the pie dough.
Roll out a section of dough to about 1/4 inch thick. Use 2 sizes of flower cookie cutters for each marigold; 2 large & 1 a size smaller. Attach the the two large cutouts with a drop of water in between & then attach the smaller flower. Press down in middle of the flower. Now, place the flower onto one of the parchment cutouts and every so slightly cup the dough together to form the marigold. Place this into one of the egg carton containers.

Use the tip of toothpick or fondant tool to pull a couple of inner petals to the middle and you’re done! Repeat this for all the flowers. I made 11 large and 9 small flowers. Place into the fridge until ready to paint.
Coloring the flowers is super fun. Beat 3 eggs with 1/4 cup water and divide into 3 separate custard cups. Add yellow food coloring to one and orange to the second cup. To get a pretty color of red, add a couple of drops of red and a very small drop of brown. It makes a beautiful red umber. If it is too dark just add more red and a drop of orange.
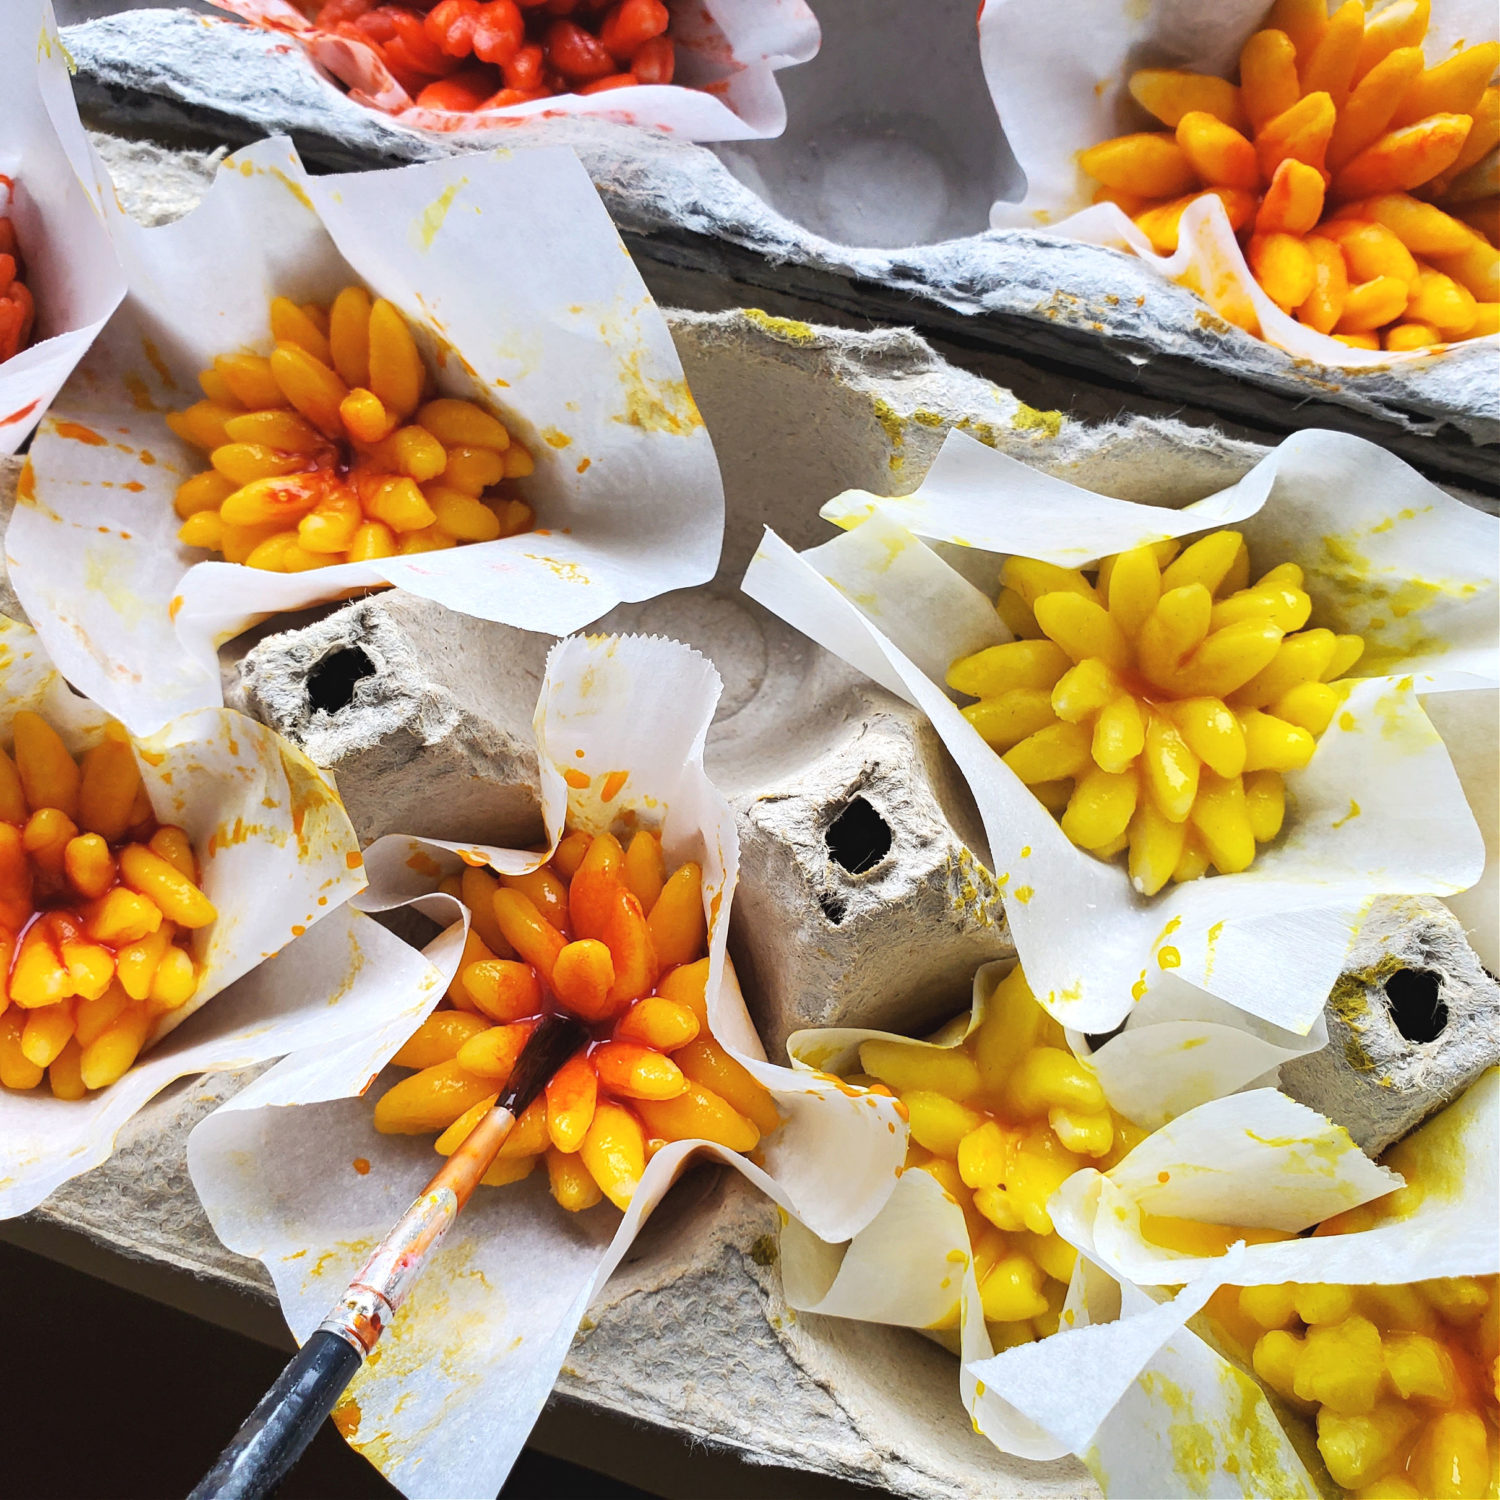
Using a paint brush, brush on each color with abandon, getting the inner and outer petals (and the bottom) of each flower. To give your flowers some depth use a paint brush and drop some of the orange into the middle of the yellow marigolds. For the orange marigolds, drop in some red umber. And, for the red marigolds centers use some watered-down brown.
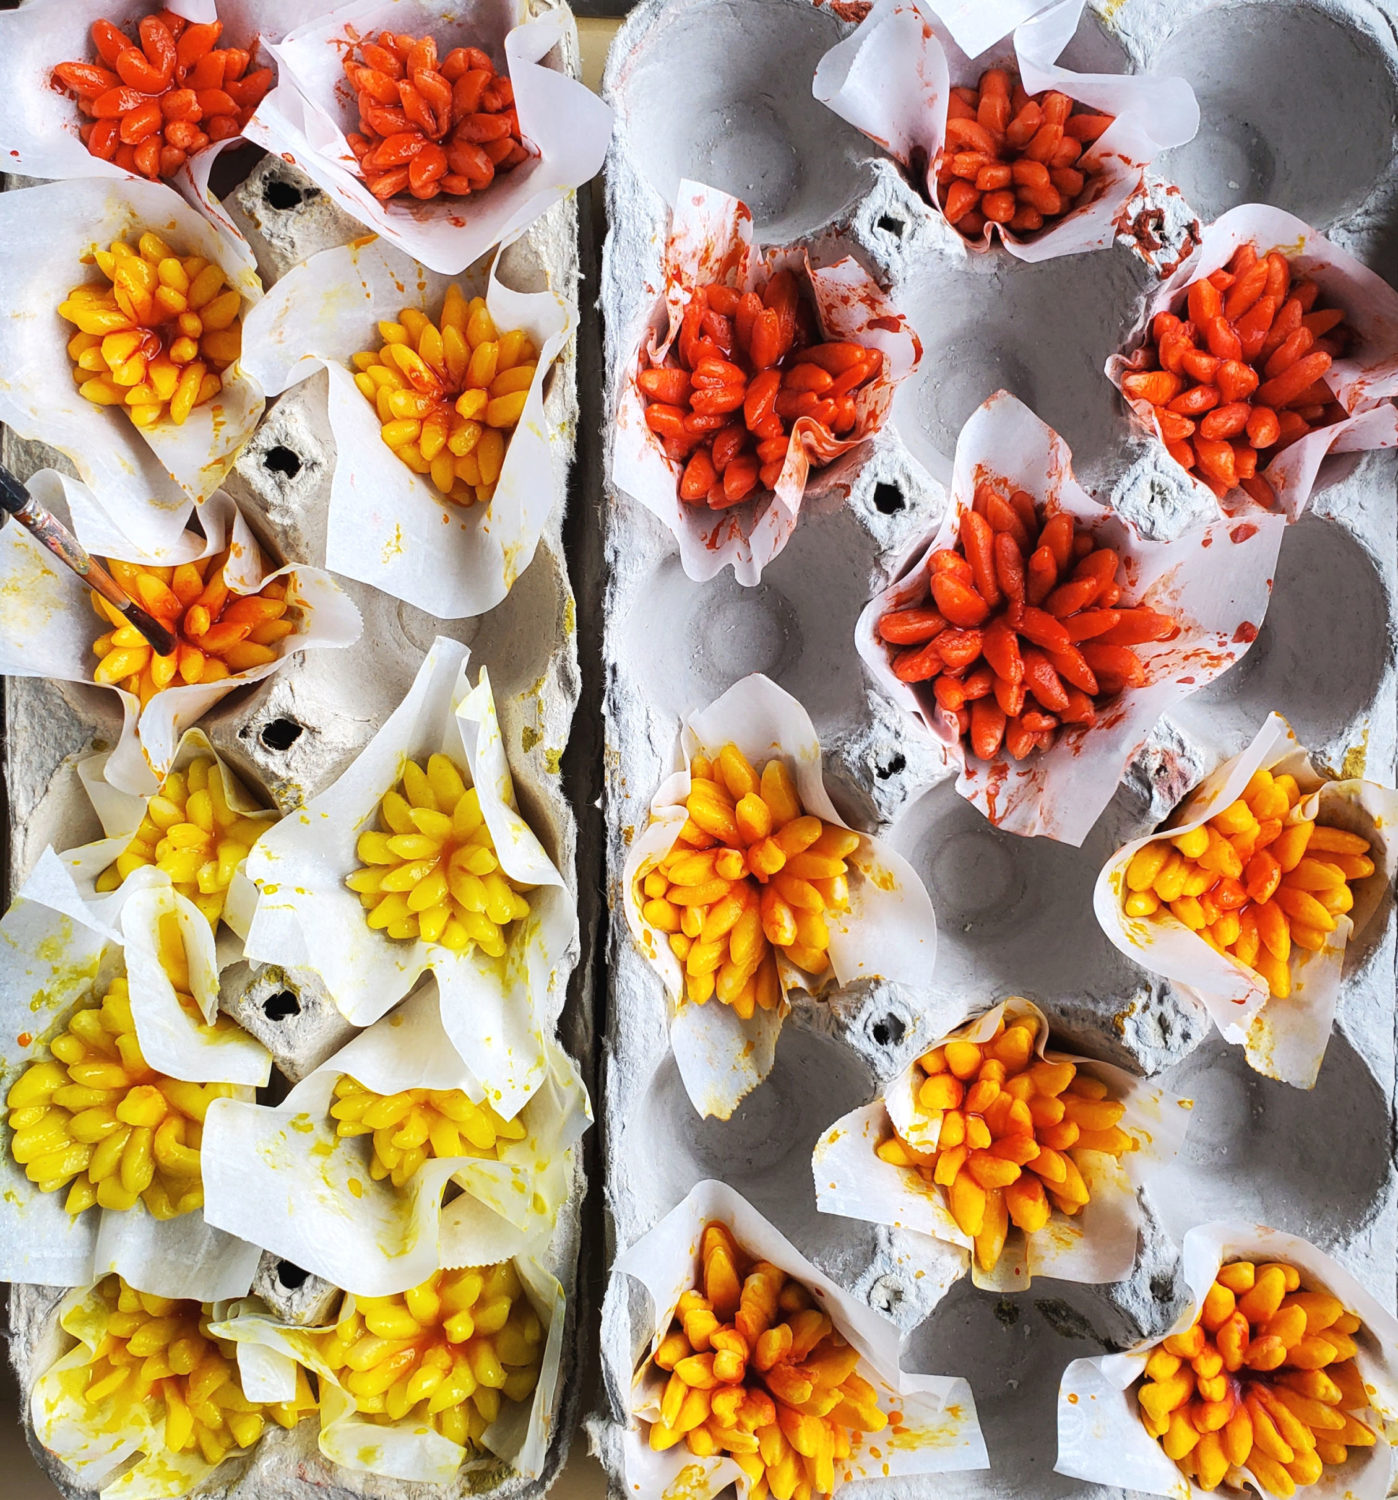
Once you have all of the flowers done place them into the freezer until it’s time to place them onto the pie.
Use the same cookie cutter for a flower on the forehead (see skull further down). Just remember to pre-paint and freeze all decorations before adding to the skull.
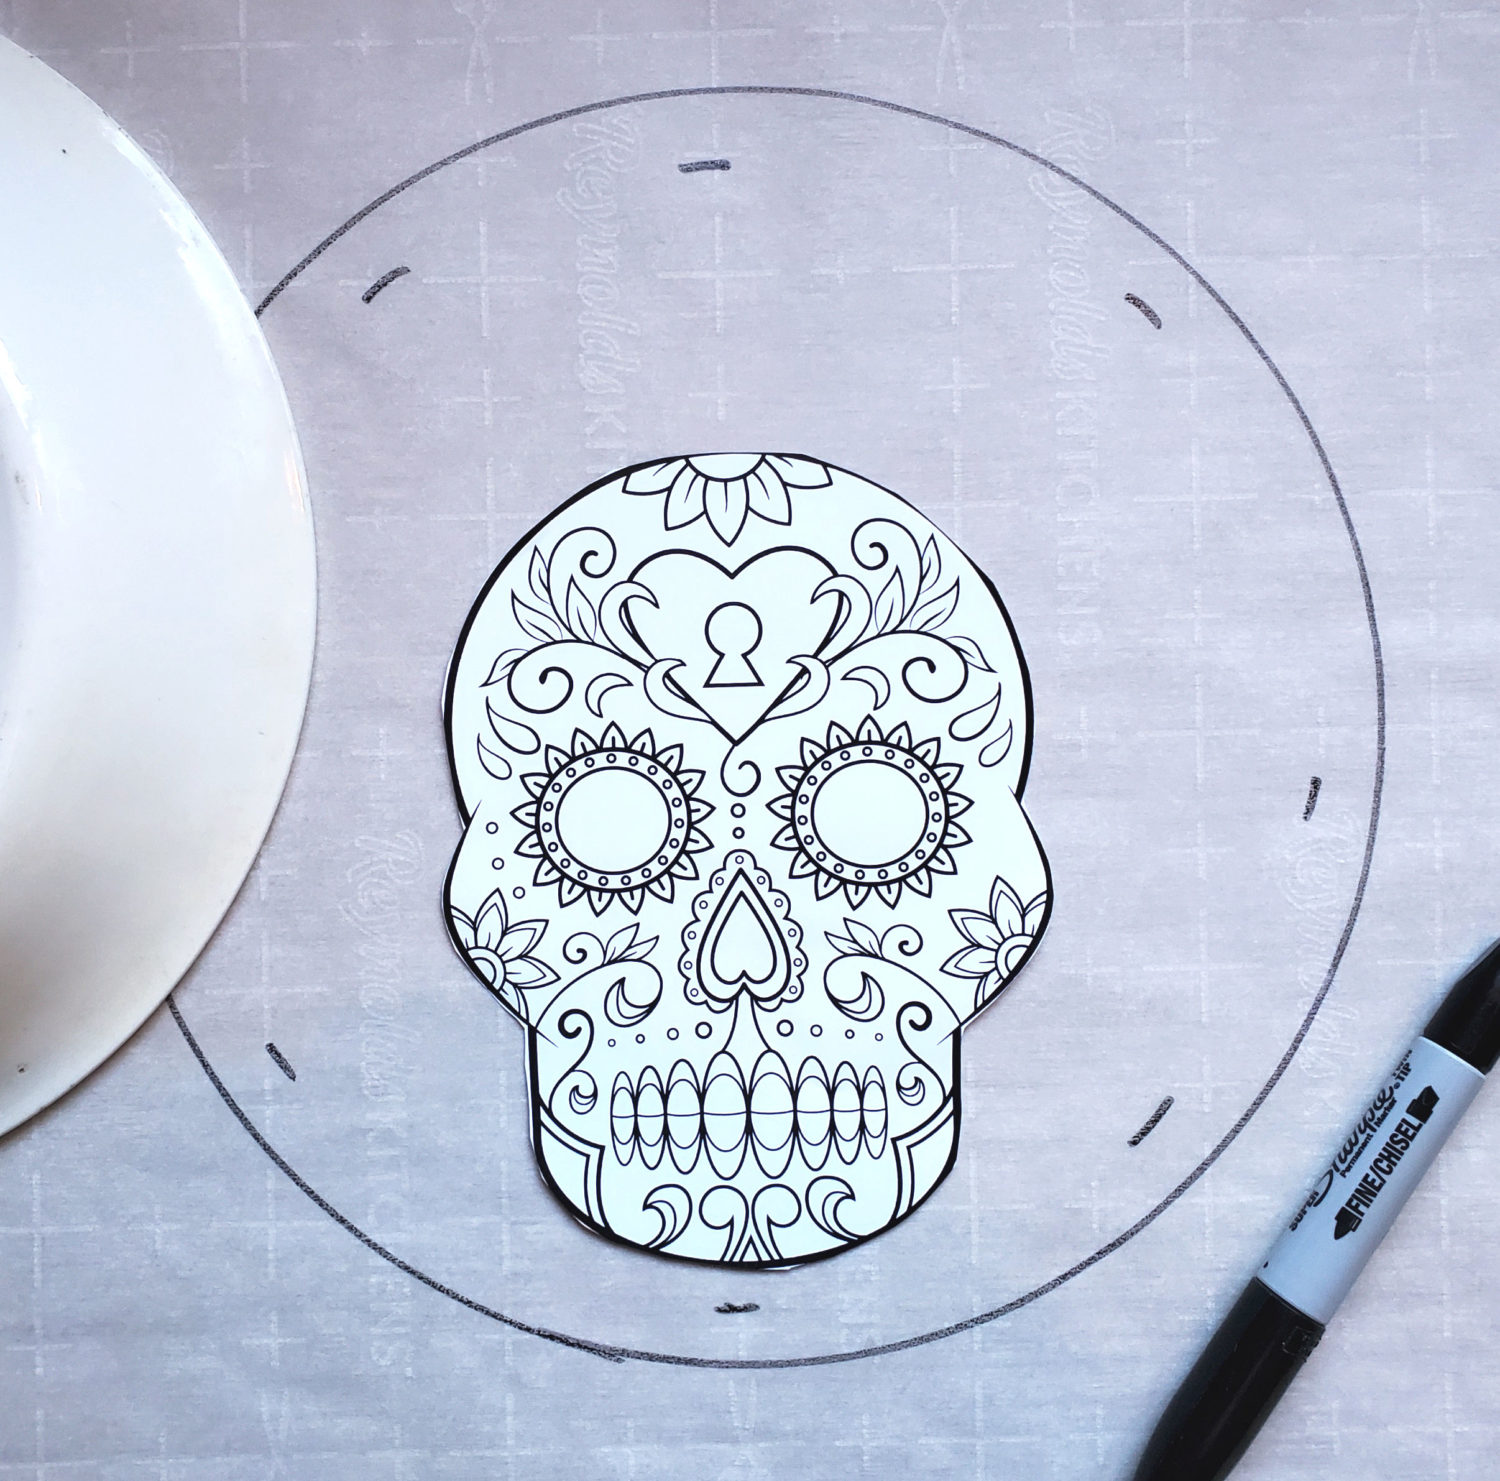
Most importantly before starting, make sure the skull is not too big for marigold headdress. Trace the pie plate onto parchment first & place your printed skull on the parchment for sizing. I used a 10-inch pie plate; the dashes are the crust edge allowances.
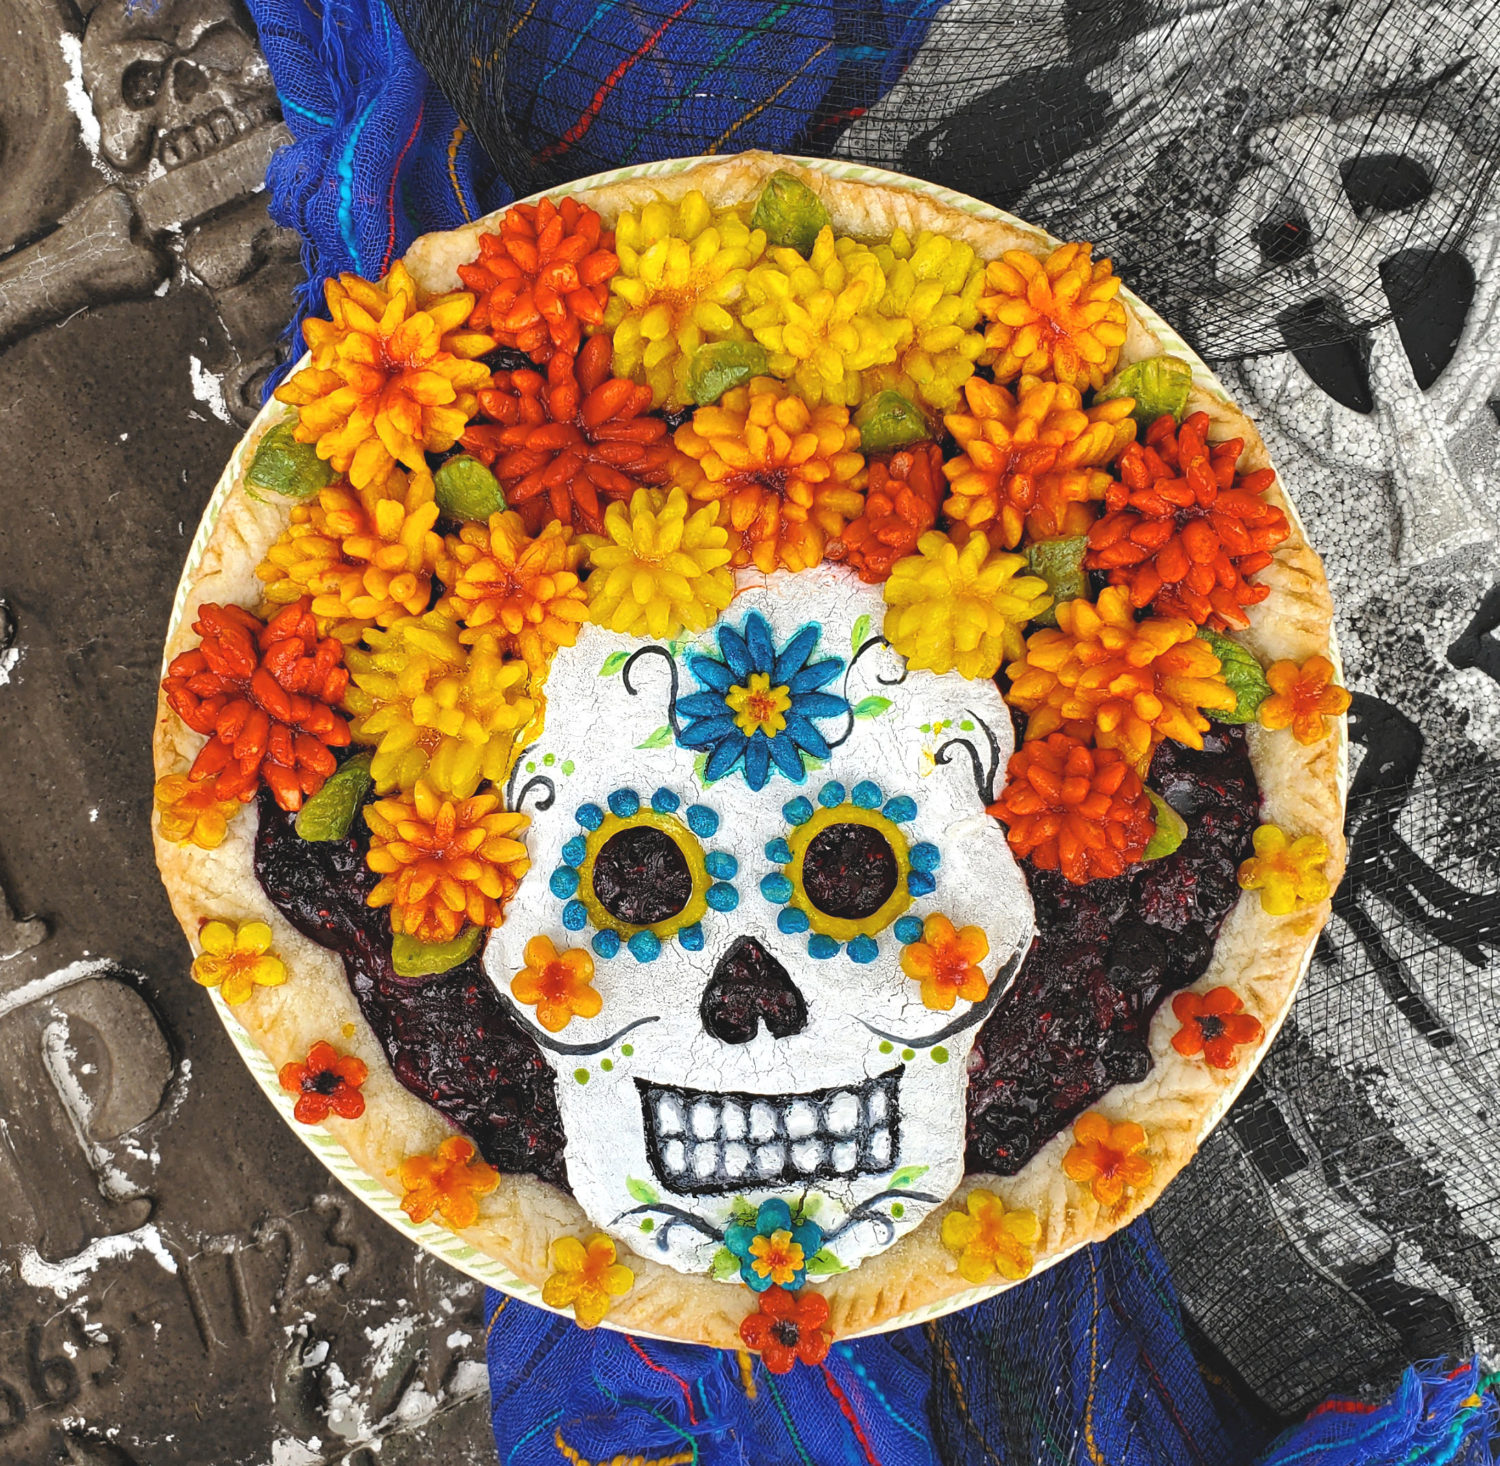
Use the same skull cut out to cut your pie dough skull. Cut out the eyes, nose, and make imprints for teeth. The white is actually food coloring. YES! They now make white food coloring. It’s so terribly fun to paint with on food.
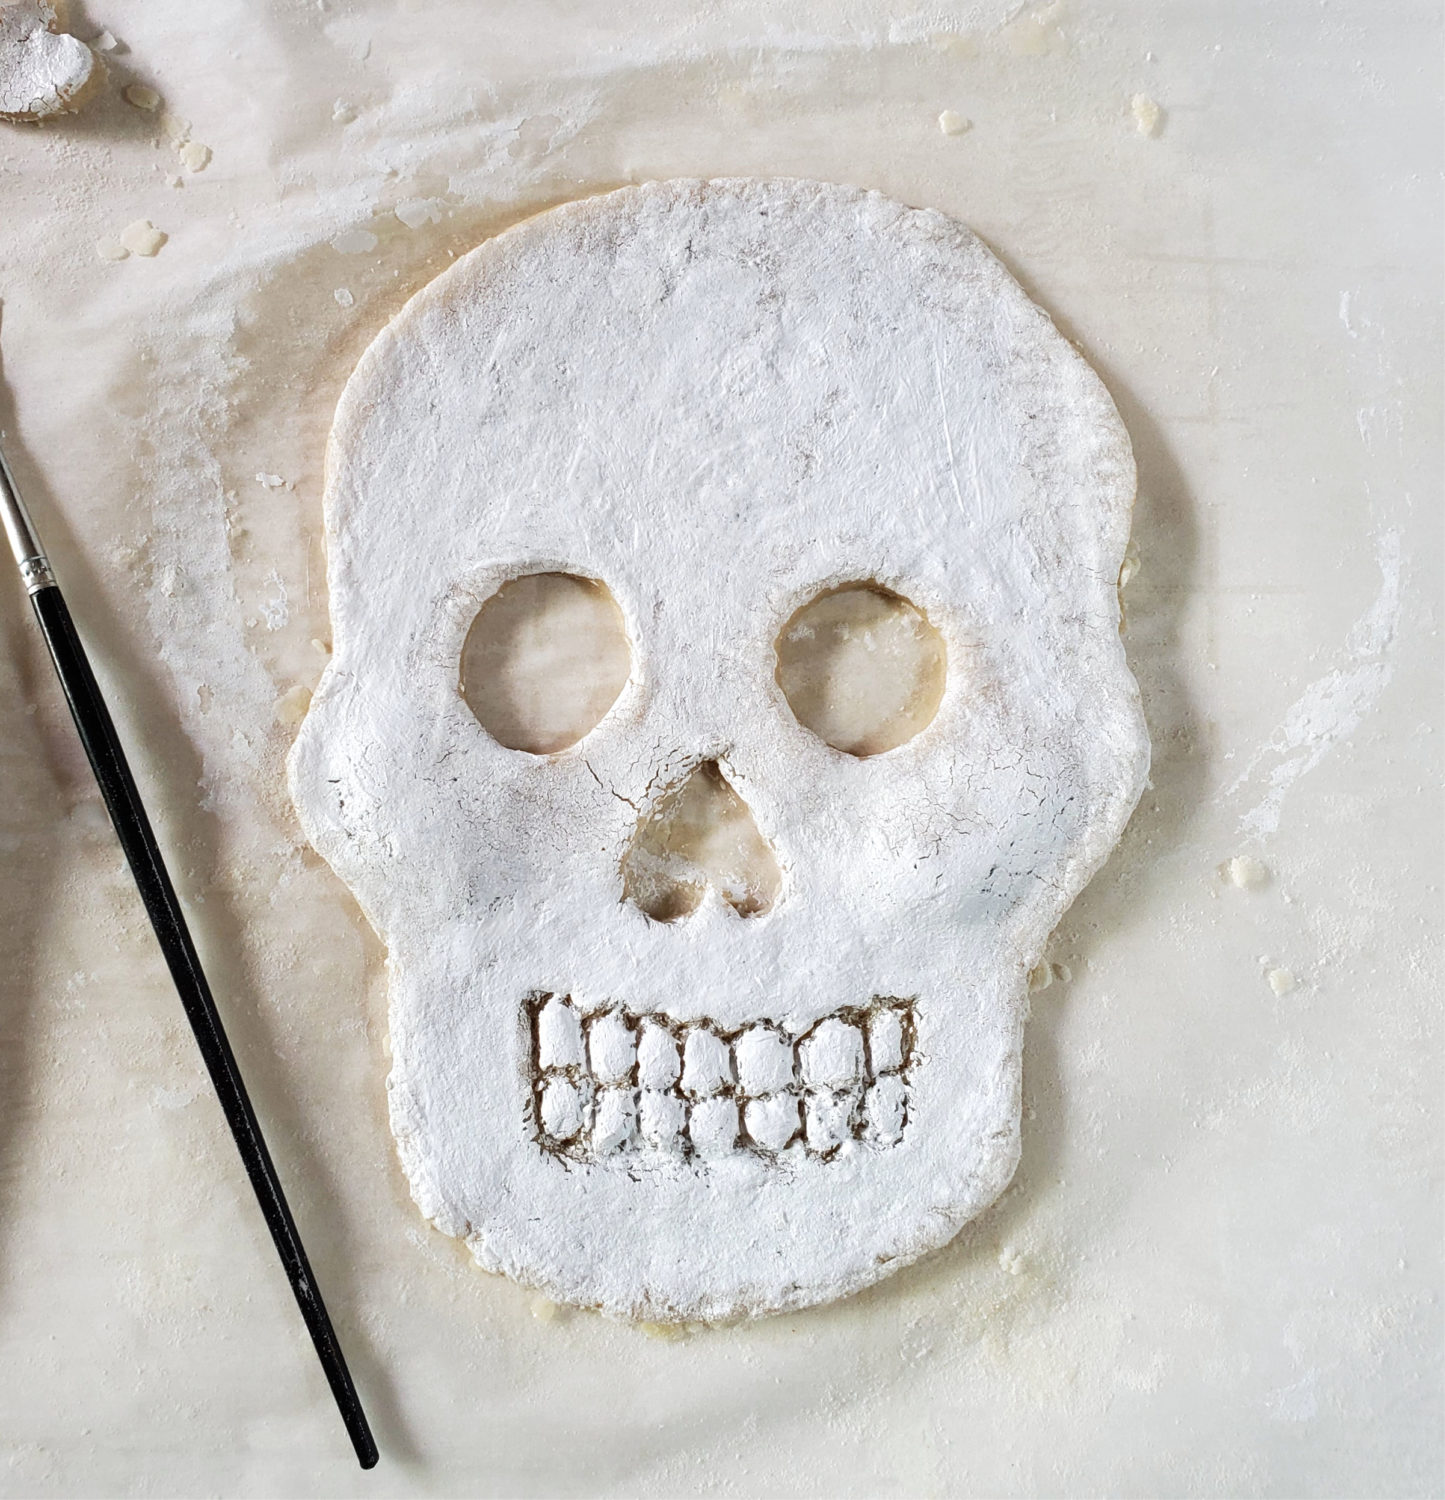
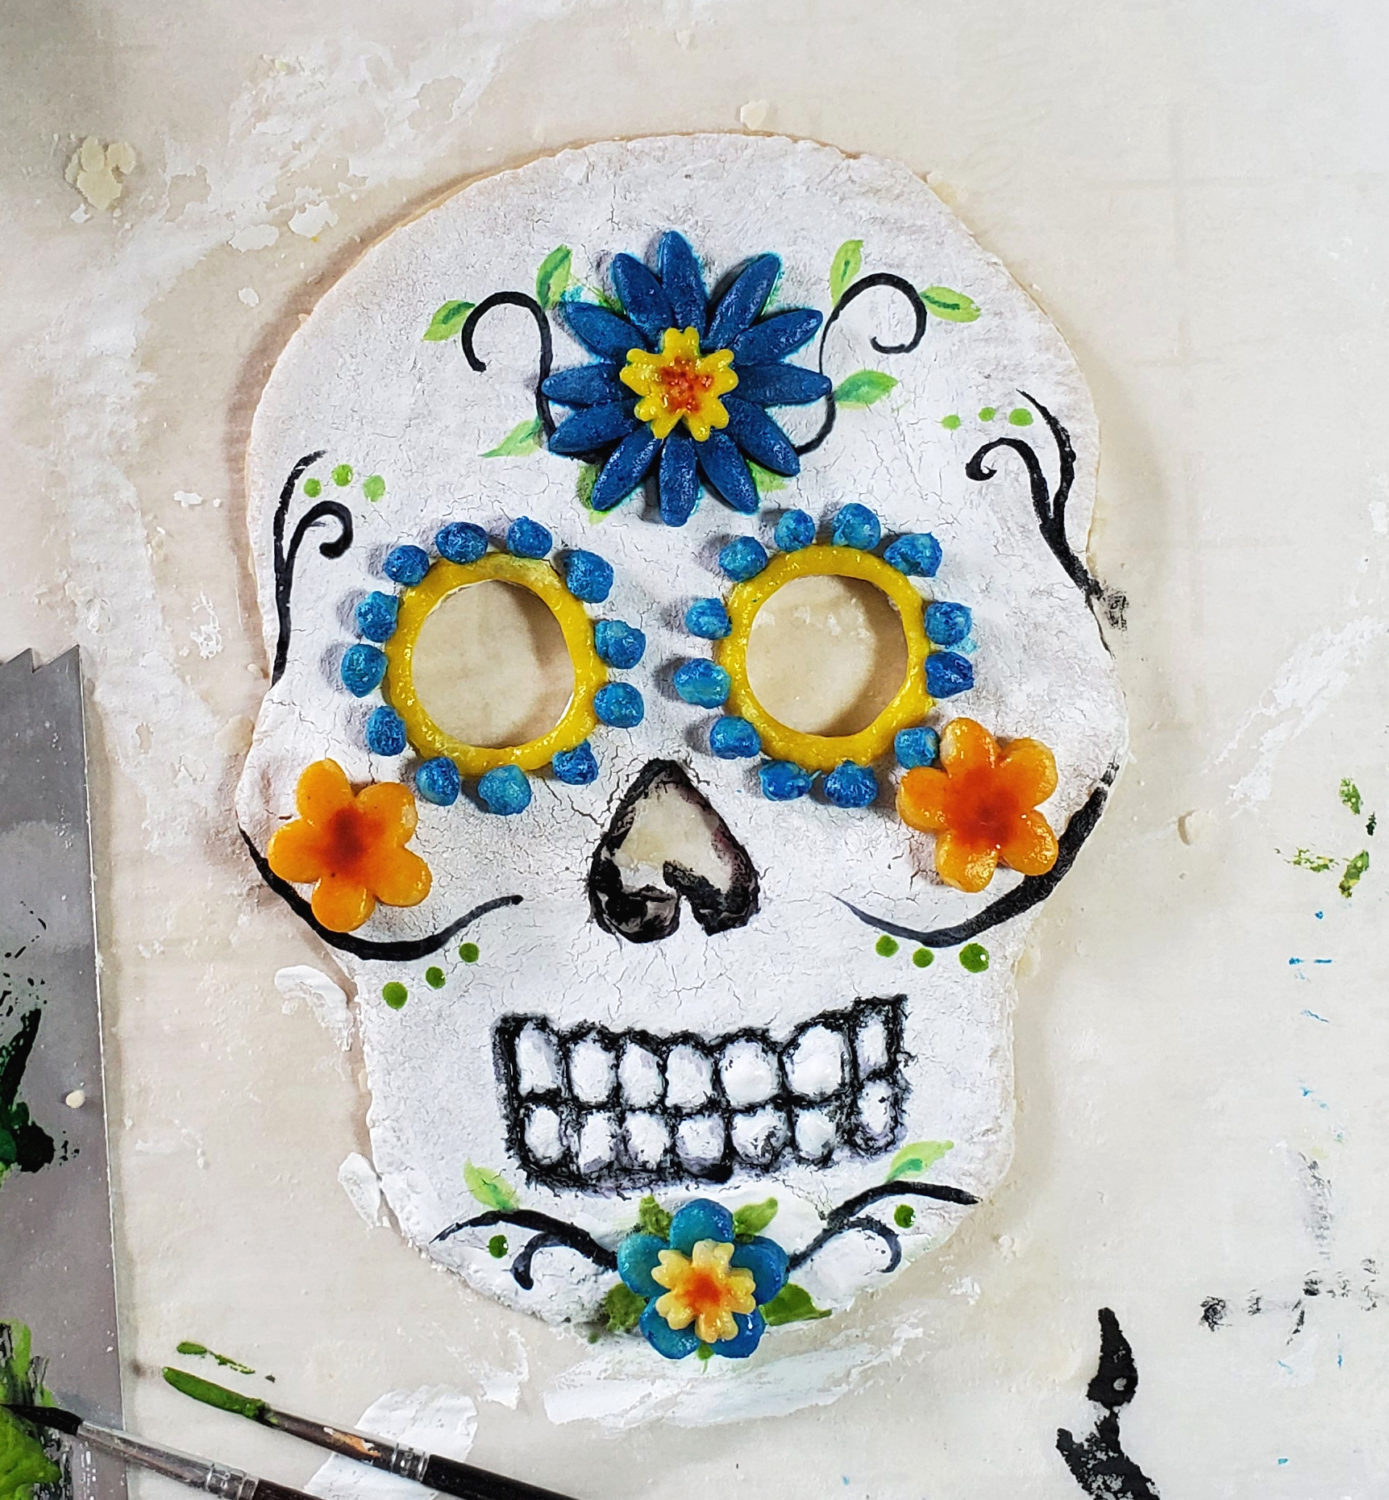
If you look closely I placed a pie of pie dough under each cheekbone; hence giving the skull a little more depth. Below, using more gel food coloring, paint your designs. If you look at the next picture I painted the leaves too small on the forehead for the blue flower I made. Drats. However, she still turned out gorgeous & delicious.

Catrina Calavera is coming to life.
Once she’s all done baking you can “fix” or paint more to your liking.
I also went with a more whimsical skull face as my last two Halloween pies were pretty darn creepy. Macabre Sweeny Todd Meat Pot Pies & Zombie Berry Pie.
Once I added the marigolds it seemed unfinished so I quickly cut out some leaves, painted them, and popped them into the crevices. I also decided the crust was too plain and cut out small flowers using the same marigold colors.
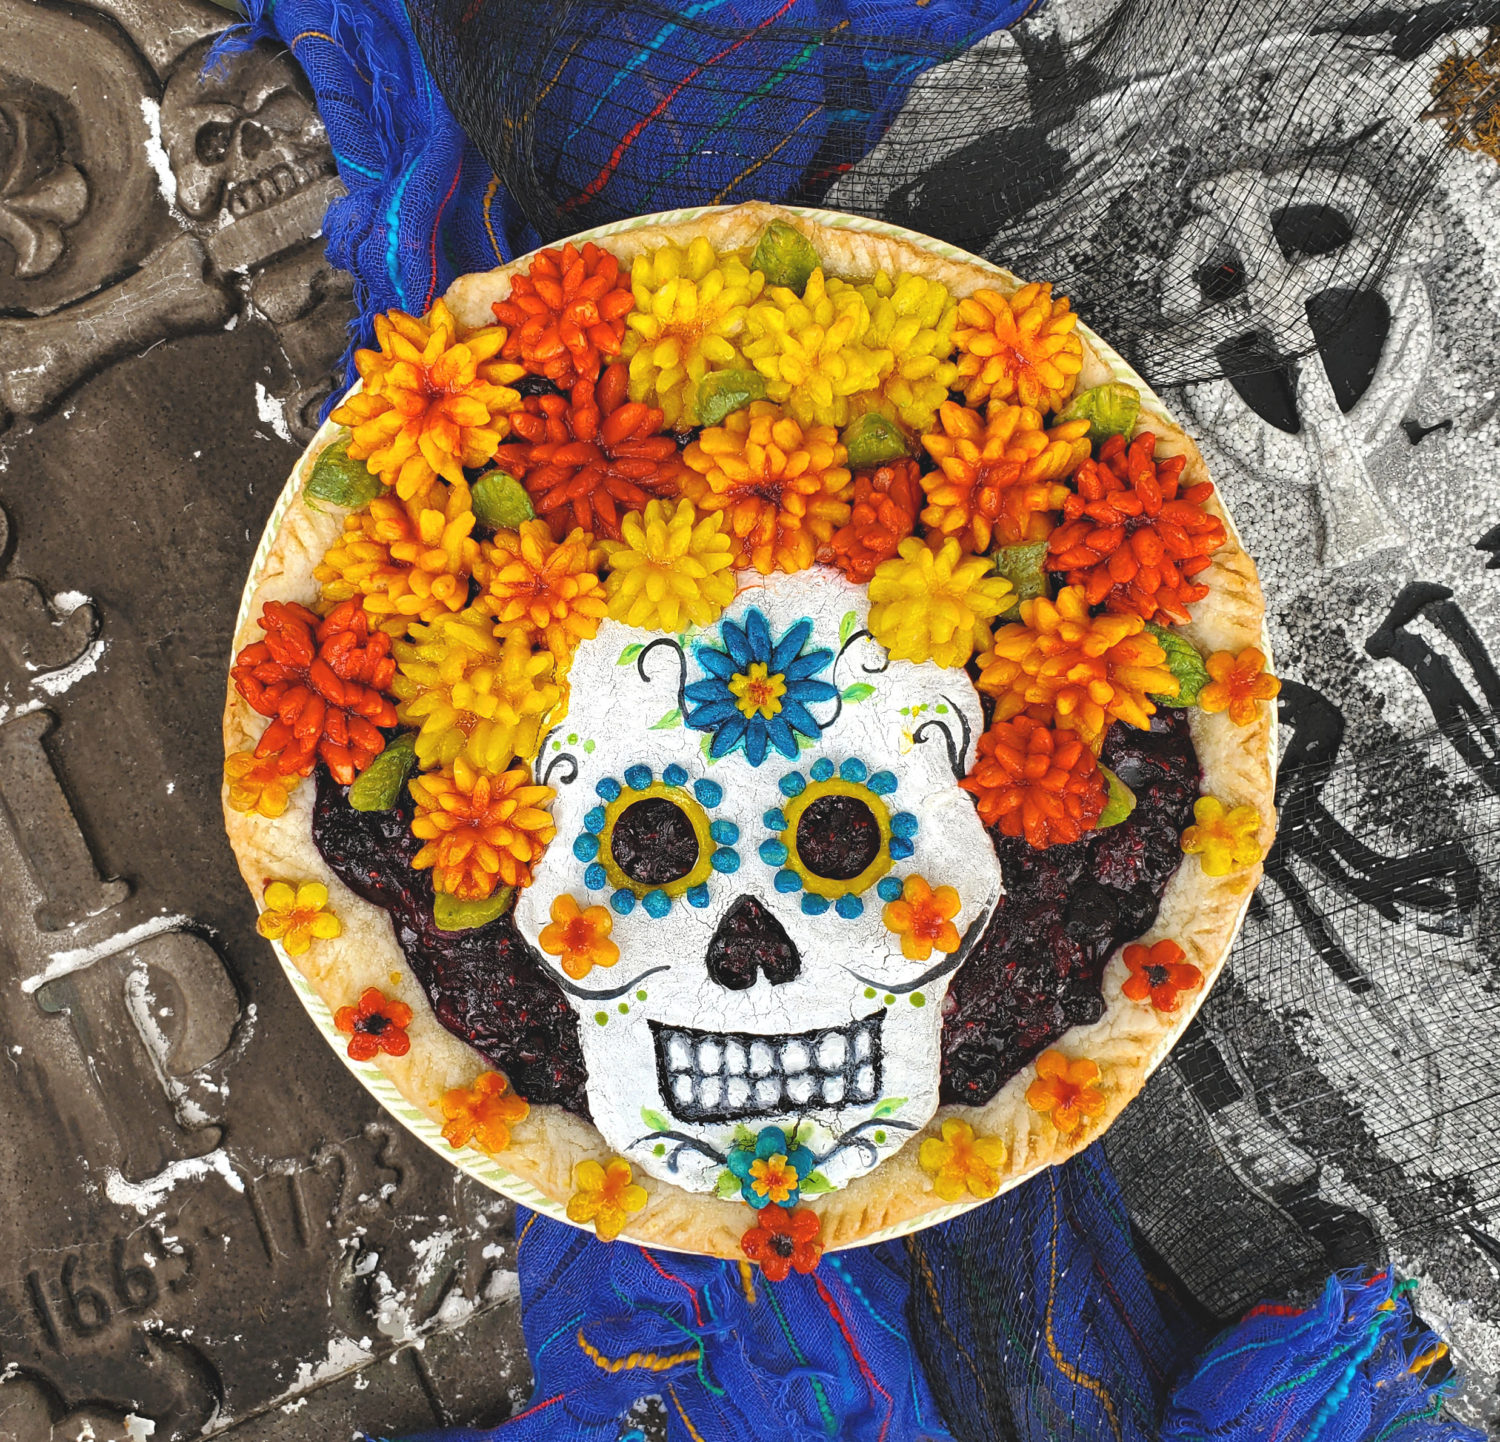
Here is the prebaked pie with the marigold headdress.
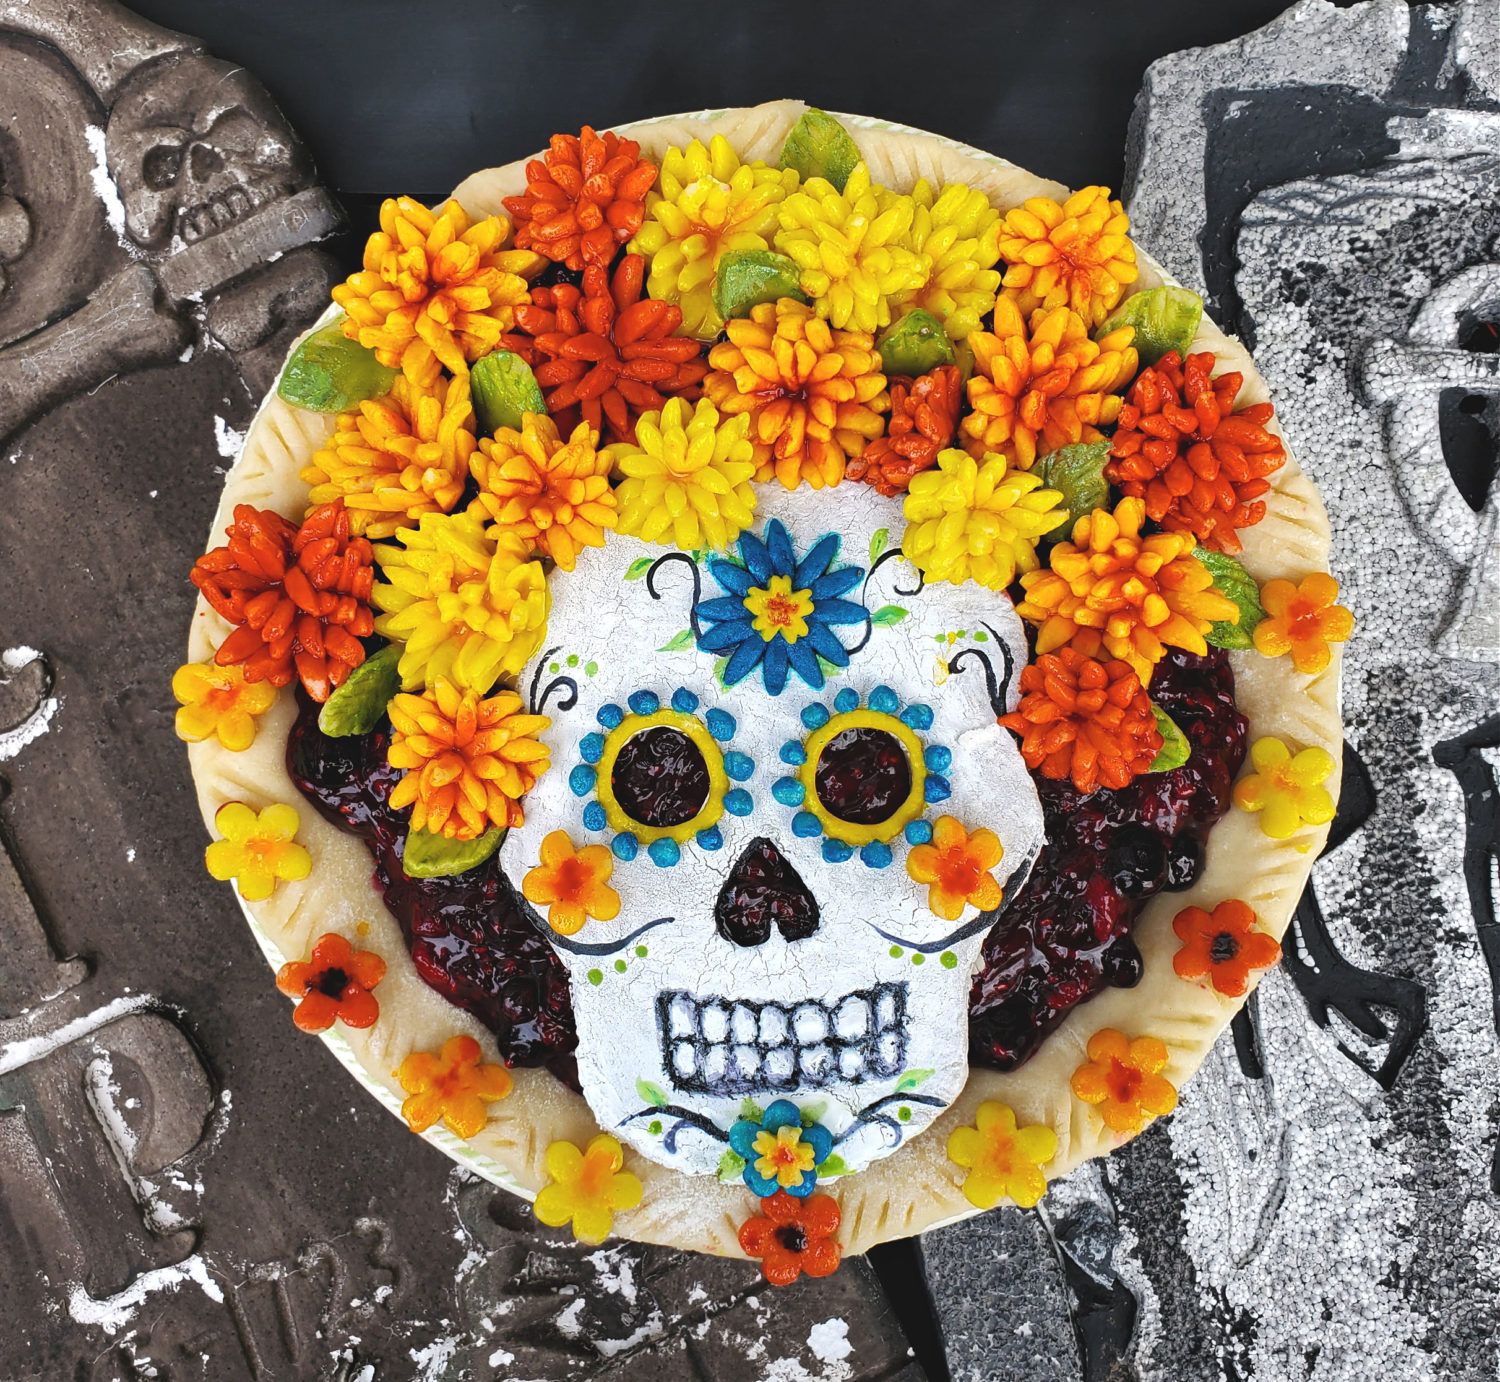
Surprisingly, after 45 minutes of baking, Miss Calavera Catrina looked nearly the same; ah-mazing! She’s ready for Dia de Muertos celebrations!
Off to honor my dead!
Dia de Muertos – Day of the Dead Triple Berry Pie
Equipment
- Gel food colorings
- 3 sizes of flower cookie cutters (for large & small marigolds)
- Small 5 petal cookie cutter for cheeks/chin of skull
- Fine tip food safe paint brushes
- 3 eggs plus 1/4 cup water (for food coloring washes/paint)
- Empty egg cartons for pie crust marigolds
- Parchment paper (full sheets and about 20 pieces cut into 2-1/2-inch squares for marigolds)
Ingredients
Triple Berry Filling
- 5 cups mixed berries (black raspberry, red raspberry, gooseberry, blackberry, blueberries, etc.)
- 1 tablespoon orange juice
- zest of half of a small orange
- 1 cup pure cane granulated sugar
- 1/3 cup clearjel food starch or tapioca starch
- dash of salt
- 1 tablespoon butter
Grandma's Pie Crust – bottom crust, marigold flowers & extra cutouts
- 3 cups all purpose flour
- 1-1/2 teaspoon salt
- 1/4 cup pure cane sugar
- 1/8 teaspoon baking powder
- 1-1/2 cups vegetable shortening
- 3/4 cup cold water
Instructions
Berry Filling
- In a large bowl, mix dry ingredients together, sugar, starch. Toss the berries into the dry ingredients, being careful not to break them up too much. Add the orange zest and juice. **(If using frozen berries, see directions below.)
- Place the berry filling in a large pan on the stovetop over medium heat and bring to a simmer. Remove from heat. Add the butter and stir gently until melted. Set aside and let cool in fridge while preparing bottom crust, sugar skull, and flowers. The berry filling can sit overnight in the fridge.
Pie Crust
- Stir in all dry ingredients and cut in the vegetable shortening with a large fork or pastry cutter until crumbly.
- Add the cold water all at once and mix just until forms a ball (do not kneed or over mix). Cover with plastic wrap or towel as you are using the dough to make the flowers, skull, etc.
Assembly and Baking
- Preheat oven to 350 F.
- Make the marigolds as per the pictures above. Place in refrigerator for a few minutes before painting. Cut out the skull, cut out eyes and nose, making imprints for teeth.
- Cut leaves, and small flowers for pie crust edge if desired.
- Make the colors for the marigolds by beating 3 eggs with 1/4 cup water. Divide into 3 custard cups. For a pretty color of red, add a couple of drops of red and a very small drop of brown for a red umber (brick red). Place all flowers/leaves in freezer.
- White food coloring and black food coloring does not need to be thinned with water. Let the white dry completely before painting on other colors. However, to get the black to seep into the teeth crevices, mix a couple of drops of black into 1 tablespoon of water, use a fine tip brush to apply.
- Roll out the bottom crust and place in pie plate. Add the prepared pie filling.
- Place on the skull, marigold flowers, leaves and extra flowers around edge.
- Bake for 45 minutes.
Frozen Berry Instructions
- Save & strain the juice that separates from the thawed berries.In a sauce pan add the sugar and starch from recipe above, stir together to help eliminate lumps.
- Pour the strained berry juice, orange zest, and juice. Over medium high heat, whisk while cooking until the juice loses the opaque color and thickens. Add the butter and fold in the thawed berries. Bake as above.