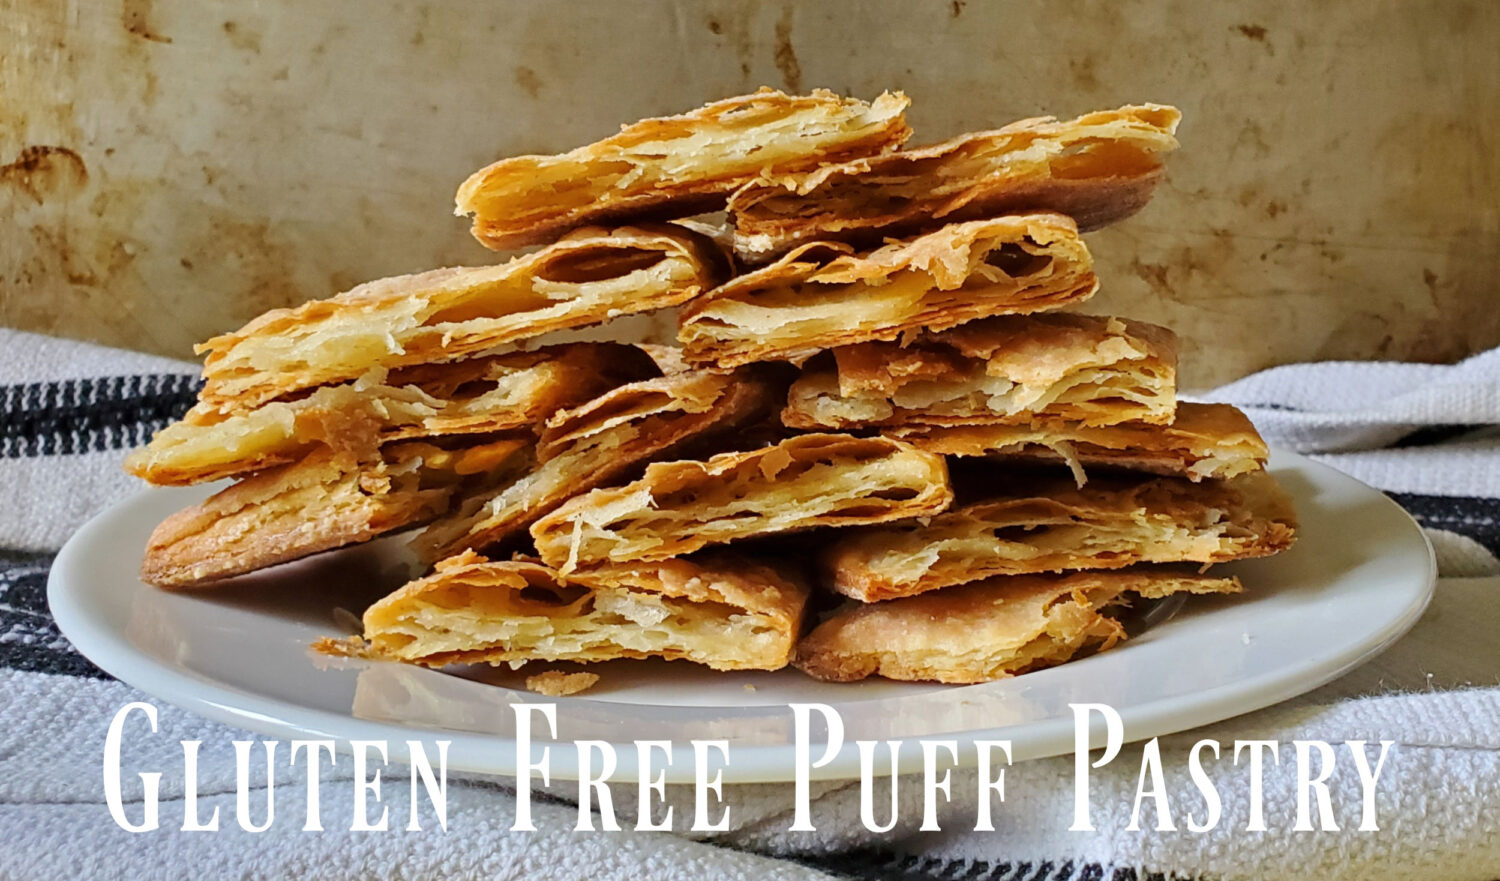
Up until now I have been using store-bought gluten free puff pastry; however, what to do when you’re a small town and NO GLUTEN FREE PUFF PASTRY is available? Yep, you don’t suffer, you figure it the hell out, like other life challenges. If you want it bad enough, you will make it happen. (My kiddos heard that a lot growing up.) No matter, this gluten free puff pastry is life changing.
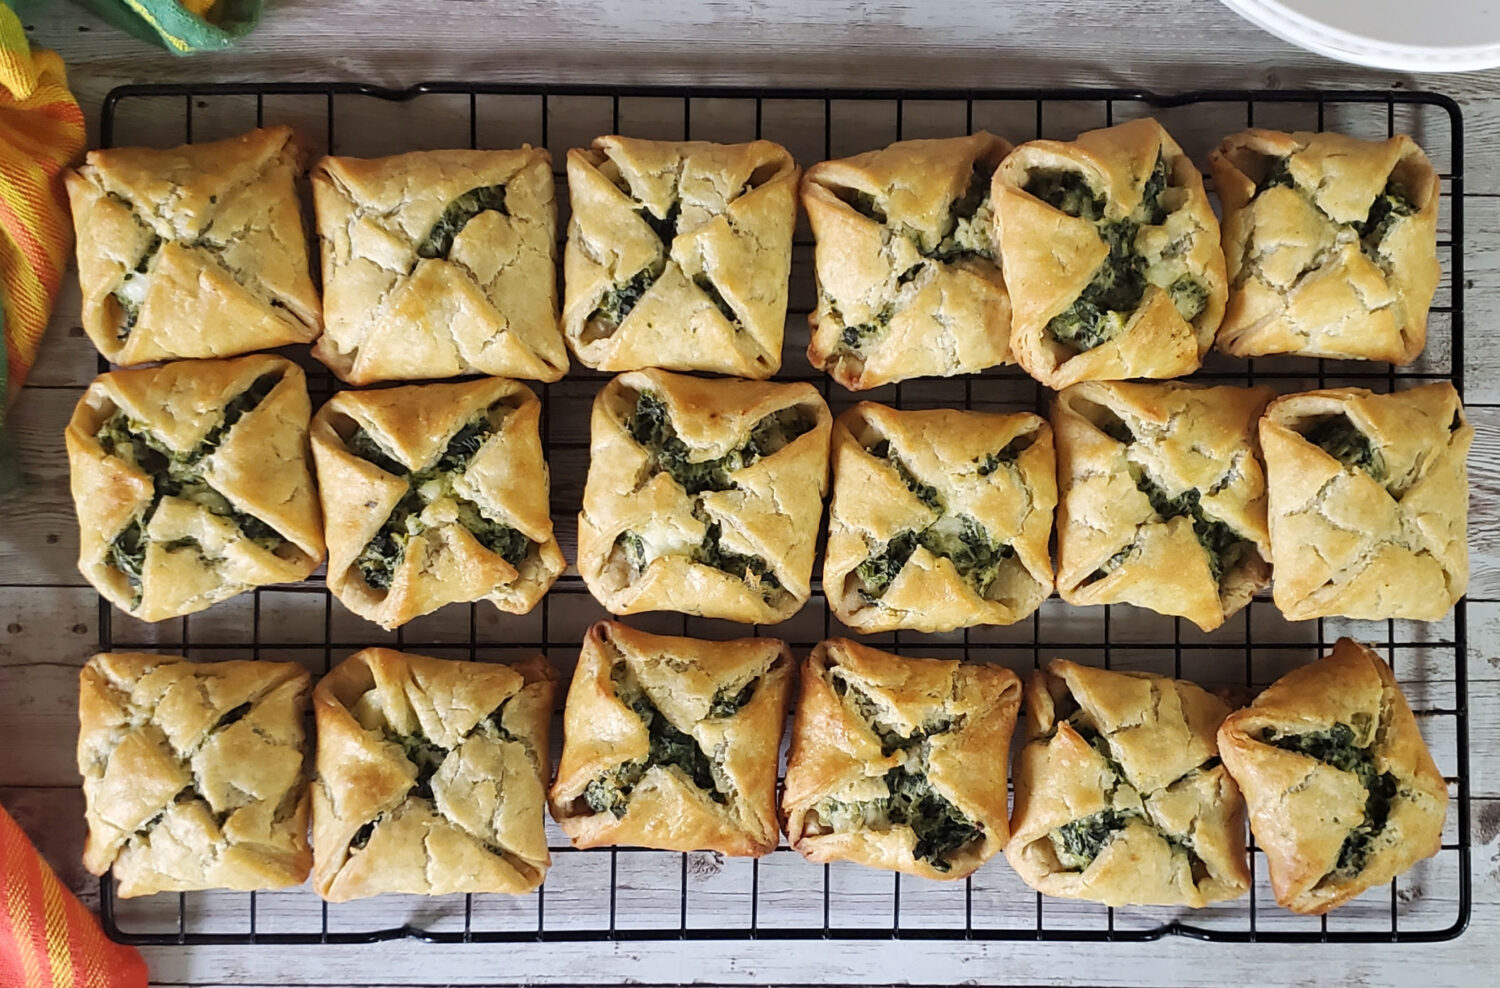
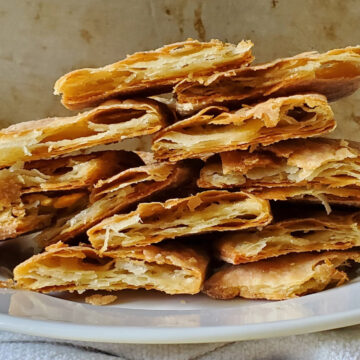
Above are Spanakopita appetizers (recipe blog for filling coming soon).
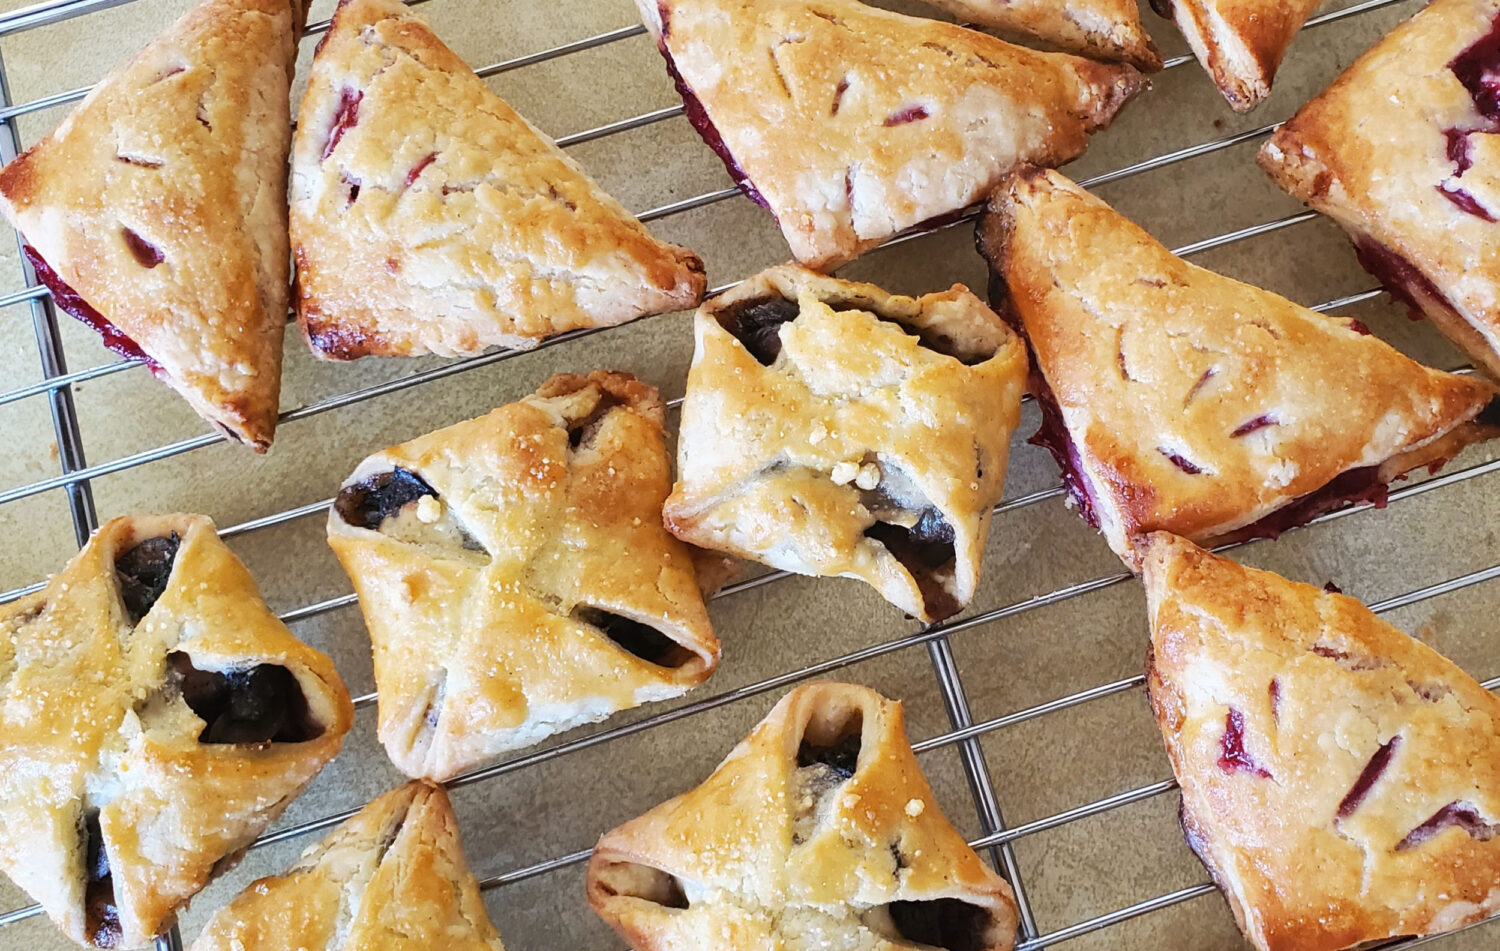
The first batch was mushroom & onion filling, and a few apple-cranberry turnovers, but my favorite to date is spinach-feta cheese (I just ate another one).
Regardless of your filling of choice, this blog is dedicated to creating the puff pastry.
Quality Ingredients Matter
- Choose a high quality name brand butter for less moisture content.
- Use Bob’s Red Mill Gluten-Free Flour 1 to 1 (comes in a blue bag) or use my Gluten-Free Flour Mix, Bob’s is eerily similar to mine, neither of us use some of the heavier flours, and both have xanthan gum, which is vital to giving a bit of stretch to gluten free.
Step 1: Prepare the Ingredients
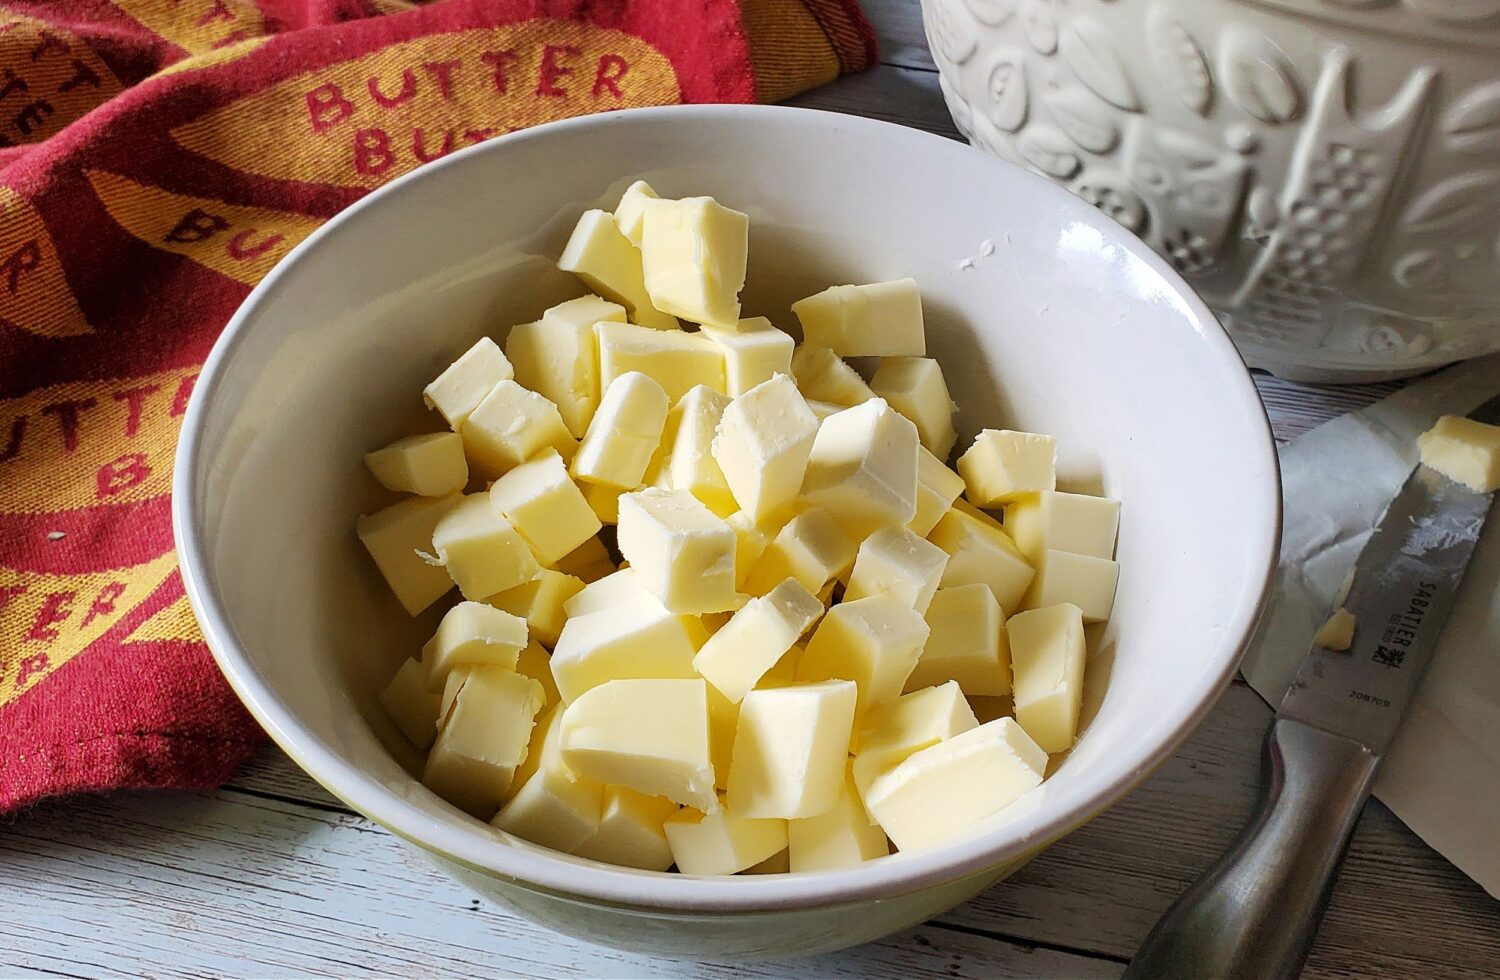
As per the recipe, the butter needs to be COLD. Dice the 3/4 cup of butter, place in fridge.
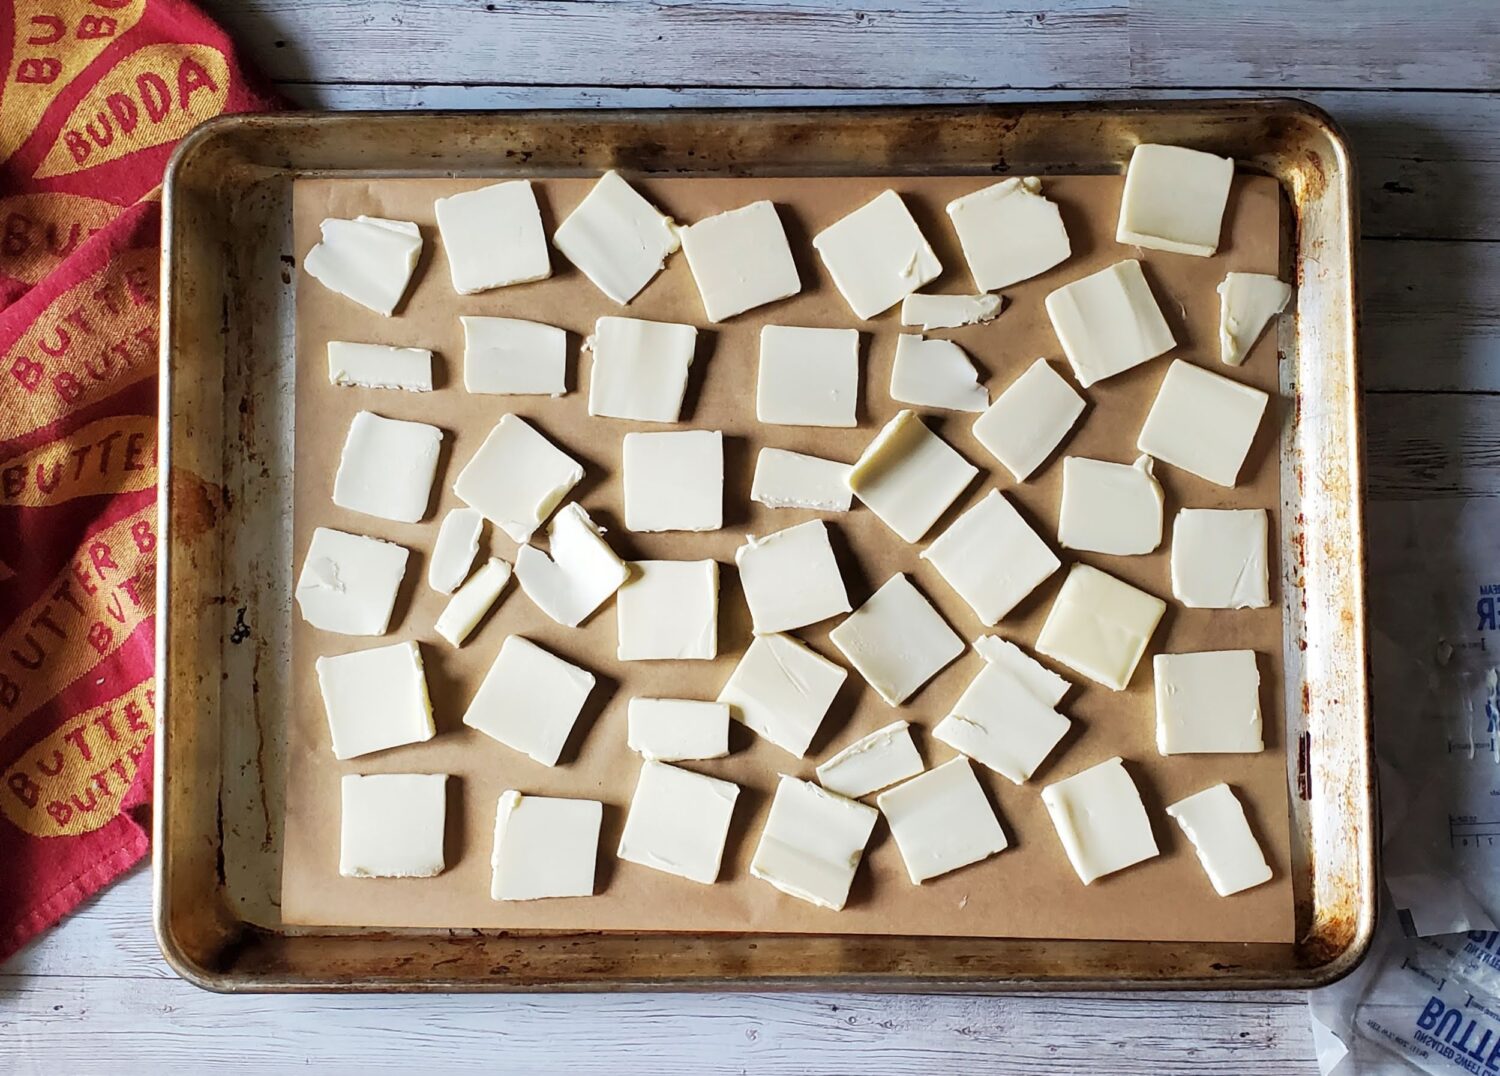
Slice 2 sticks (1 cup) of butter into about 40 slices, place on parchment lined baking sheet and back into the fridge.
Beat the egg and mix with the heavy cream; this is your liquid for dough.
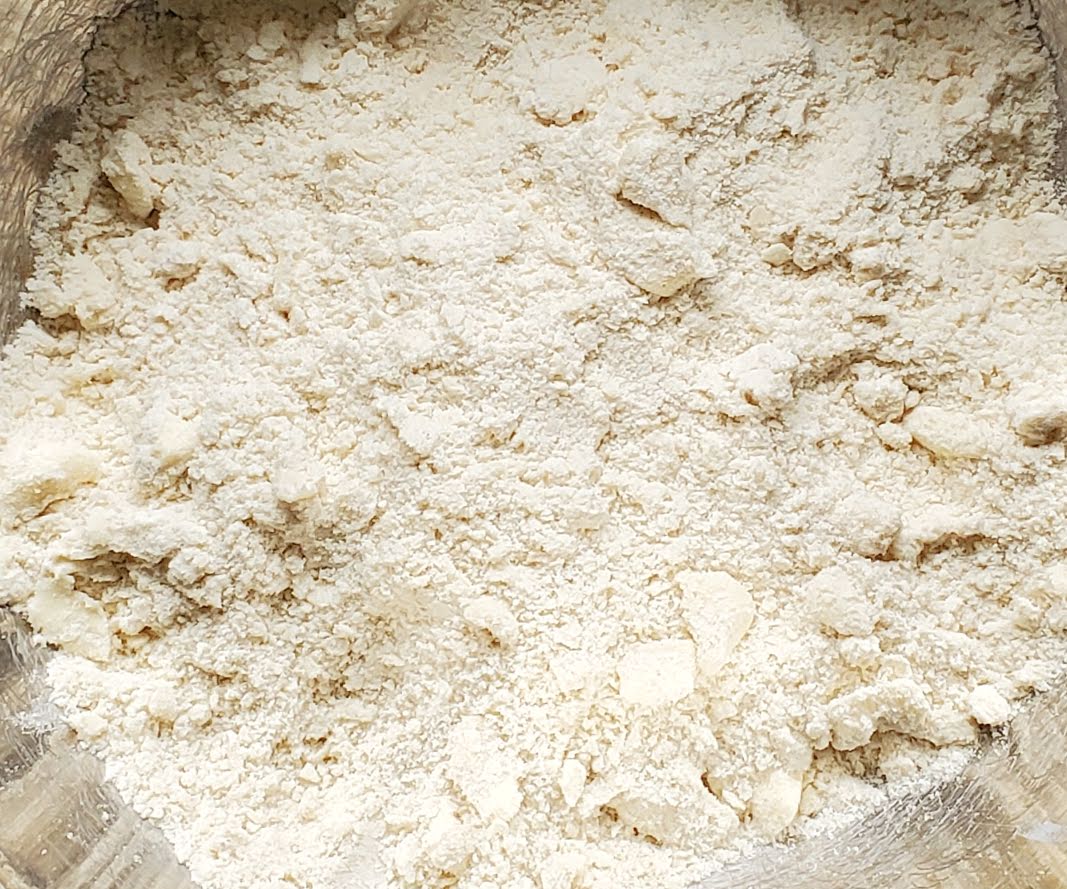
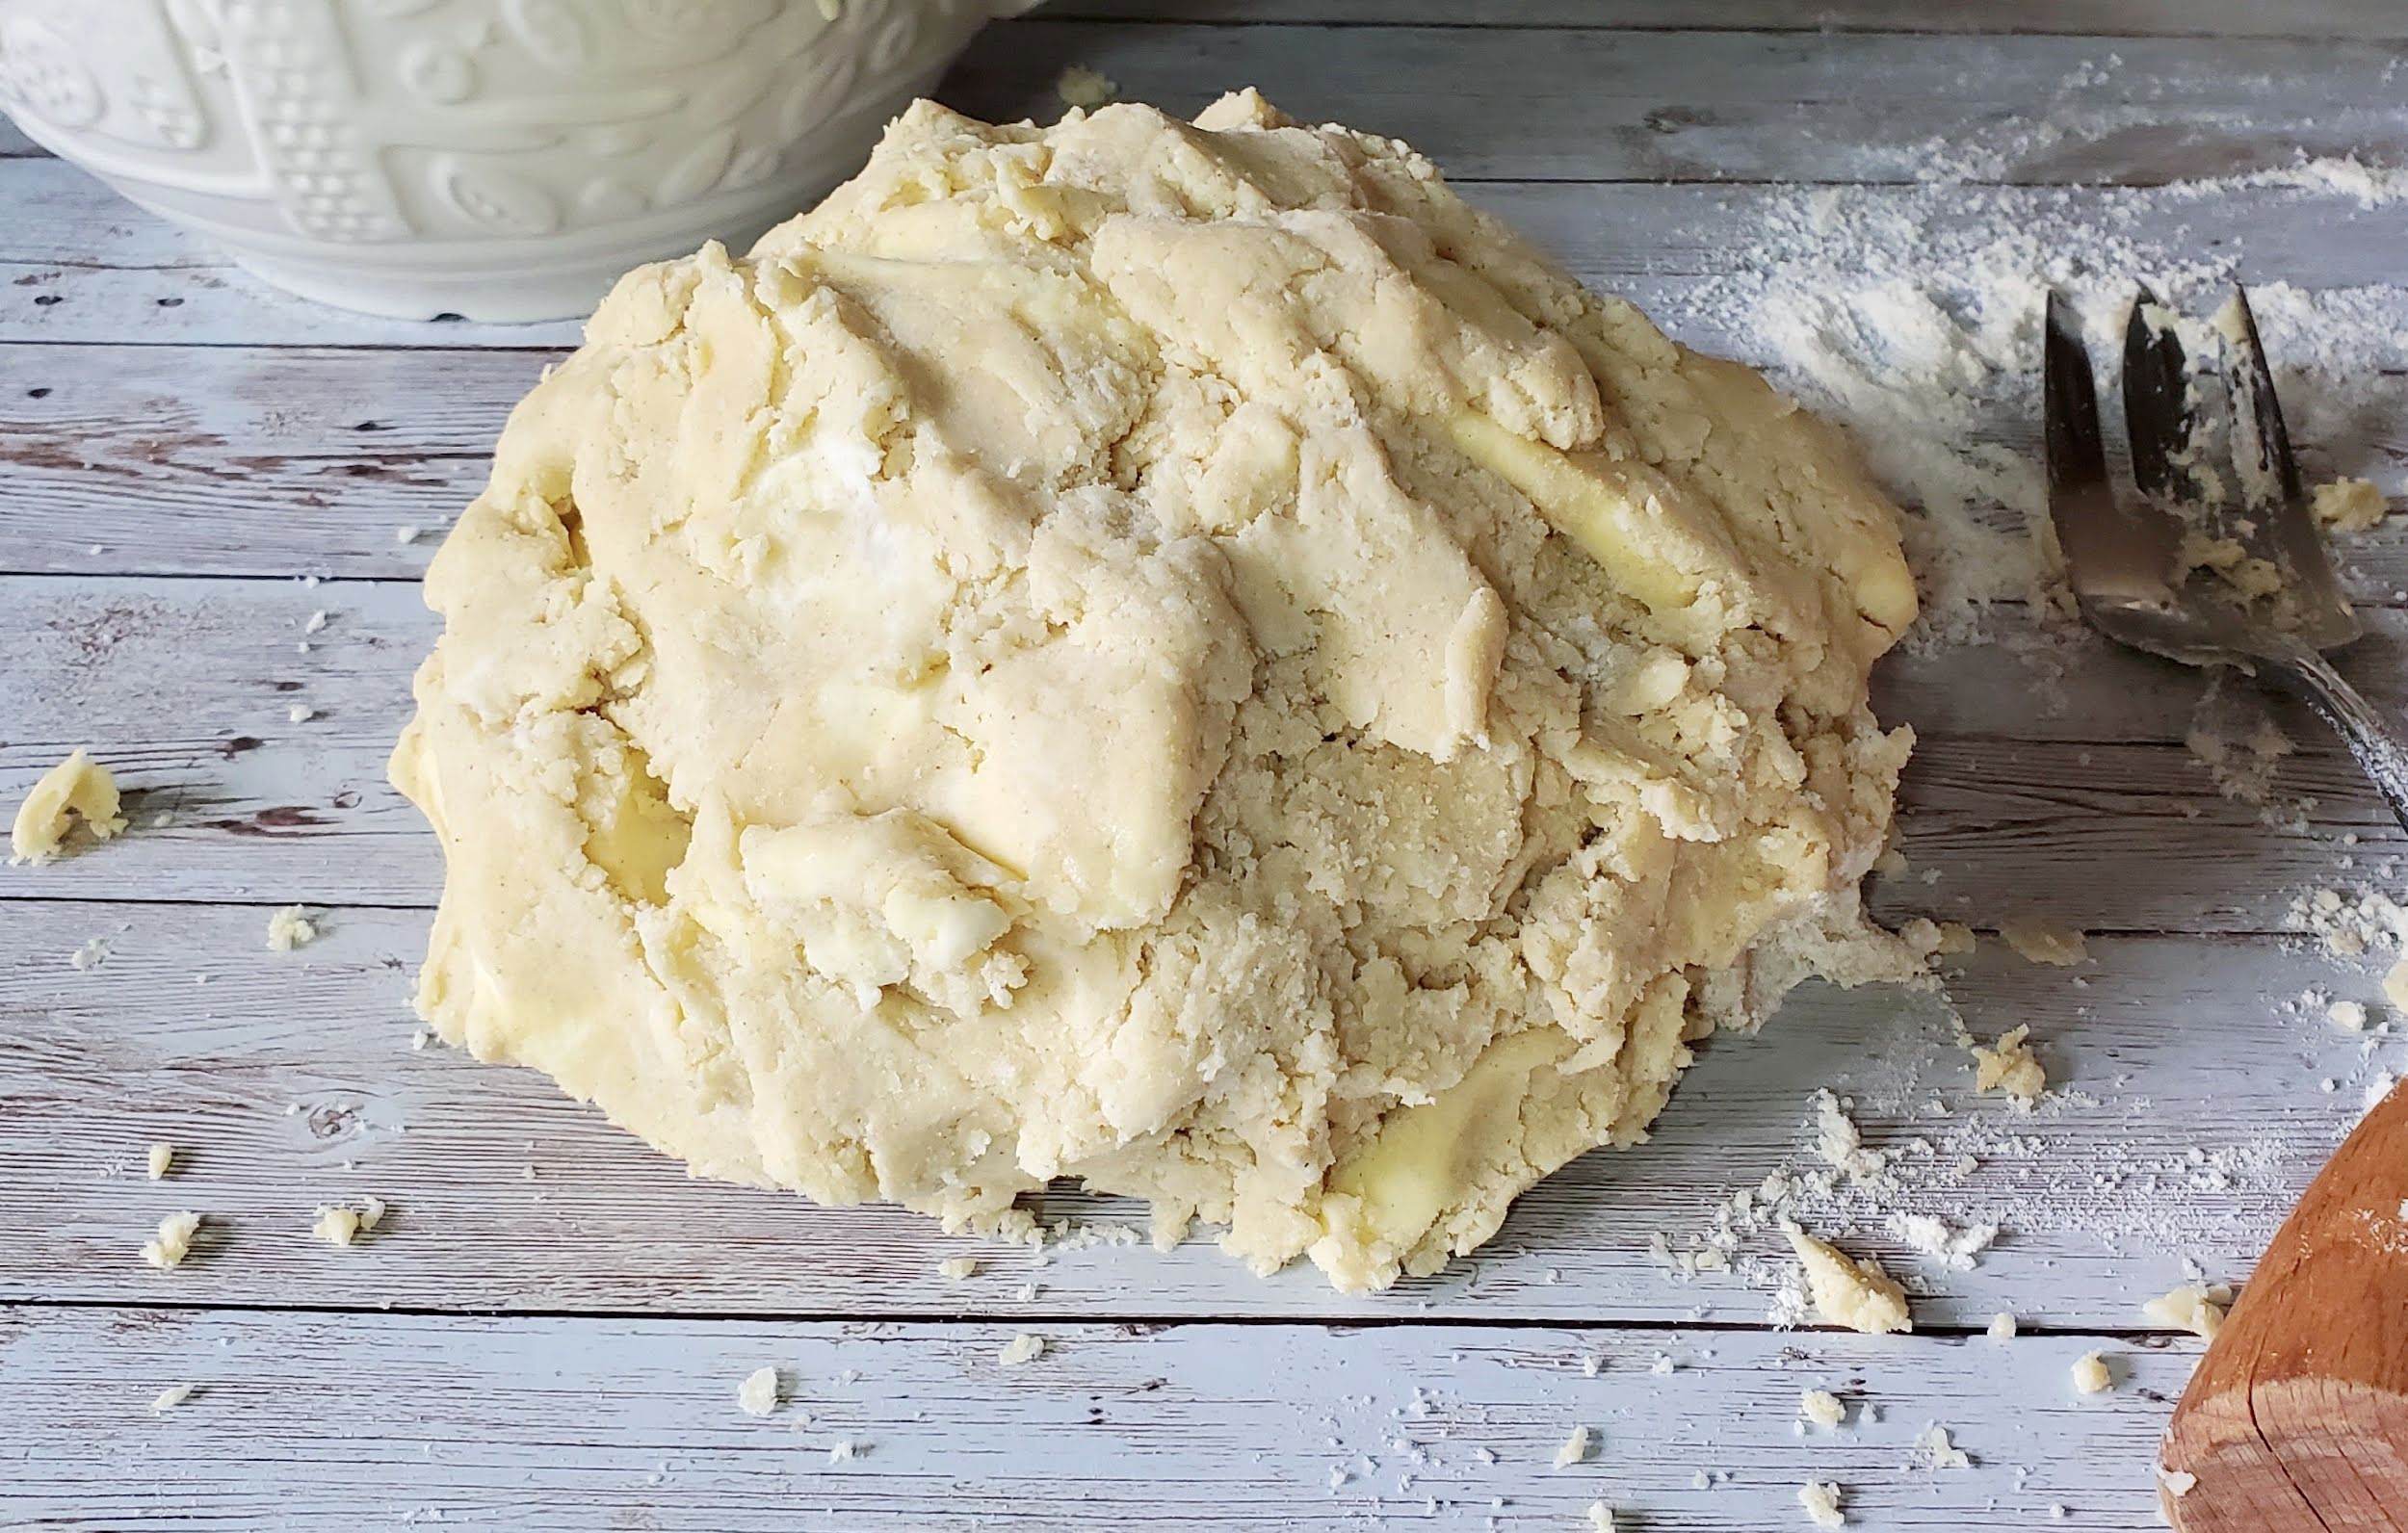
Place all the dry ingredients in a large bowl and cut in the DICED butter until pea size.
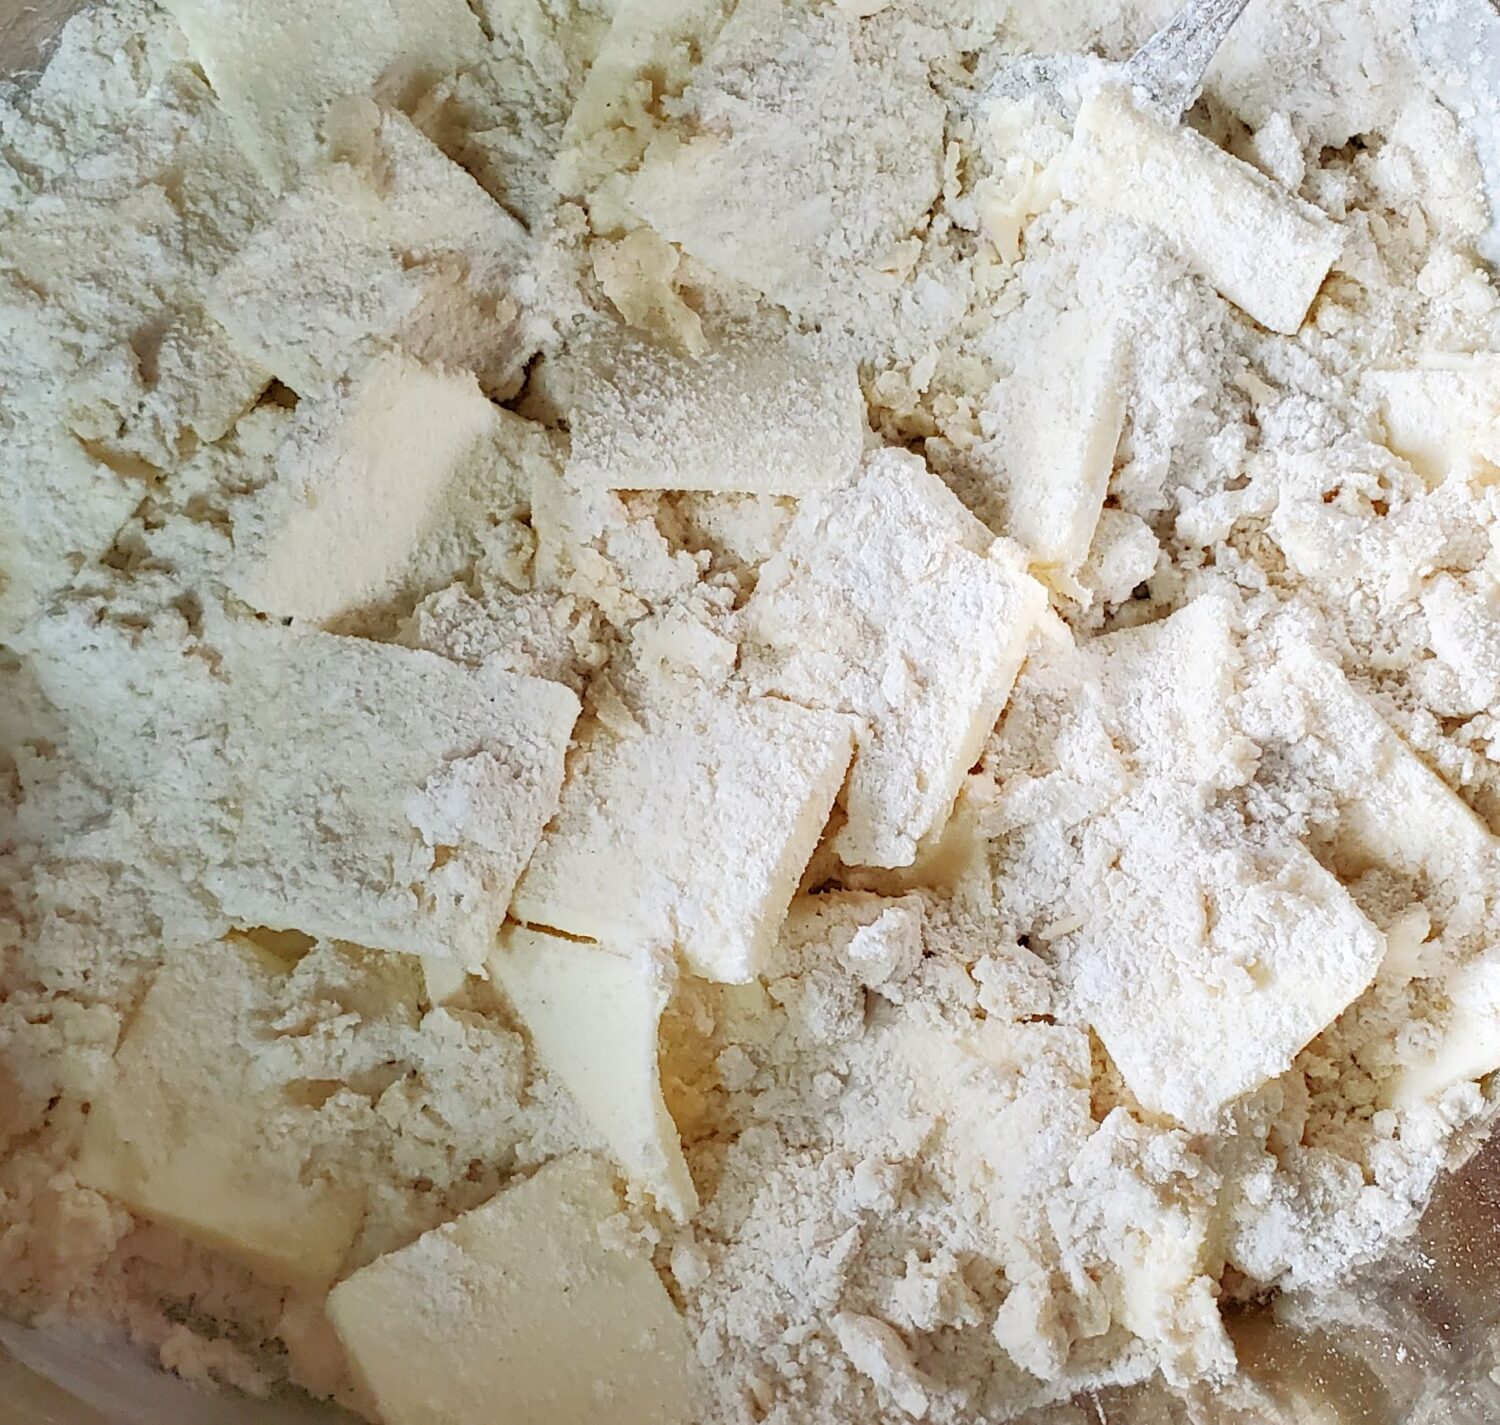
Stir in the slice butter and coat each piece separately with the flour mixture (I had already started to add the liquid before I took pic).
Make a well in the center, pour in the beaten egg and heavy cream and stir until it comes together in a mound.
Laminating the Dough
This is where the fun begins, be prepared for a beautiful mess with a gorgeous result.
Lamination 1: Place the dough mound on a floured surface and roll out into a large rectangle (about 20 x 18), size seriously does not matter. The edges are going to be very rough with the first roll out.
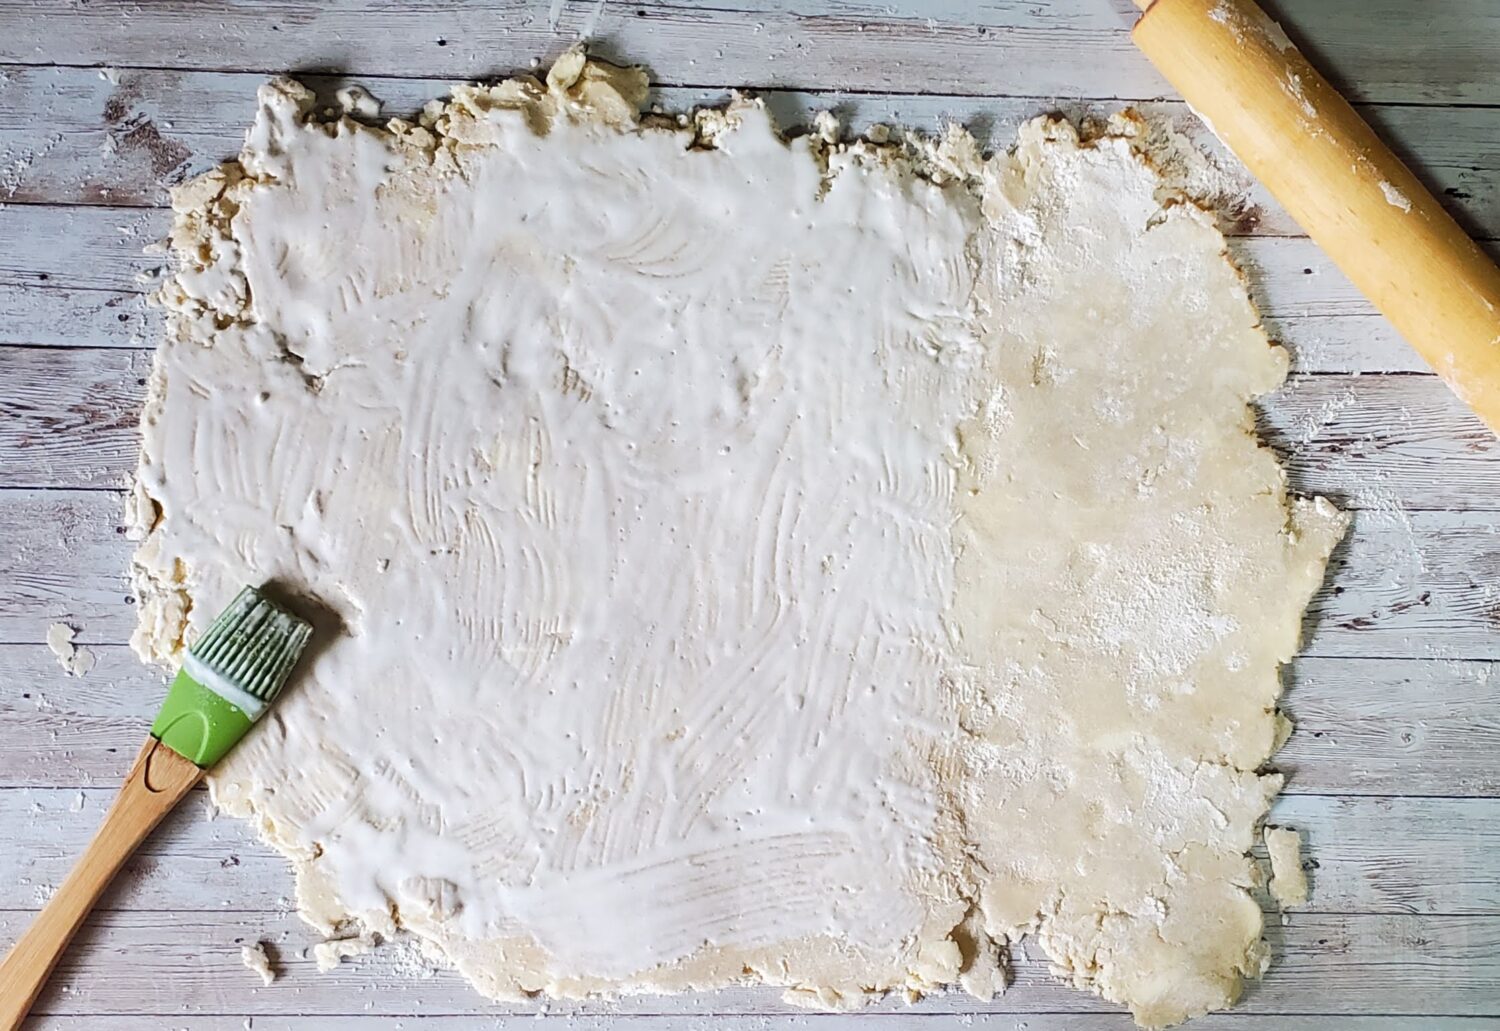
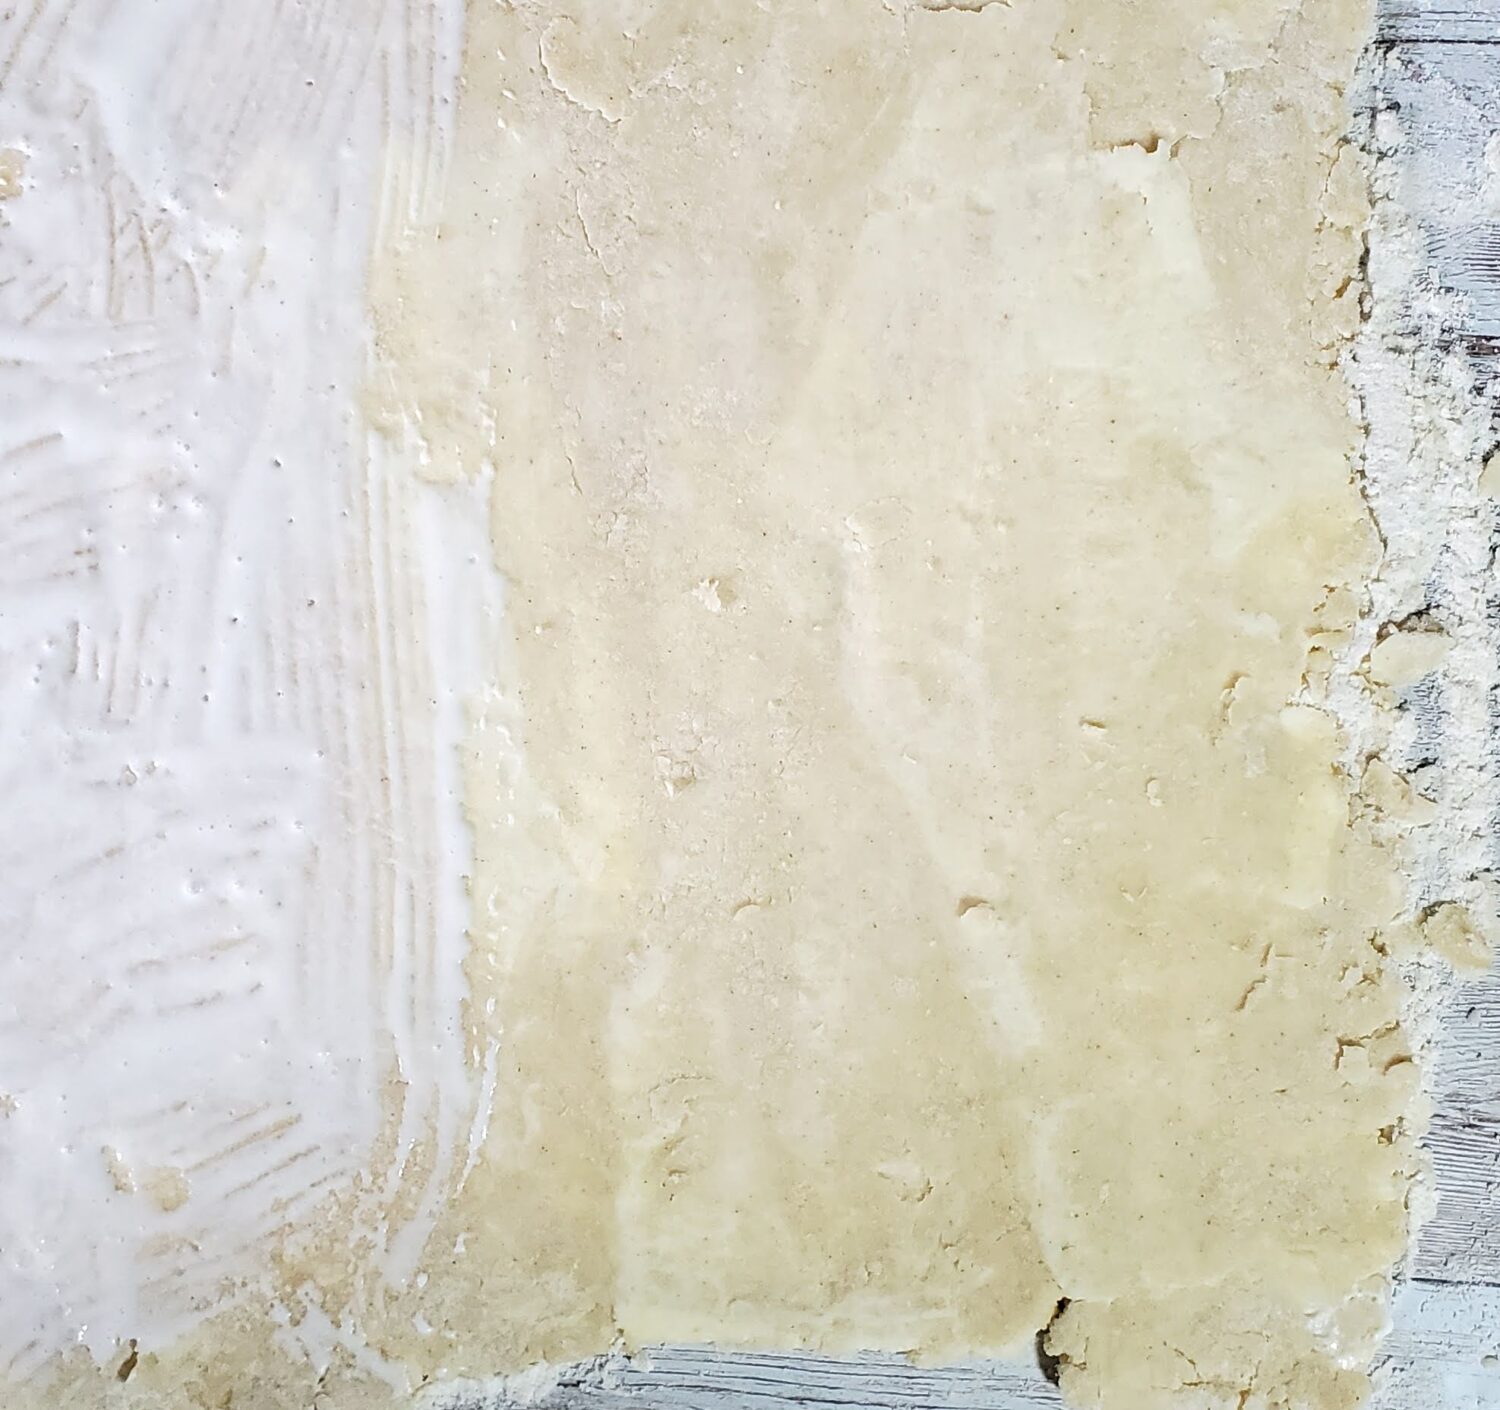
Brush on about 2 to 3 heavy tablespoons of heavy and fold one-third over the middle onto cream, and then fold over the other third, and rotate 90 degrees, see below.
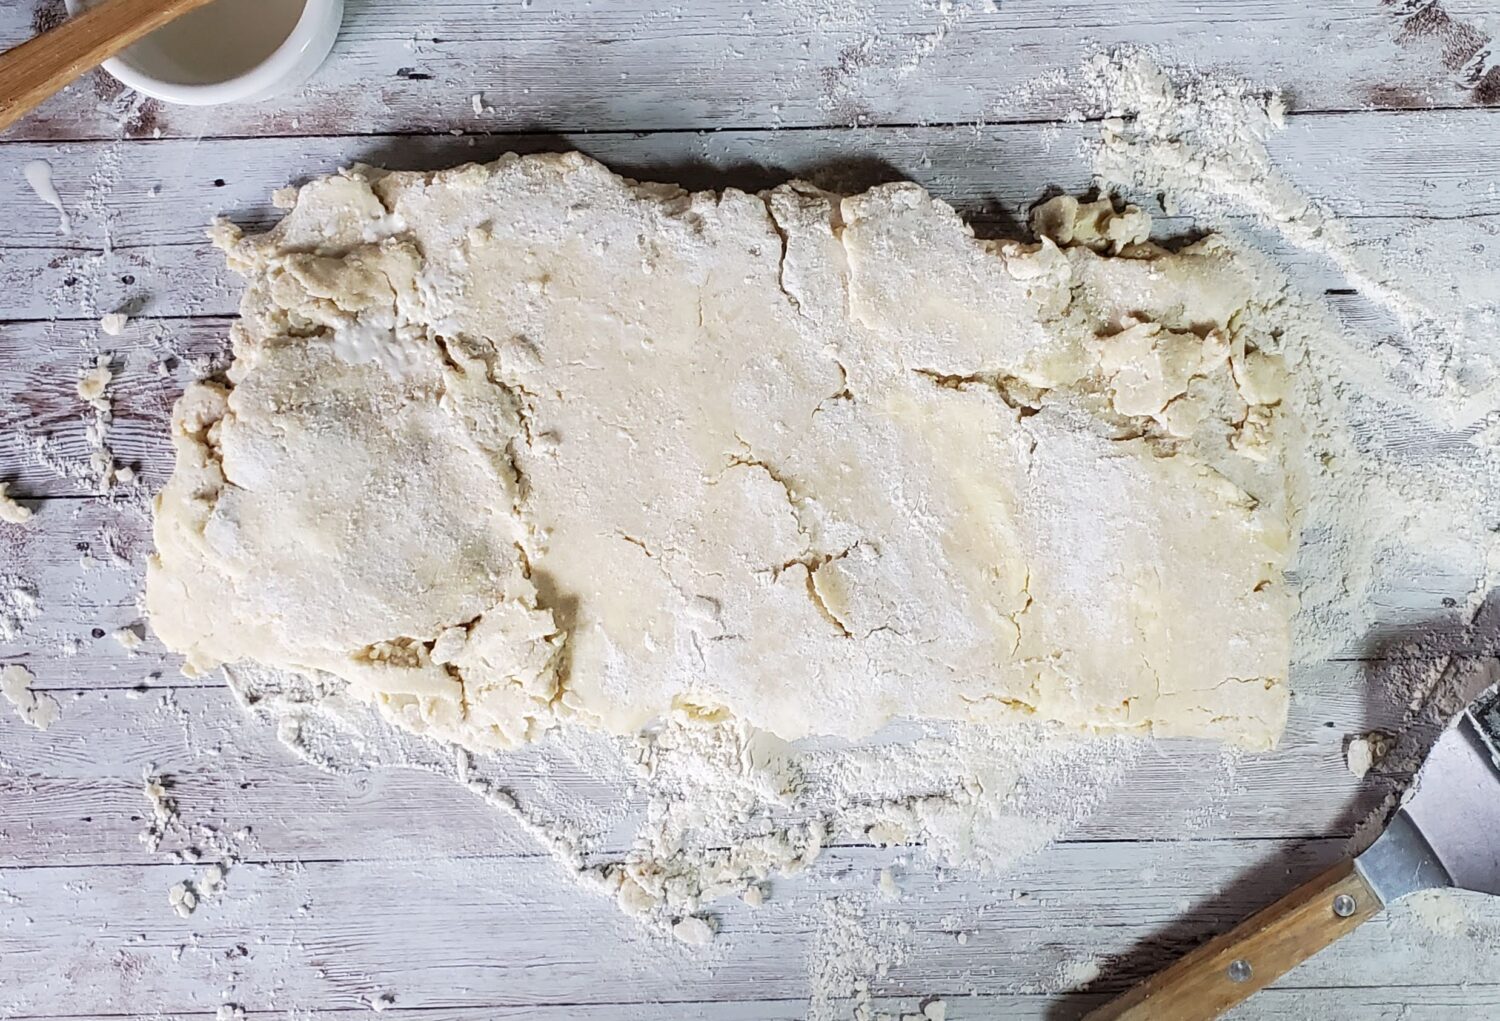
Lamination 2: Rotate the dough 90 degrees, roll out again into a rectangle and repeat with heavy cream and folds as step 1. As you see below, the edges are less rough before spreading cream and folding.
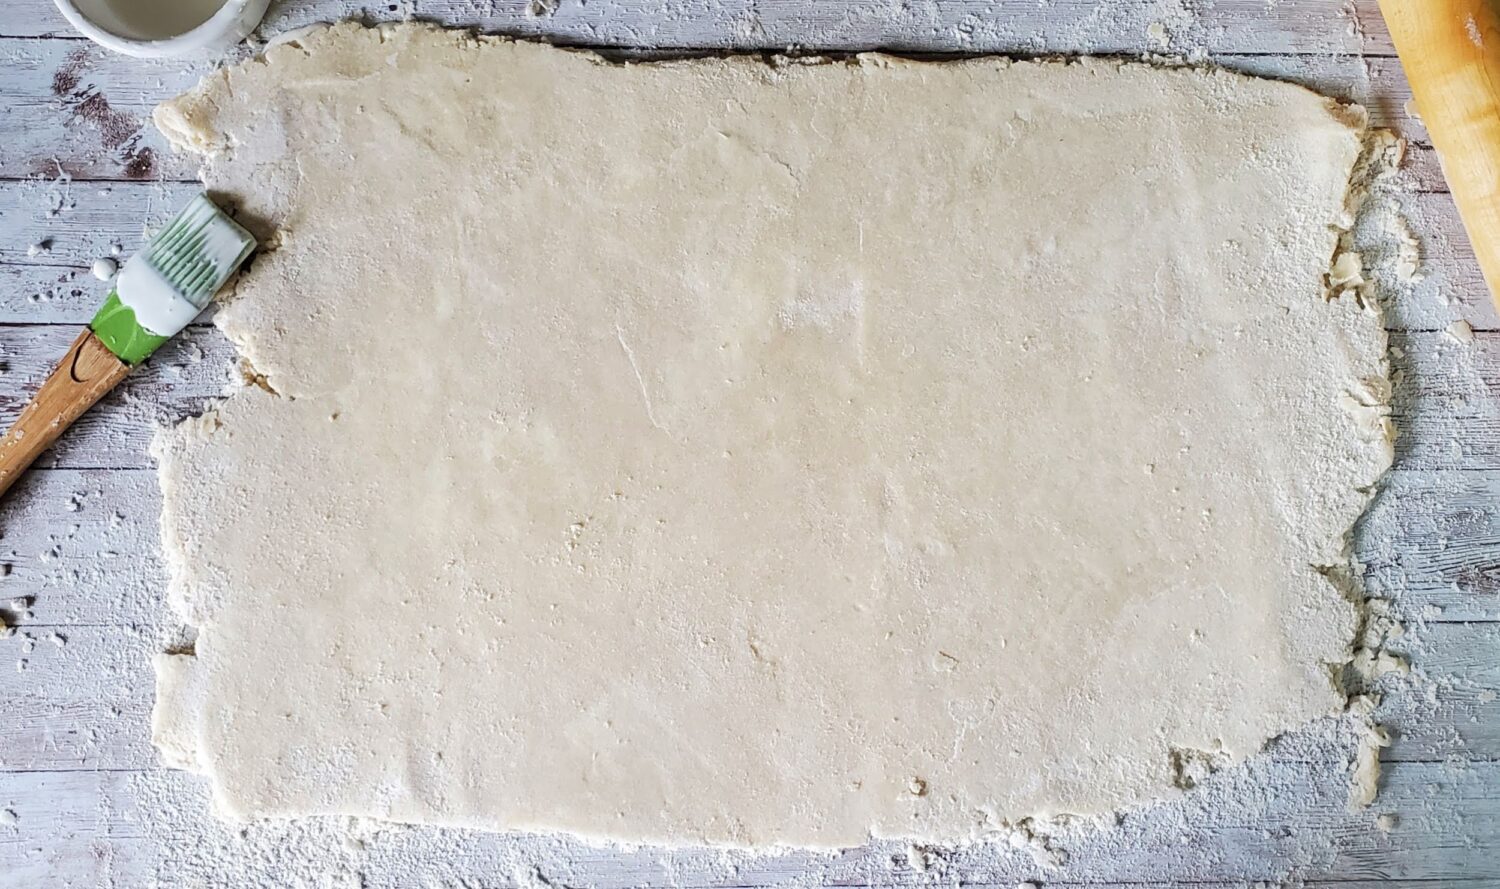
Lamination 3: Rotate the dough 90 degrees, roll out again into a rectangle and repeat with heavy cream and folds as step 1 & 2. You will see the butter striations; you’re lamination is perfect!
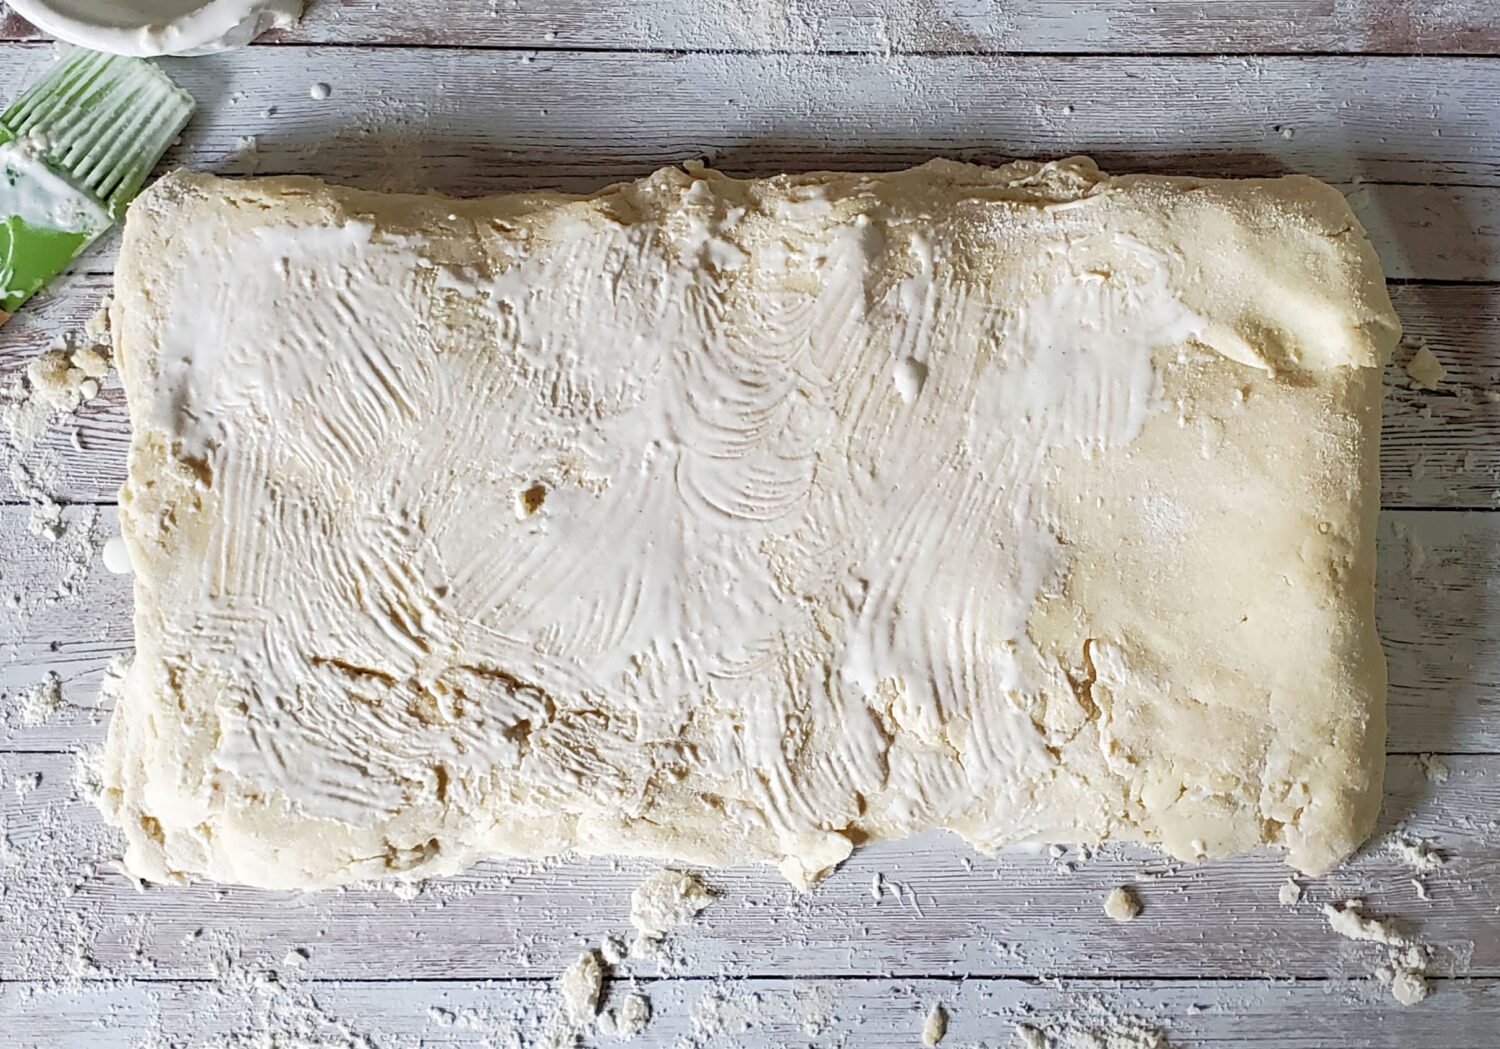
Lamination 4 (really just a final fold): Rotate the dough 90 degrees, BUT DO NO ROLL OUT. Use the rest of the heavy cream to brush onto the dough, and fold in thirds.
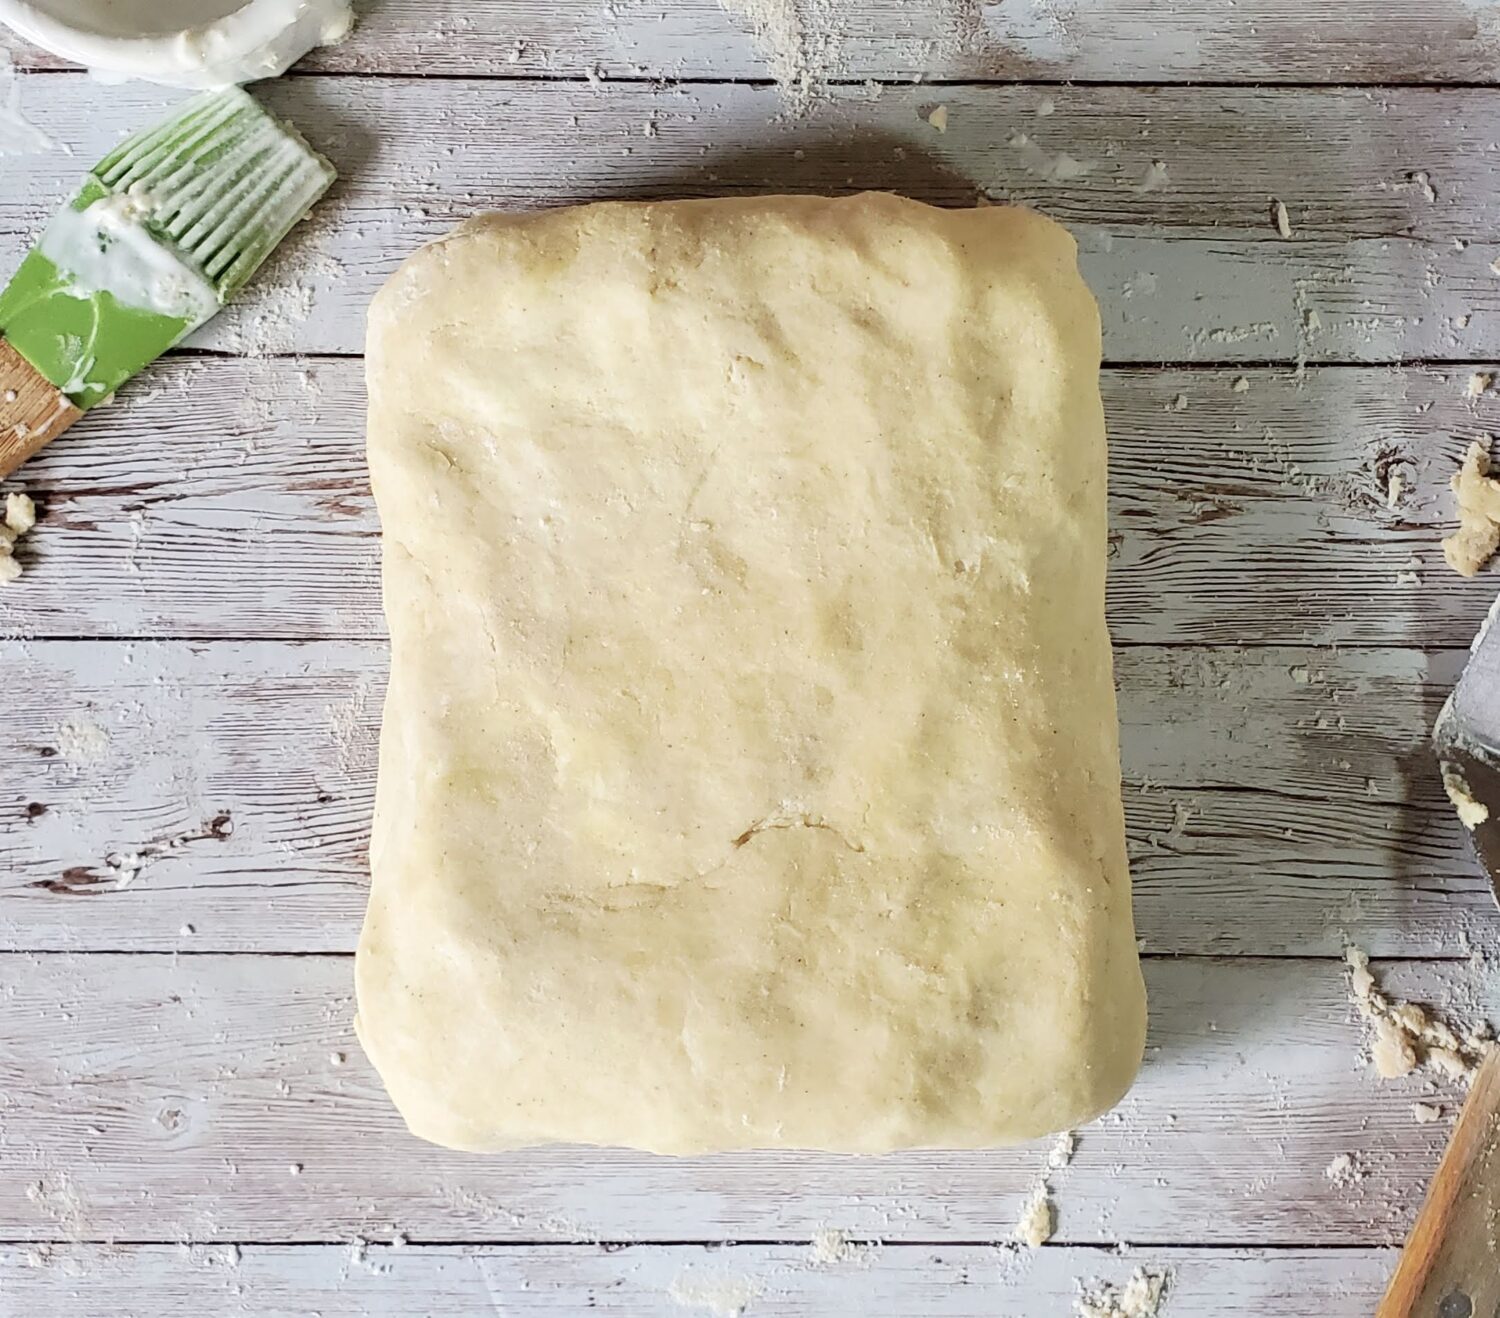
Lightly press in any loose edges and seal tightly in a couple layers of plastic wrap and place in refrigerator for 20 minutes before using.
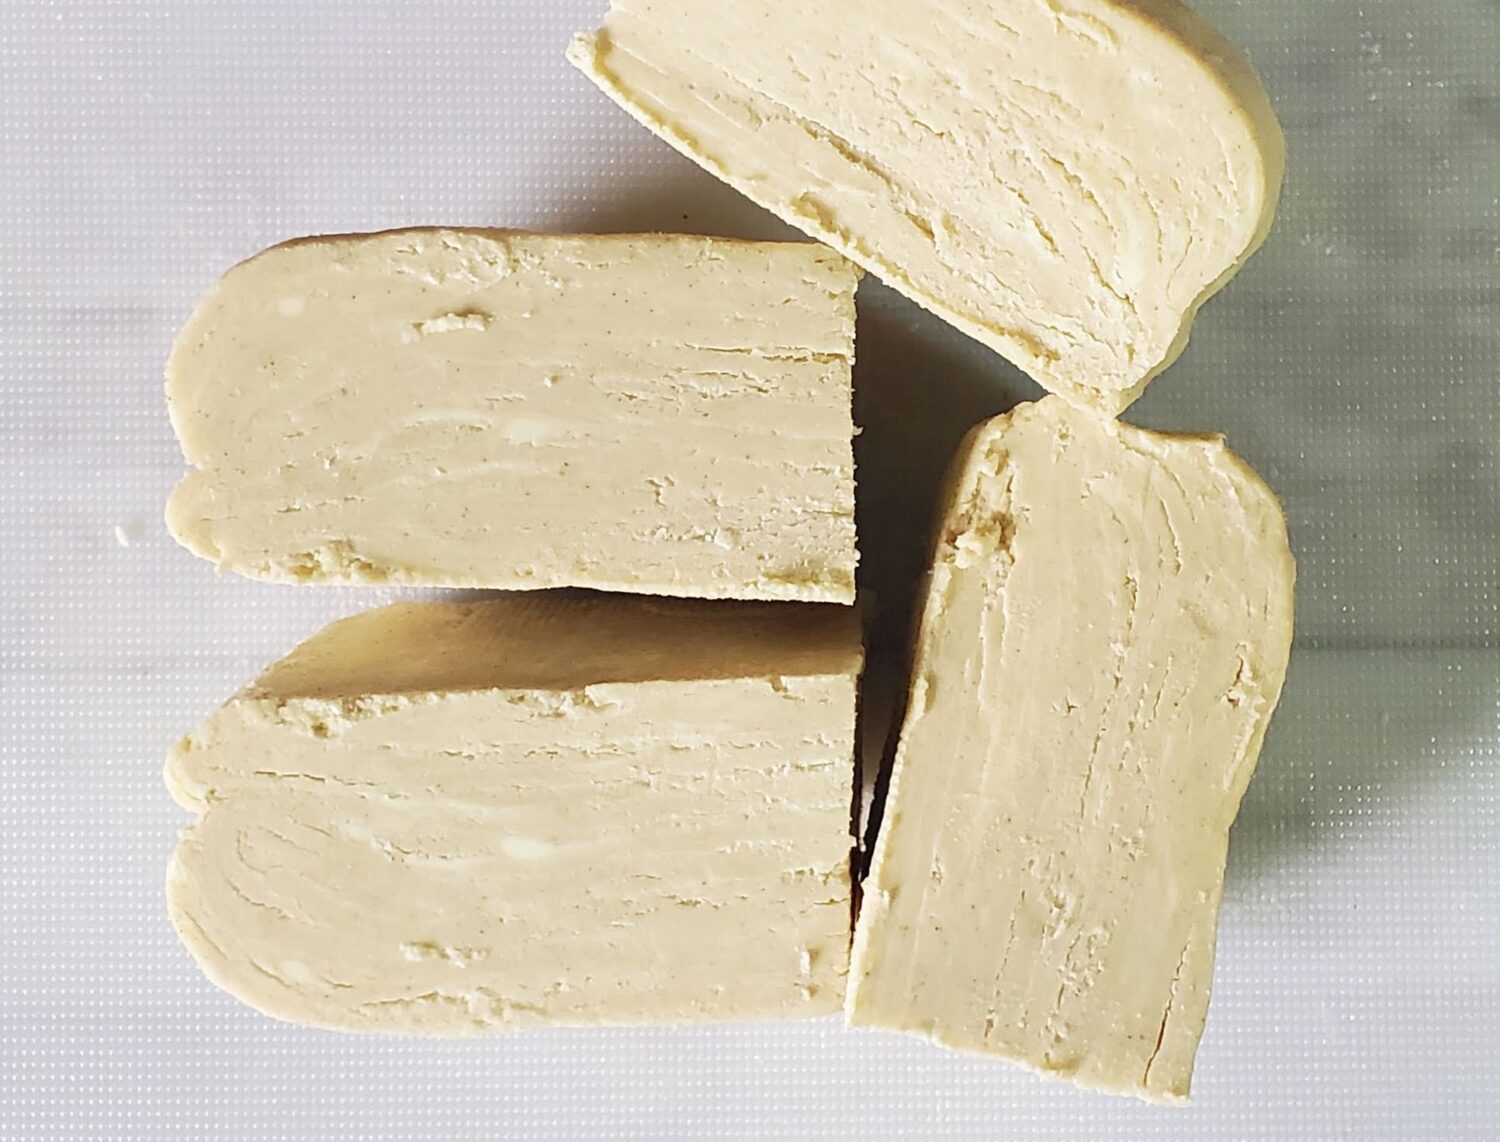
To use the dough, cut the finished rectangle into 4 equal pieces.
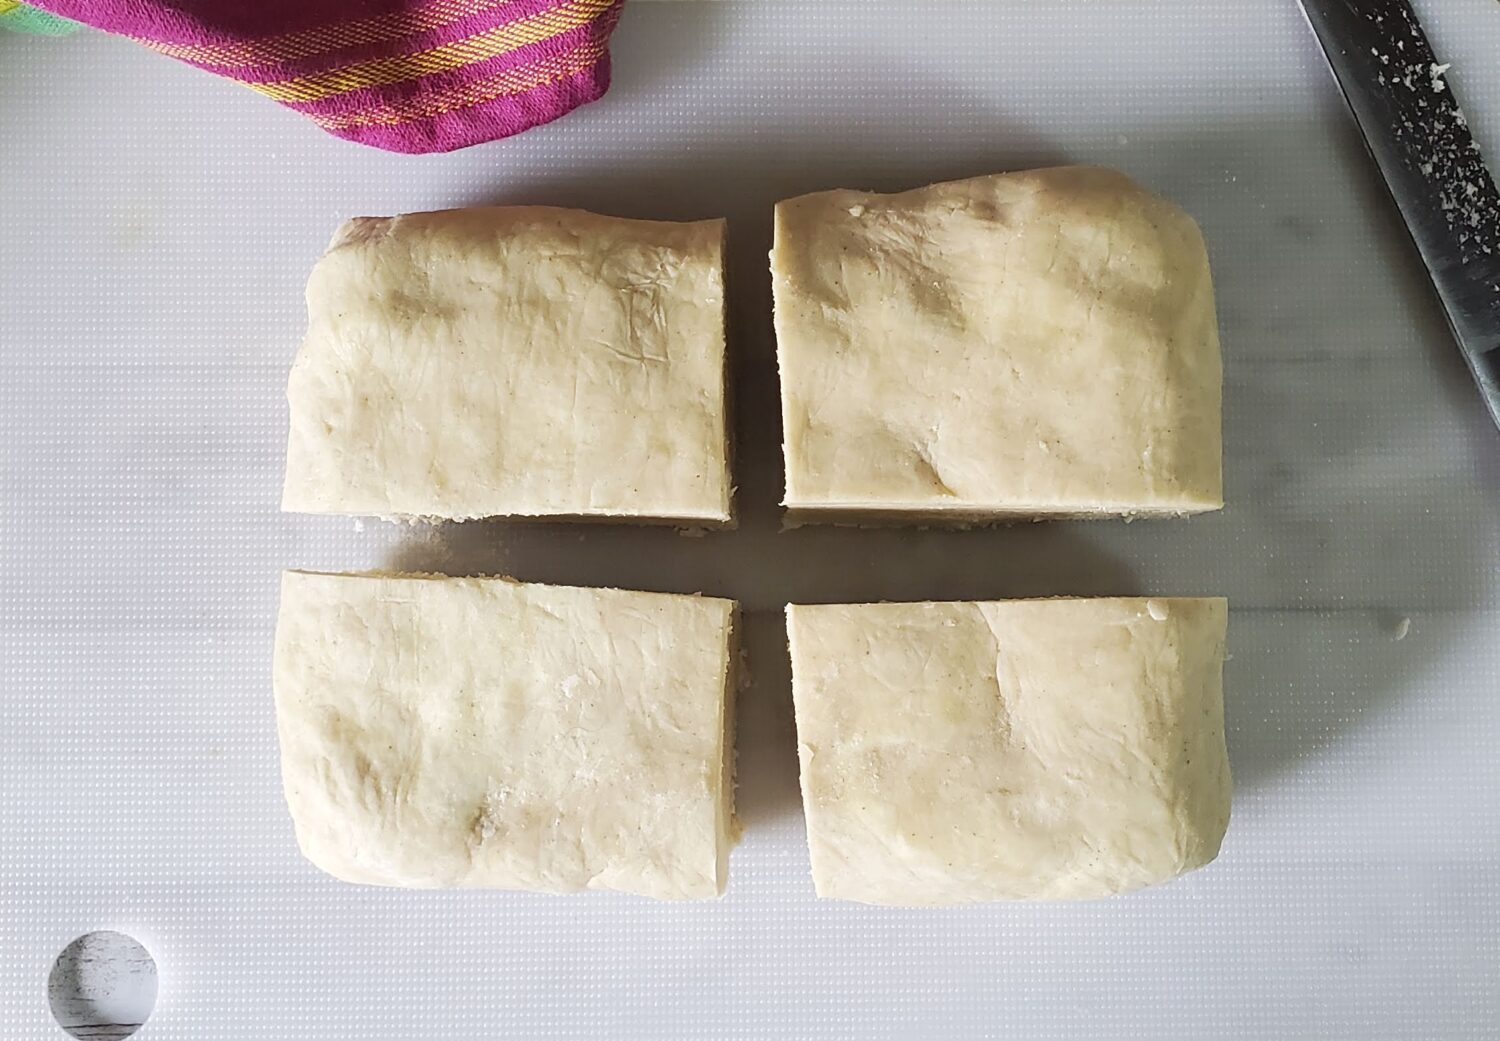
You can see the super yummo buttery layers created.
Baking: Temperature Matters
Puff pastry needs a fairly high temperature to “puff,” 425 F is perfect. (I tried 400, it was not the best). Regardless what you are baking, savory or sweet, the temperature should be 425 F. Most baking times will be about 15 to 20 minutes, just watch the last 5 minutes, they can brown up pretty fast at the end.
Each square of dough makes 9 turnovers or appetizers, each square is 3-1/2 inches. This entire recipe makes 36 servings at this size.
So, put on your stretchy pants and create some puff pastry magic. Devour at will.
Gluten Free Puff Pastry
Ingredients
- 3 cups gluten free flour mix (with xanthan gum in mix) Bob's Red Mill 1 to 1, or Portlandia Pie Lady gluten free flour mix
- 2 tablespoons sugar (may omit for savory)
- 1 teaspoon salt
- 1-3/4 cups (3-1/2 sticks) unsalted butter, keep cold (divided, see instructions below)
- 1 large egg
- 3/4 cup heavy cream, kept cold
- 1/2 cup heavy cream for laminating (see below)
Instructions
- Dice 3/4 cup cold butter (1-1/2 sticks) into small 1/4to 1/2-inch pieces, place in bowl and refrigerate.
- With a sharp knife, slice the remaining butter(2sticks or 1 cup) into very thin slices, place on parchment lined baking sheet and place into refrigerator.
- In a medium bowl whisk the egg and the 3/4 cup heavy cream together, place in fridge.
Dough Assembly
- Place the dry ingredients (flour, sugar and salt) into a large mixing bowl, stir well. Add the diced butter and mix with large serving fork, pastry cutter, or by hand until butteris crumbly and pea size.
- Add the shaved butter and toss in the flour mix to coat each piece, separate any peels that stick or clump together. You want each piece to be coated with flour mix.
- Make a well in the center of the flour/butter mix and pour in the egg/cream mixture. Stir with fork JUST ENOUGH for dough to form a ball mass. If dry add 1 to 2 tablespoons of heavy cream
- Cover dough with plastic wrap and refrigerate for 15minutes for butter to firm back up.
Lamination Process
- On a lightly floured countertop, roll out the chilled dough into a long rectangle, about1/2-inch thick; about 15 x 20 (the first roll is going to be very rough around the edges as it is gluten-free).
- First Laminating Fold: On 2/3 of dough, brush on about 2 tablespoons of heavy cream. Use a large metal spatula to loosen under dough, then fold in thirds from short end of rectangle over one-third of center, then the left folded over the first fold. (Like folding a letter, 2 creases.)
- Rotate the folded pastry by 90 degrees, dust under dough & roll out the pastry again into a long rectangle (about 16 x 20 again). The edges will be a little less rough.
- Second Laminating Fold: Repeat as in first laminating fold, brush with heavy cream, loosen with metal spatula, and fold into thirds (2 creases).
- Rotate the folded pastry by 90 degrees, dust under dough & roll out the pastry again into a long rectangle (about 16 x 20 again). The edges will be a little less rough & you will see layers of butter striation.
- Third Laminating Fold: Repeat as1st and 2nd, fold in thirds over heavy cream, but only roll out to about 18 x 12.
- Fourth (final) Fold: Use whatever leftover cream you have to lightly brush over the rectangle. Fold into thirds, tuck in rough edges and press together to form a 6 x 8 rectangle. Cover tightly with 2 to 3 layers of plastic wrap and place in refrigerator.